Roses are forgiving, but pruning at the wrong time can cost you flowers or even stress the plant going into winter. The sweet spot is when the rose is ready to grow, but has not started pouring energy into soft new shoots that can get zapped by cold.
This guide breaks pruning down by season, rose type, and climate, then walks you through a no-nonsense how-to you can use in a real backyard.
The main timing rule
For most roses, the best time to prune is late winter to early spring, right as the plant is waking up but before it puts on lots of tender growth.
If you want one easy yardstick that works in many areas: prune when you see buds swelling and you are close to your average last frost date.
- Too early: You can trigger growth that gets damaged by a hard freeze.
- Too late: You remove growth the plant already spent energy producing and can delay blooms.
Cold-zone note: In very cold climates, it is often safer to wait a bit longer, until buds are clearly swelling (or forsythia is blooming), to reduce winter dieback on freshly cut canes.
Best time by season
Late winter to early spring (main pruning)
This is the big one. You shape the plant, remove dead wood, and set it up for strong flowering.
- Cold and temperate climates: Late winter through early spring, usually near last frost. In colder spots, lean toward the later end of the window.
- Warmer climates: Often mid to late winter, since roses start growing earlier and may never fully go dormant.
Summer (deadheading and light pruning)
In summer you are not “pruning” as much as you are tidying.
- Deadheading is removing spent blooms (often down to the first strong leaf) to encourage repeat flowering on many varieties.
- Light pruning is trimming a long, floppy, or out-of-bounds shoot to keep the plant tidy and supported.
- Remove diseased leaves and flowers promptly.
Fall (usually hands off)
In most regions, avoid hard pruning in fall. Cutting back encourages tender new growth that does not harden off before winter.
What you can do in fall:
- Remove clearly dead or diseased canes.
- Lightly shorten very tall canes if winter winds are likely to whip and snap them.
- Clean up fallen leaves if black spot has been an issue.
If you protect roses in cold climates, do it at the right time: mulch or mound after the plant has gone dormant and the ground is starting to freeze, not while it is still actively growing.
Best time by type
Rose type matters because some roses bloom on new wood (fresh growth from this year) and some bloom on old wood (growth formed last year). Prune the wrong group at the wrong time and you can cut off your flowers.
Quick reality check: Labels can be vague, and “old garden rose” does not always mean once-blooming. If you are not sure, confirm whether your rose is once-blooming or repeat-blooming before you make big cuts.
Hybrid tea, floribunda, grandiflora
Best time: Late winter to early spring.
These generally bloom on new growth, so spring pruning helps push strong flowering canes.
Shrub roses (many modern landscape roses)
Best time: Late winter to early spring for shaping and renewal.
Shrub roses are usually tough. When in doubt, do a moderate spring prune and focus on removing old, unproductive wood over time.
Climbing roses
Best time: Right after the main bloom flush for once-blooming climbers, or late winter to early spring for repeat bloomers (light to moderate).
Main bloom flush simply means the big wave of flowers the plant produces in its peak season.
- Repeat-blooming climbers: In spring, remove dead wood and lightly shape. Save heavy shaping for after a bloom cycle if needed.
- Once-blooming climbers: Prune after flowering so you do not remove next year’s bloom wood.
Ramblers (often once-blooming)
Best time: After flowering.
Ramblers can be vigorous. Remove some older canes after bloom to make room for new basals.
Old garden roses and other once-bloomers
Best time: After they flower.
If they bloom once in spring or early summer, those buds are usually on old wood. Spring pruning can mean fewer blooms. (Many Gallicas, Albas, and Damasks fall in this camp, while some Bourbons and Portlands can repeat, so double-check your variety.)
Knock Out and similar landscape roses
Best time: Early spring.
You can prune them fairly hard, but you do not have to. Even a simple cleanup plus a light shape will keep them blooming well.
Miniature roses
Best time: Early spring.
They respond well to the same basic method as larger roses, just with smaller cuts.
Newly planted roses (year 1)
Best time: Light pruning in the spring window.
In a rose’s first year, focus on establishing roots and structure. Skip severe pruning unless you are removing dead, damaged, or diseased wood.
Use your climate to pick the week
Instead of chasing a calendar date, look for these signals:
- Average last frost is near: If you are within a couple weeks of your typical last frost, you are usually in the window.
- Buds are swelling: You will see plump buds along canes, sometimes with a hint of green.
- Forsythia blooming: In many regions, forsythia bloom lines up with a good pruning window.
If you live where winters are mild and roses barely go dormant, your “spring prune” may happen in mid winter. In those regions, a more substantial annual cut is common because plants can keep growing for much of the year. The goal is renewal and airflow, not waking the plant up.
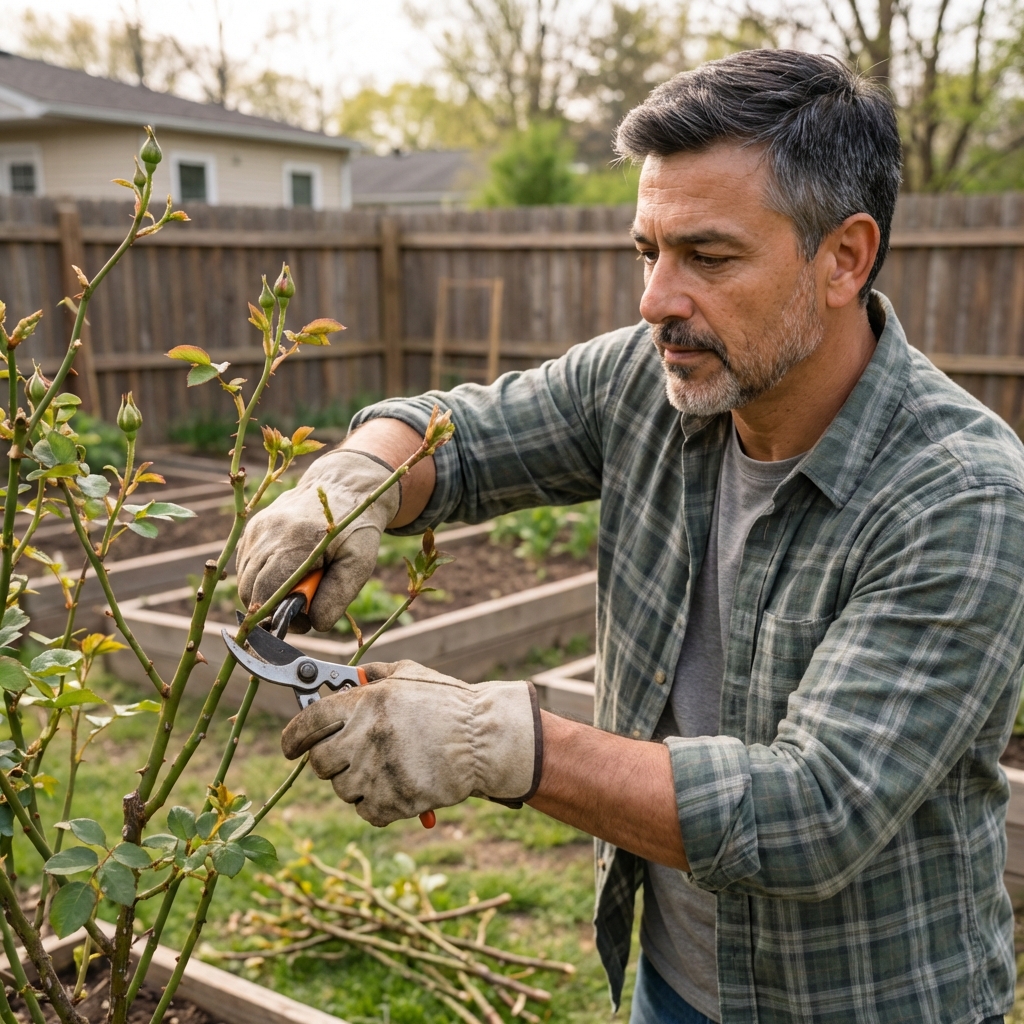
How to prune roses
1) Get the right tools
- Bypass hand pruners for most canes
- Loppers for thicker wood
- Thick gloves (rose thorns are no joke)
- Rubbing alcohol or disinfecting wipes to clean blades between plants, and especially after diseased cuts
2) Start with the “3 D’s”
Remove wood that is:
- Dead: Brown and dry inside when you scratch the bark lightly.
- Damaged: Cracked, split, or winter-burned.
- Diseased: Blackened canes, cankers, or suspicious lesions.
3) Remove suckers (for grafted roses)
If your rose is grafted, watch for shoots coming from below the graft (often from the roots). These suckers usually have different-looking leaves and grow fast. Pull or cut them off as close to the origin point as you can so they do not steal energy from the rose you actually bought.
4) Remove crossing canes and inward growth
Your goal is an open center that lets light and air move through the plant. Cut out canes that rub or grow toward the middle. Rubbing creates wounds, and wounds invite problems.
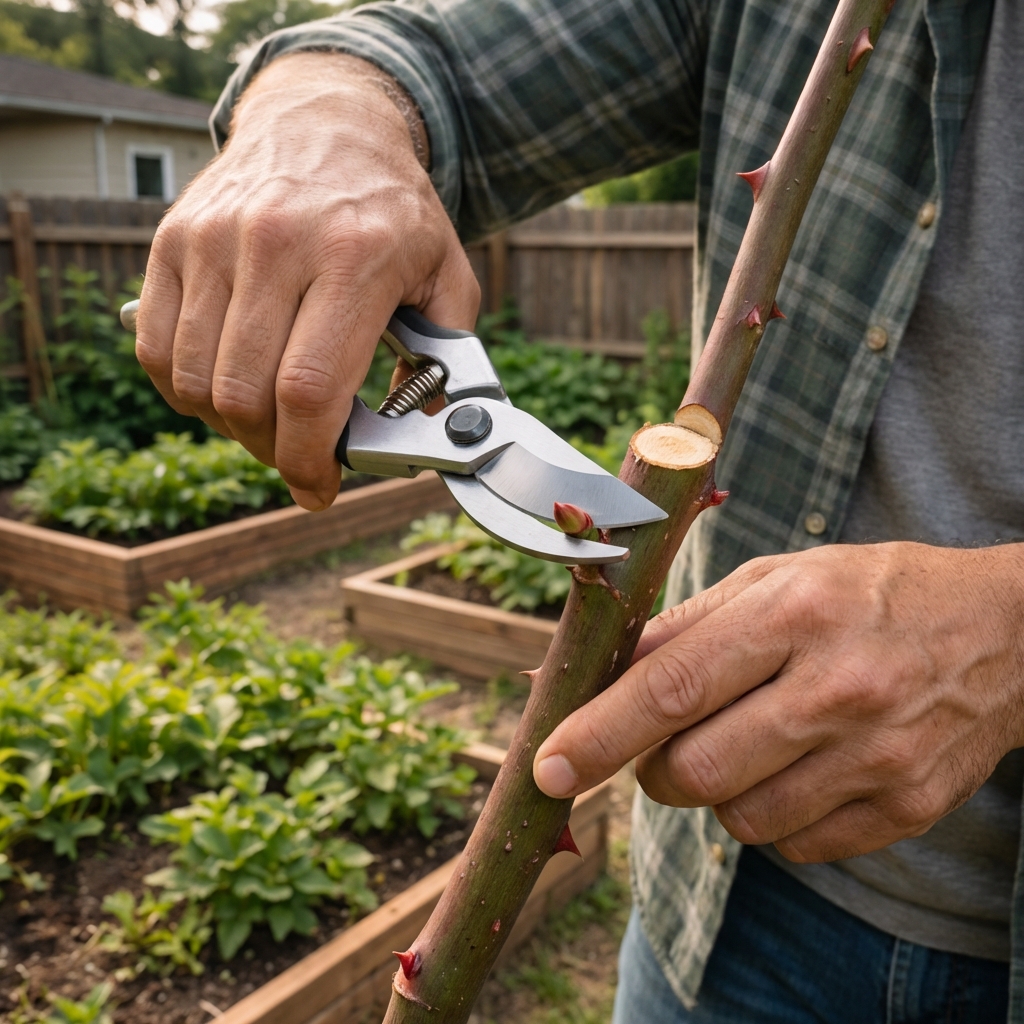
5) Make clean cuts above outward-facing buds
- Cut about 1/4 inch above an outward-facing bud.
- Many gardeners angle the cut slightly so water sheds away from the bud, but the bigger priority is a clean cut in the right spot.
- Avoid leaving long stubs, which can die back.
6) Decide how hard to prune
Use plant size and vigor as your guide:
- Hard prune (more severe): Often used on vigorous hybrid teas and floribundas when you want fewer, bigger blooms. Results vary by cultivar and by how well the plant is fed and watered.
- Moderate prune: The safest all-around approach for many home gardens. Reduce height, keep several strong canes, and shape the plant.
- Light prune: For shrubs you want larger, climbers where structure matters, or plants recovering from stress.
7) Clean up and finish
- Remove all cuttings and fallen leaves around the base, especially if you have had black spot.
- Water if conditions are dry.
- After pruning, add compost or a balanced rose fertilizer when growth starts moving in earnest.
Mistakes to avoid
- Pruning in fall like it is spring: This can trigger tender growth before winter.
- Using dull or anvil pruners: Crushing cuts heal slower. Bypass pruners make cleaner cuts.
- Removing every pencil-thin cane: On hybrid teas and floribundas, very thin canes often produce weak blooms and can be removed. On many shrub and landscape roses, thinner wood can still flower fine, so be more selective.
- Not disinfecting tools: This spreads disease, especially when you are cutting out cankers.
- Shearing roses into balls: It looks neat for a week, but it often creates a dense outer shell that blocks airflow and invites disease.
Pruning timing FAQs
Can I prune roses after they bloom?
Yes for once-blooming roses, ramblers, and many old garden roses. For repeat bloomers, you can do light shaping and deadheading after blooms, but save major pruning for the spring window.
What if I pruned too early and then it froze?
Do not panic. Wait until you see what is damaged, then prune back to healthy tissue once the worst cold has passed. Roses often rebound.
Should I seal rose cuts?
Most home gardeners do not need to. Focus on clean cuts, good airflow, and overall plant health. In areas with known cane borer issues, some gardeners use a simple sealant, but it is not universally necessary.
How do I know if a cane is alive?
Scratch a small spot on the cane with your fingernail.
- Green and moist underneath: alive
- Brown and dry: dead, prune it out
A yearly pruning plan
If you want a routine that works without overthinking:
- Late winter or early spring: Main prune, remove dead wood, open the center, shape the plant.
- Late spring through summer: Deadhead, remove diseased leaves, light touch-ups.
- Fall: Minimal cuts, tidy, and protect plants in cold areas.
Do that consistently and you will see the payoff: fewer tangled canes, better airflow, and more reliable flowering year after year.

Jose Brito
I’m Jose Britto, the writer behind The Country Store Farm Website. I share practical, down-to-earth gardening advice for home growers—whether you’re starting your first raised bed, troubleshooting pests, improving soil, or figuring out what to plant next. My focus is simple: clear tips you can actually use, realistic expectations, and methods that work in real backyards (not just in perfect conditions). If you like straightforward guidance and learning as you go, you’re in the right place.