Repotting an orchid sounds fancy, but it is really just basic plant care with one big twist: orchids need lots of air around their roots. The eco-friendly part comes down to choosing reusable materials, buying less plastic, and only replacing what actually needs replacing.
Many of the most commonly sold home orchids are Phalaenopsis (moth orchids). The tips below fit those best, but the same approach works for many common orchids as long as you match the potting mix to the type.
When to repot (and when to leave it alone)
Repotting is helpful when the mix breaks down, roots outgrow the pot, or you suspect root problems. It is not something orchids need every few months. As a simple rule of thumb, many Phalaenopsis do well with a repot about every 1 to 2 years, since bark slowly breaks down and holds more water over time.
Good reasons to repot
- The potting mix looks soggy or crumbly and stays wet too long.
- Roots look unhealthy (brown, mushy, hollow, or foul-smelling).
- The plant wobbles because roots have outgrown the space.
- Salt buildup (white crust) on the mix or inside the pot.
- Recent store purchase with tight moss packed around roots that never dries.
Salt tip: to reduce buildup long term, flush the pot with plain water occasionally (let lots of water run through the mix, then drain fully).
Times to wait
- During full bloom, if possible. Repotting can shorten flower life.
- When the plant is already stressed from cold damage, dehydration, or pests. Stabilize it first.
Best timing: right after blooming finishes, as new growth begins. If you spot fresh root tips (they look like small, bright green points), that is a great sign the plant is ready. If you cannot tell, do not worry. Repotting after blooms fade is usually fine.
Eco-friendly supplies that actually work
You do not need a cart full of new stuff. A few reusable items and a smart pot choice go a long way.
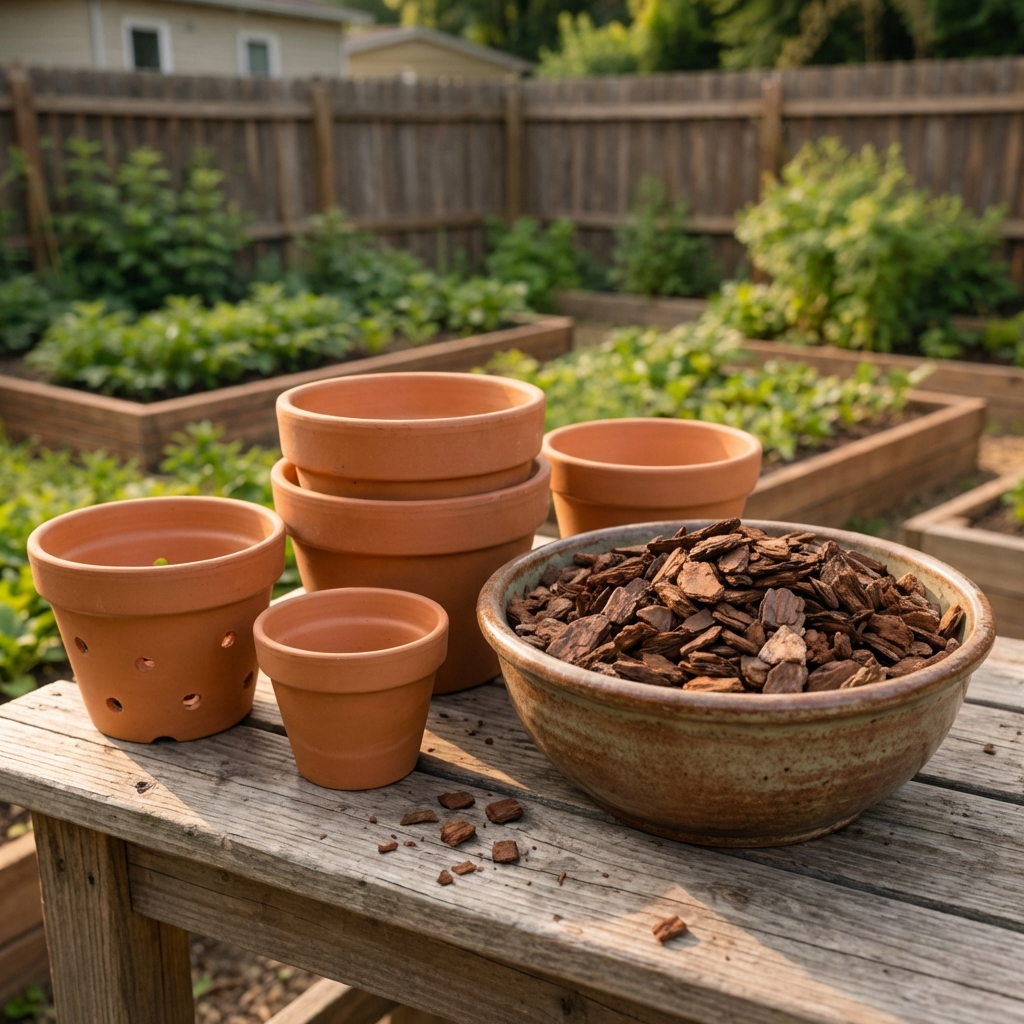
Sustainable pot options
- Reuse the current pot if it is the right size and has good airflow. Clean it well first.
- Terracotta (unsealed) is breathable and long-lasting, but it dries faster. Great if you tend to overwater.
- Reusable clear orchid pots are plastic, but practical. If you already have one, keep using it. Clear pots help you monitor roots and moisture so you waste less mix and fewer plants.
- Avoid novelty pots with no drainage. Drainage is non-negotiable.
Low-waste potting mix choices
For most Phalaenopsis orchids, a chunky mix is the sweet spot: it drains fast but still holds a little moisture.
- Orchid bark (fir or pine) as the main ingredient for airflow.
- Coconut husk chips as a renewable alternative to some bark mixes (rinse well to reduce salts).
- A small amount of sphagnum moss only if your home is very dry. Use sparingly to prevent soggy roots.
- Horticultural charcoal (optional) for freshness and drainage. A little goes a long way.
Skip: regular potting soil, compost, and mixes that look like fine mulch. Orchids suffocate in that.
Tools
- Sharp scissors or pruners (cleanable and reusable)
- Isopropyl alcohol for sanitizing blades (or a flame if you are comfortable doing so safely)
- A bowl of lukewarm water (to soften old media)
- Optional support: a reusable stake you already have, a bamboo skewer, and soft cotton string or plant ties (skip disposable clips if you can)
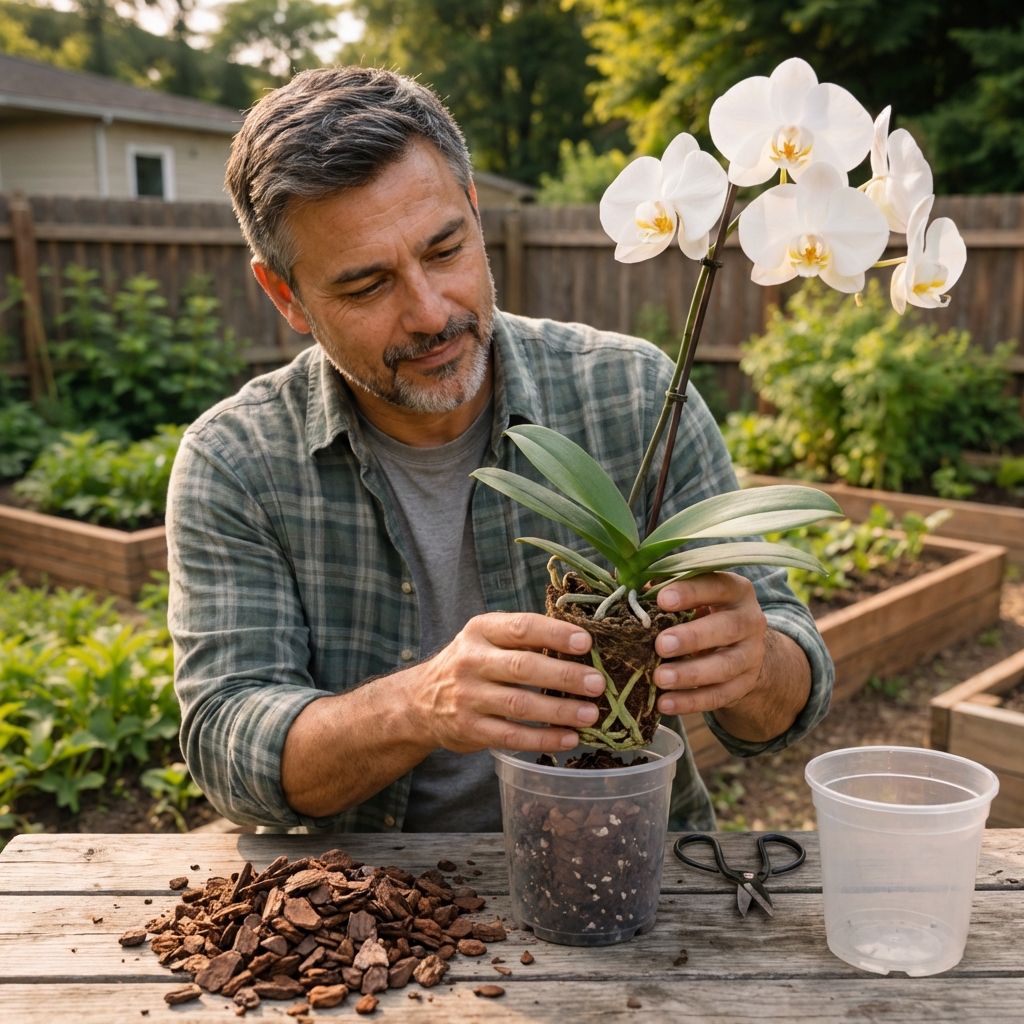
Step-by-step: repot your orchid with minimal waste
1) Prep the mix and pot
Soak bark or coconut chips for 15 to 30 minutes, then drain. This reduces dust and helps the mix hydrate evenly later, so you do not overwater trying to “wet the bark.”
Wash and reuse your pot if you can. Hot soapy water works, then rinse well. If you are dealing with rot, follow with a disinfecting soak, then rinse and dry:
- Option: 10% bleach solution (1 part bleach to 9 parts water) for 10 minutes
- Rinse very well and let the pot dry fully before repotting
2) Remove the orchid gently
Squeeze the sides of a plastic pot to loosen roots. If roots are stuck, take your time. Tearing healthy roots is the fastest way to set the plant back.
3) Remove old media
Pick out old bark and moss with your fingers. If it is packed in tight, soak the root ball in lukewarm water for a few minutes and try again.
Eco note: old orchid mix is usually not great to reuse for orchids because it breaks down and holds too much water. But you can often reuse it elsewhere as a light mulch under shrubs, in pathways, or tossed into a compost pile if it is not contaminated with pests or disease. Keep in mind that woody bark can temporarily tie up nitrogen as it decomposes, so avoid mixing large amounts into garden beds right around hungry plants.
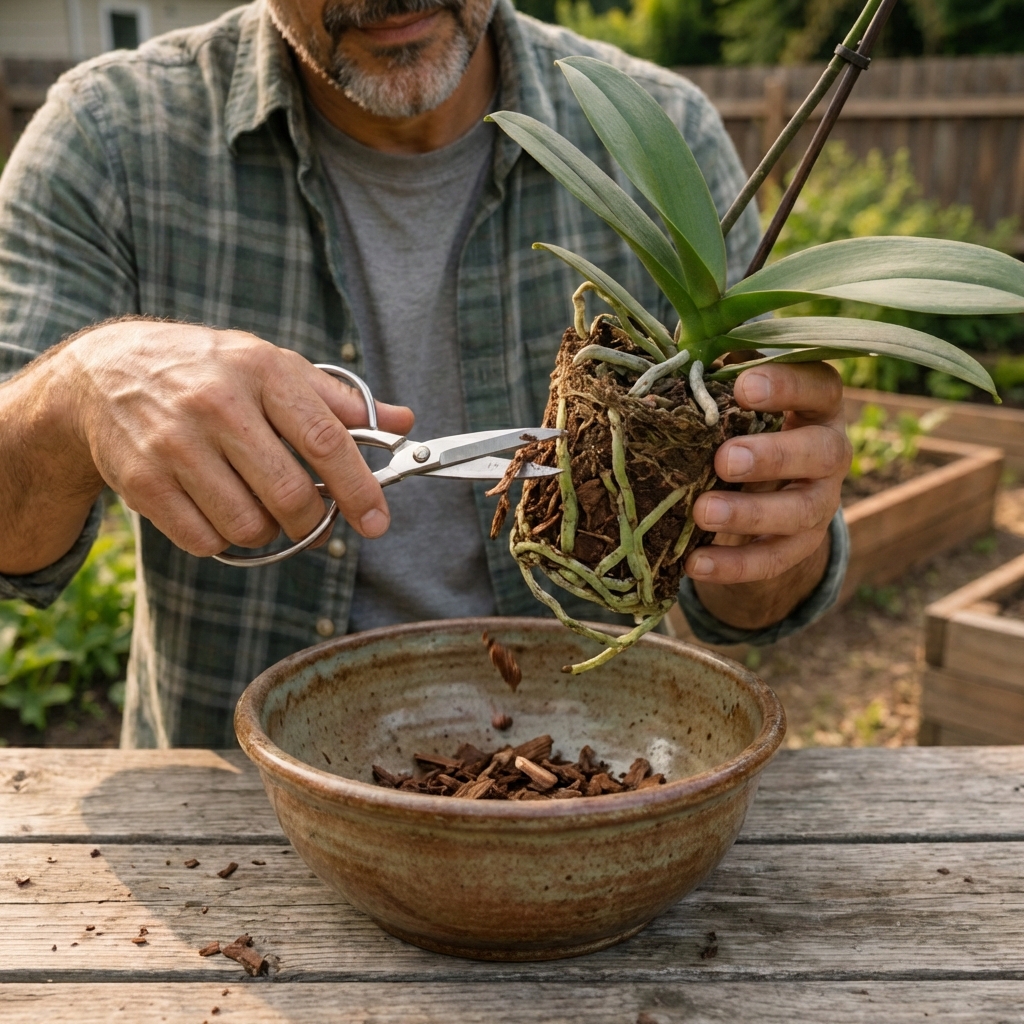
4) Inspect roots and trim only what is dead
Healthy Phalaenopsis roots are firm. They can be silvery when dry and green when wet. Dead roots are mushy, hollow, or stringy.
- Sanitize your blades.
- Trim dead roots back to firm tissue.
- Leave healthy roots even if they look a little wrinkled. Wrinkles often improve once watering is consistent.
5) Do not panic about aerial roots
Those roots reaching into the air are normal. You do not need to force them into the pot. If a few naturally tuck in without bending or snapping, fine. Otherwise, let aerial roots stay out.
6) Choose the right size pot
Orchids like a snug fit. In most cases, go only 1 inch wider than the root mass, or keep the same pot size if roots look fine. Oversized pots stay wet and invite rot.
7) Repot at the correct depth
Hold the orchid so the base of the plant sits just above the mix. Keep the crown (the center where new leaves emerge) above the media so water does not collect there. Fill around the roots with bark, tapping the pot to settle pieces without packing them tight. Air pockets are good. Compacted media is not.
8) Stabilize without plastic stakes when possible
If the plant is wobbly, use a reusable stake you already have, or a simple bamboo skewer. You can also tie gently with soft cotton string. Once new roots grab the mix, remove supports.
Aftercare: the first 2 to 3 weeks matter most
Repotting is a small shock. Your job is to keep conditions steady while new roots adjust.
Watering after repotting
- If you trimmed many roots or saw rot, it often helps to wait a bit before watering so cut ends can dry. In many homes that is about 2 to 4 days. In warm, humid conditions you may only wait 1 to 2 days. In cool or very damp conditions, you may wait closer to 4.
- After that, water thoroughly, then let the mix drain completely. Never leave the pot sitting in water.
- Water again only when the mix is mostly dry and roots look silvery, not green.
Light and humidity
- Give bright, indirect light. Avoid hot direct sun while it recovers.
- Normal household humidity is usually fine, but if your air is very dry, a pebble tray can help. Keep the pot above the water line, not in it.
Fertilizing
Hold off on fertilizer for about 2 to 3 weeks. New media and stressed roots do better with plain water at first. When you restart, use a weak orchid fertilizer at a reduced dose.
Common mistakes that cause orchid decline
- Using regular potting soil: it stays wet and chokes roots.
- Choosing a pot with poor drainage: orchids need drainage holes, period.
- Packing the mix tightly: airflow is part of watering.
- Upsizing too much: big pot equals slow drying and rot risk.
- Watering on a schedule: water based on root color and mix dryness instead.
- Leaving a decorative cachepot full of water: empty it every time.
Eco-friendly extras that make a real difference
Buy media in bulk and store it right
If you keep a couple orchids, a small bag is fine. If you have many, buying larger bags reduces packaging. Store bark dry in a sealed bin so it stays clean between repots.
Compost with caution
Old bark can go into compost if it is not loaded with pests or rot. If you had a serious root rot issue or suspect disease, do not compost that media. Toss it to avoid spreading problems.
Quick checklist
- Repot after blooms fade, ideally as new growth begins.
- Many orchids appreciate fresh media every 1 to 2 years.
- Reuse a pot if possible, and always ensure great drainage.
- Use chunky bark or coconut chips, not soil.
- Trim only dead roots with sanitized tools.
- Keep the crown (where new leaves emerge) above the mix and avoid packing media tight.
- Go easy on water and fertilizer right after repotting.
If you do those basics, you will be surprised how quickly an orchid bounces back. In most homes, most repotting problems come from staying too wet, not from being a little too dry.

Jose Brito
I’m Jose Britto, the writer behind The Country Store Farm Website. I share practical, down-to-earth gardening advice for home growers—whether you’re starting your first raised bed, troubleshooting pests, improving soil, or figuring out what to plant next. My focus is simple: clear tips you can actually use, realistic expectations, and methods that work in real backyards (not just in perfect conditions). If you like straightforward guidance and learning as you go, you’re in the right place.