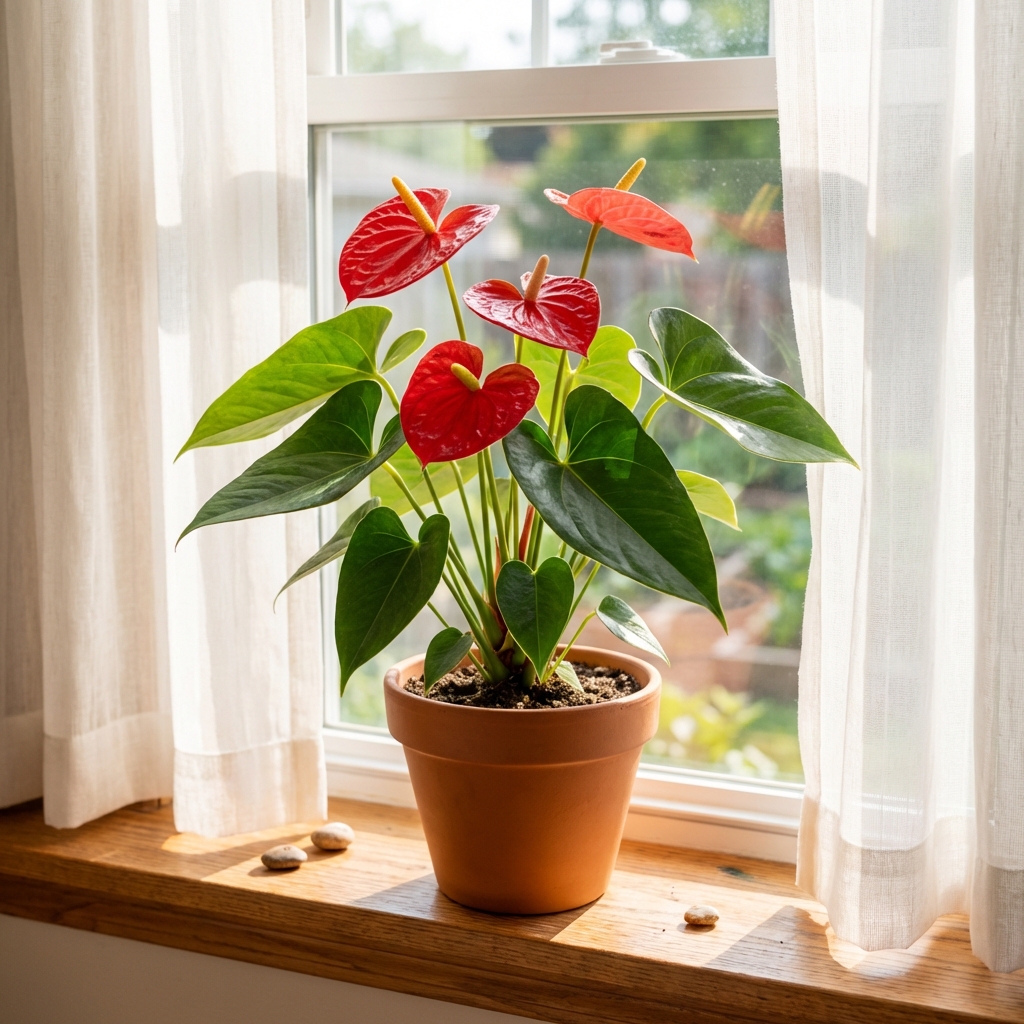
Anthuriums are one of those houseplants that look high-maintenance, but they are not. Give them bright, filtered light, a chunky airy potting mix, and a watering routine you can stick to, and they will reward you with glossy leaves and long-lasting flowers.
This guide focuses on organic solutions that are practical for real homes. No mystery bottles. No complicated schedules. Just the basics done well.
Toxicity and handling
Important: Anthuriums contain calcium oxalate crystals and are toxic if ingested. Keep them away from children, cats, and dogs. Chewing the plant can cause mouth and throat irritation, drooling, and stomach upset.
The sap can also irritate skin for some people, especially during pruning and repotting. If you are sensitive, wear gloves, avoid touching your face, and wash hands and tools after.
Know what your Anthurium wants
Most common Anthuriums sold as houseplants are Anthurium andraeanum hybrids. They come from warm, humid forests where light is bright but filtered and roots sit in loose, airy debris, not dense mud.
- Light: bright indirect, gentle morning sun is usually fine
- Water: evenly moist, never soggy
- Soil: chunky and fast-draining, like an orchid-style mix
- Humidity: moderate to high helps, but you can work with average homes
- Feeding: light, consistent, and organic
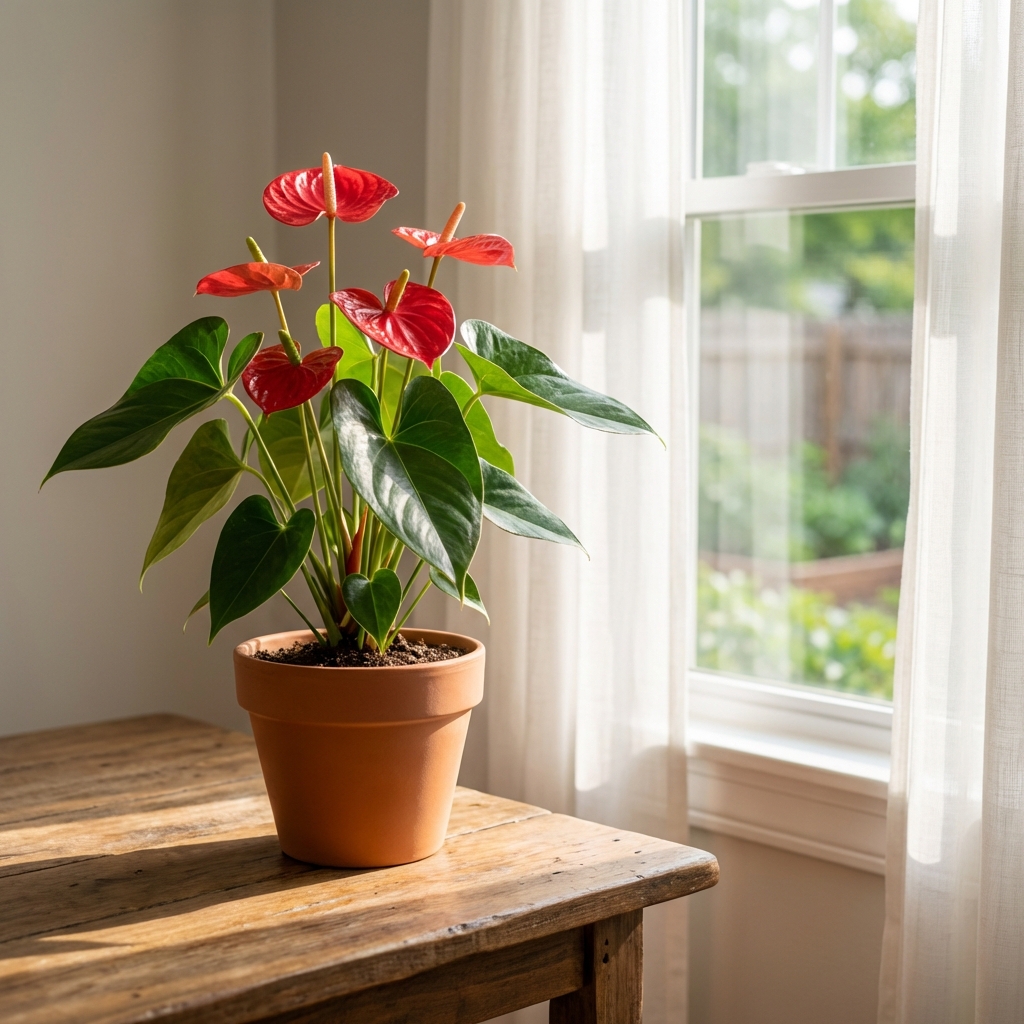
Light that keeps blooms coming
If your Anthurium is not blooming, light is the first thing to adjust. A plant can stay alive in low light, but flowering takes energy.
Best placement
- East window: ideal for many homes because morning sun is softer
- South or west window: workable if you use a sheer curtain or set it back a few feet
- North window: often too dim for steady blooms
Easy check: if you can comfortably read a book in that spot during the day without turning on a lamp, your Anthurium is probably in the right range.
Signs you need more light: no flowers for months, long leggy petioles, smaller new leaves.
Signs of too much sun: pale patches, crispy edges, or scorched spots on leaves.
Watering without guessing
The trick with Anthuriums is avoiding two extremes: bone-dry for too long, or constantly wet. Roots need moisture and oxygen at the same time.
A simple routine that works
- Check the pot every 5 to 10 days.
- Water when the top 1 to 2 inches feel dry to the touch.
- Water thoroughly until it drains, then empty the saucer.
Organic support: better water quality
If your tap water is very hard or heavily chlorinated, Anthuriums can get leaf tip browning over time. If you notice that, try one of these:
- Rainwater (best if you can collect it cleanly)
- Filtered water (simple pitcher filter is fine)
- Let water sit overnight to off-gas some chlorine
Red flag: yellowing leaves plus a musty smell from the pot usually points to staying too wet. Back off on watering and fix the potting mix and drainage.
Organic potting mix that Anthuriums love
The fastest way to make Anthurium care effortless is to use a mix that dries at a reasonable pace while staying airy. Regular all-purpose potting soil often holds too much water for too long indoors.
Easy DIY chunky mix (organic-friendly)
Use this as a starting point, then adjust based on your home conditions:
- 40% coco coir or peat-based potting mix (choose a quality, low-salt product)
- 30% orchid bark (fir bark or similar)
- 20% perlite or pumice
- 10% worm castings or finished compost
Optional add-ins: a small handful of horticultural charcoal can help keep the mix fresher longer, especially if you tend to water a bit heavy.
Pot choice and drainage
- Always use a pot with a drainage hole.
- Terracotta can be helpful if you are an overwaterer.
- Do not oversize the pot. A pot that is too big stays wet longer.

Organic feeding for steady growth and flowers
Anthuriums are not heavy feeders, but they do appreciate consistent nutrition during active growth. Think light and regular, not strong and occasional.
Low-fuss organic options
- Worm castings: top-dress with 1 to 2 tablespoons for a 6-inch pot every 6 to 8 weeks
- Compost tea (gentle): use occasionally during spring and summer, not every watering
- Fish emulsion: effective but smelly, dilute well and use monthly
- Kelp/seaweed extract: great for overall vigor, use monthly or every other month
How to avoid overfeeding
Too much fertilizer often shows up as brown leaf tips, crusty buildup on the soil, or stressed new growth. With organic feeds, the risk is lower, but it is still possible to overdo it.
My rule: If your plant is not putting out new leaves, cut feeding in half and focus on light and watering first.
Humidity and temperature, the realistic approach
Anthuriums prefer higher humidity, but you do not need a jungle room. Aim for comfort levels that are also comfortable for you.
Simple ways to raise humidity (no gimmicks)
- Group plants together to create a more humid pocket
- Use a small humidifier near the plant in winter
- Move it away from vents and drafty doors
About pebble trays: they can help a little in very still spaces, but do not expect miracles. A humidifier makes a bigger difference.
Temperature sweet spot
- Best range: 65°F to 80°F (18°C to 27°C)
- Avoid: cold windows in winter and hot, dry blasts from heaters
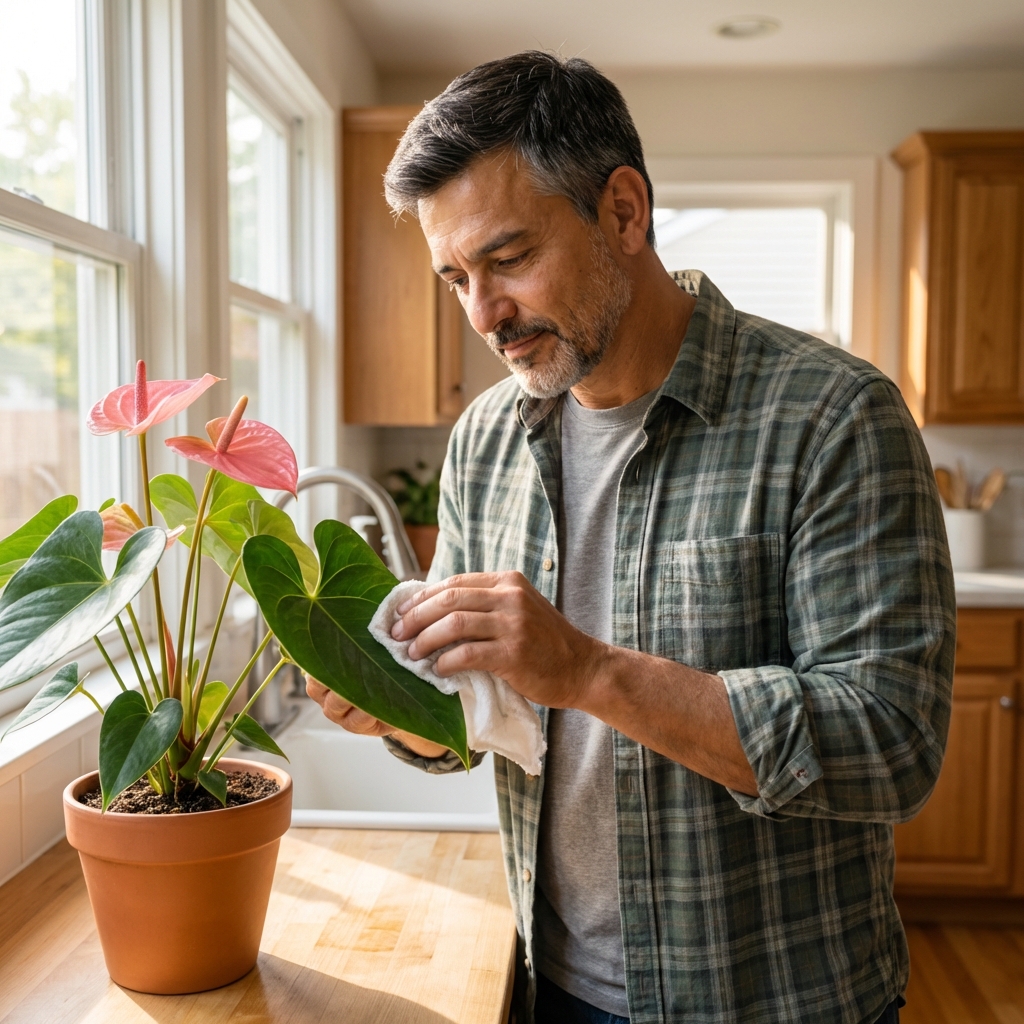
Pruning and cleaning
Healthy Anthurium leaves are naturally shiny. You do not need leaf shine products, and they can actually clog pores on the leaf surface.
Quick care that pays off
- Wipe leaves with a damp microfiber cloth every few weeks to remove dust.
- Trim old flowers at the base of the stem once they fade. Use clean snips.
- Remove yellow leaves as they fully decline, unless you suspect a fungal or bacterial issue. If a leaf looks spotted, slimy, or is rapidly yellowing, remove it right away to reduce spread.
If you want a gentle organic boost while cleaning, you can add a drop of mild castile soap to a bowl of water, then wipe and follow with a plain water wipe. Keep it very diluted.
Organic pest control for Anthuriums
The most common indoor pests are spider mites, mealybugs, scale, and fungus gnats. Catch them early and you can usually fix the issue without harsh chemicals.
First step: isolate and inspect
Move the plant away from others. Check under leaves, along stems, and near the soil line.
Organic fixes that work
- Spider mites: rinse leaves in the shower, then spray with insecticidal soap. Repeat every 5 to 7 days for 3 rounds.
- Mealybugs: dab with cotton swab and 70% isopropyl alcohol, then follow with insecticidal soap.
- Scale: gently scrape off with a fingernail or soft brush, wipe with alcohol, then treat with soap.
- Fungus gnats: let the top layer dry more between waterings, add a thin layer of sand or fine grit, and use BTI dunks or bits (a biological control) in your watering can.
Neem oil note: neem can help, but it is easy to overapply and burn leaves, especially in bright light. If you use it, dilute carefully and test on one leaf first.
Common Anthurium problems and simple organic solutions
No flowers
- Likely cause: not enough light, or feeding too weak
- Fix: move closer to bright indirect light and add a gentle monthly organic feed during spring and summer
Yellow leaves
- Likely cause: overwatering or poor drainage
- Fix: switch to a chunkier mix and let the top inches dry before watering
Brown tips
- Likely cause: low humidity, mineral-heavy water, or fertilizer buildup
- Fix: try filtered water and increase humidity. Flush the pot with plain water every couple months.
Droopy leaves
- Likely cause: too dry, or root stress from staying wet too long
- Fix: feel the mix and adjust. If it is soggy and droopy, check roots for rot and repot if needed.
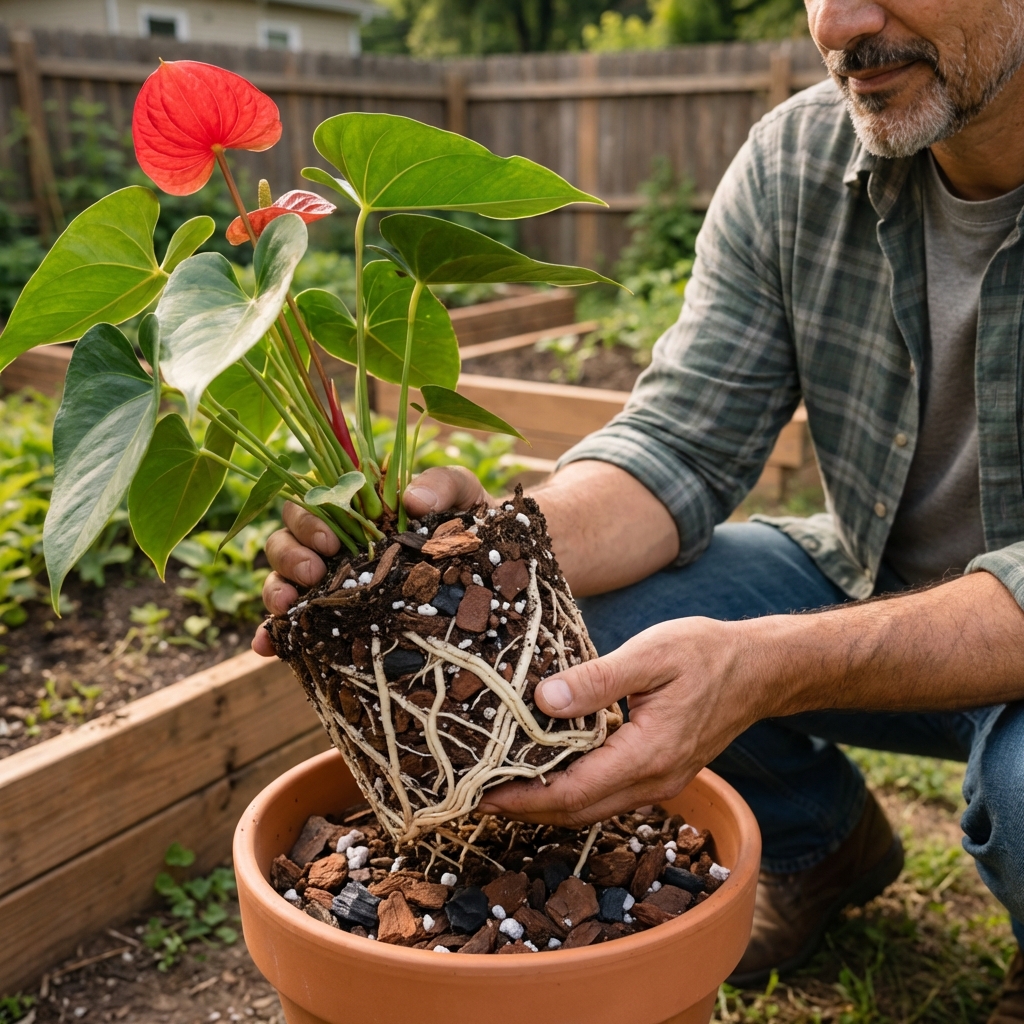
Repotting and root health
Anthuriums generally like being slightly snug in their pots. Repot when roots are circling heavily or the mix breaks down and stays wet.
When to repot
- Every 1 to 2 years for fast growers
- Immediately if you suspect root rot and the soil smells sour
Organic root-rot response
- Unpot and rinse roots gently.
- Trim mushy roots with clean scissors.
- Repot into a fresh, airy mix.
- Hold off on fertilizer for 4 to 6 weeks while it recovers.
Propagation (easy option)
If you want to make a second plant or share one, the simplest method is division during repotting. This keeps things low-fuss and gives you a bigger start than stem cuttings.
How to divide
- Repot on a day when the plant is well-hydrated, not bone-dry.
- Slide the plant out and gently tease the root ball apart.
- Look for natural clumps with their own roots and a few leaves.
- Separate with clean hands, or use a clean knife only if you have to.
- Pot each division into the same chunky mix, water in, and keep in bright indirect light.
Do not fertilize for about a month after dividing. Let roots settle first.
Effortless weekly checklist
If you want Anthurium care to feel automatic, keep it to a short routine:
- Once a week: check soil moisture, empty the saucer, quick pest glance under leaves
- Every 2 to 4 weeks: wipe dust off leaves
- Monthly in spring and summer: light organic feeding
- Every 1 to 2 years: refresh the mix and check roots
That is it. Most Anthurium problems come from too much love, especially extra water. Keep the mix airy, the light bright, and your routine simple.

Jose Brito
I’m Jose Britto, the writer behind The Country Store Farm Website. I share practical, down-to-earth gardening advice for home growers—whether you’re starting your first raised bed, troubleshooting pests, improving soil, or figuring out what to plant next. My focus is simple: clear tips you can actually use, realistic expectations, and methods that work in real backyards (not just in perfect conditions). If you like straightforward guidance and learning as you go, you’re in the right place.