Fleas are one of those problems that feel like they come out of nowhere. One week you are weeding and watering, the next you are seeing tiny jumpers on your ankles or your pet is scratching nonstop. The tricky part is that adult fleas are only a small piece of the problem. Most of the flea population lives in the environment as eggs, larvae, and pupae hiding in carpets, pet bedding, cracks in floors, and the same cool, protected garden spots that also hold moisture and leaf litter.
This guide walks you through a complete, home-and-yard plan that fits real life. It is focused on practical steps, safe choices for gardeners, and timing that actually breaks the flea life cycle.
Know what you are fighting: the flea life cycle
If you only kill the fleas you can see, you will usually get a second wave. Here is the basic breakdown:
- Adults live on pets and bite people. They lay eggs after feeding.
- Eggs fall off into carpet, bedding, floor cracks, and soil or mulch in sheltered outdoor areas.
- Larvae avoid light and hide deep in carpet fibers or protected outdoor debris. They feed primarily on adult flea dirt (dried blood) plus other organic debris.
- Pupae sit in a cocoon and can wait. This is why fleas can “reappear” after you think you fixed it.
Your goal is to treat pets, indoors, and outdoors in a way that keeps steady pressure on the population for several weeks.
Quick signs you have fleas (and where to look first)
Indoors
- Pets scratching, chewing, or restlessness, especially around the tail base and belly.
- Small dark specks (flea dirt) on pet bedding or where your pet sleeps.
- Bites on ankles and lower legs, often in clusters.
Outdoors (gardener hotspots)
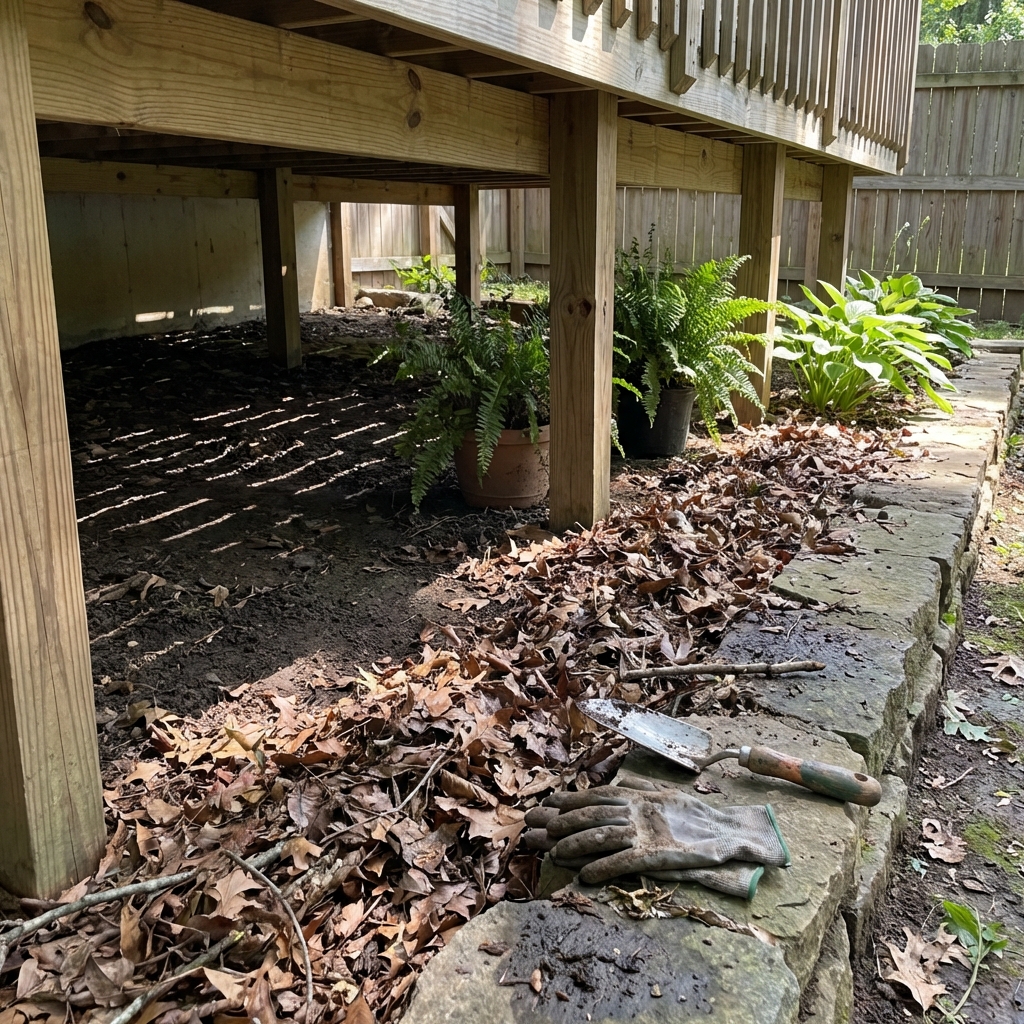
- Shady, humid zones: under decks, porches, shrubs, hedges, and thick groundcovers.
- Areas where pets nap: under a tree, beside a shed, along a fence.
- Leaf litter piles, weedy edges, and tall grass near shade.
Fast check: Put on white socks and walk slowly through shady lawn edges or under shrubs. Fleas show up as tiny dark specks that jump onto the fabric. (A little debris can stick to socks too, so look for that distinct jumping movement.)
Quick confirmation: Try the “flea dirt test.” Put a few specks on a damp white paper towel. If it smears reddish-brown, it is digested blood, which strongly suggests fleas.

Step 1: Treat the pet first (otherwise you will keep losing)
If you have pets, they are usually the main “flea transport.” Home treatment works best when your pet is protected at the same time you clean and treat the environment.
- Talk to your veterinarian about a fast-acting flea adulticide and a longer-term preventive. This is especially important for puppies, kittens, seniors, and pets with health issues.
- Treat all pets at the same time (cats and dogs), even if only one is itching. One untreated pet can keep the cycle going.
- Use products as directed. Do not stack multiple flea products unless a vet tells you to.
- Keep prevention going monthly for at least a few months after things improve (and longer if fleas are common where you live).
- Wash pet bedding on hot and dry on high heat. If it cannot be washed, consider replacing it during heavy infestations.
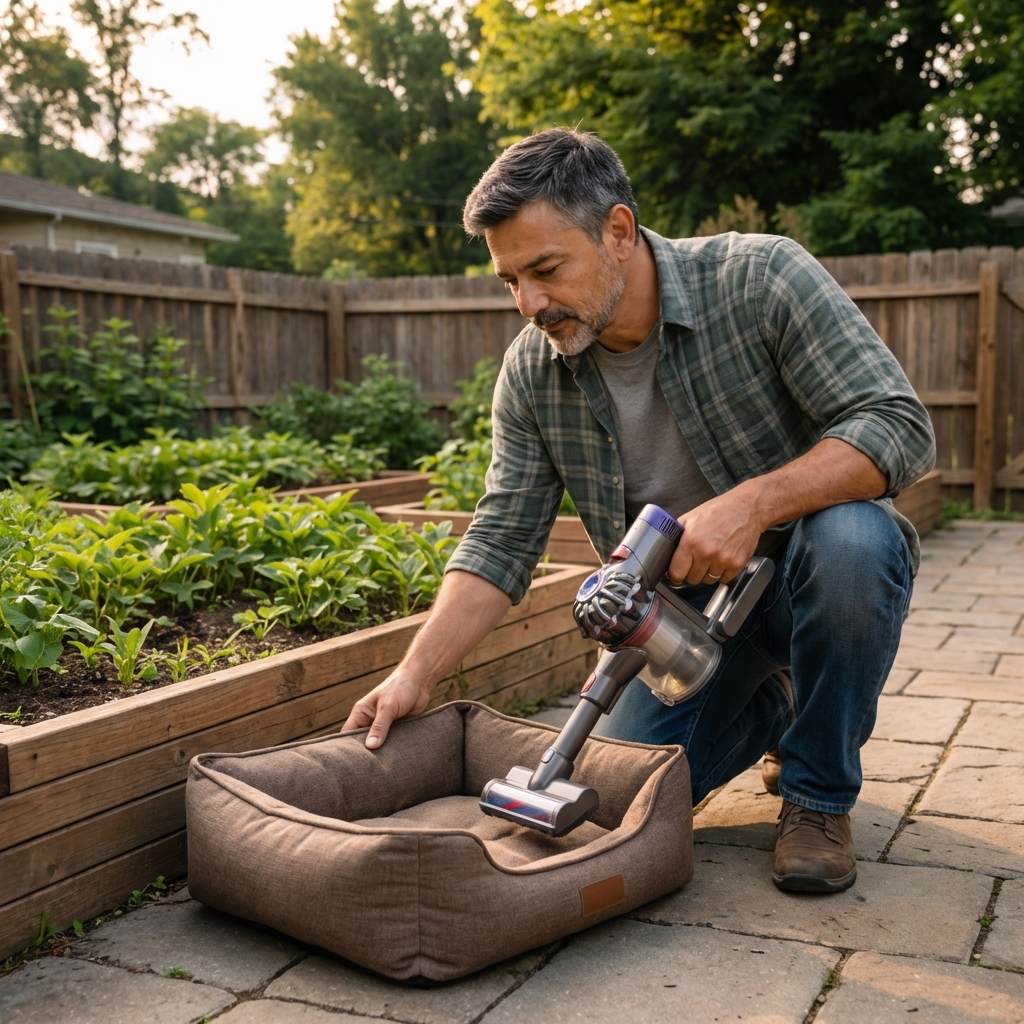
Gardener tip: If your dog loves lying under the same shrub every afternoon, assume that spot is part of the problem until proven otherwise.
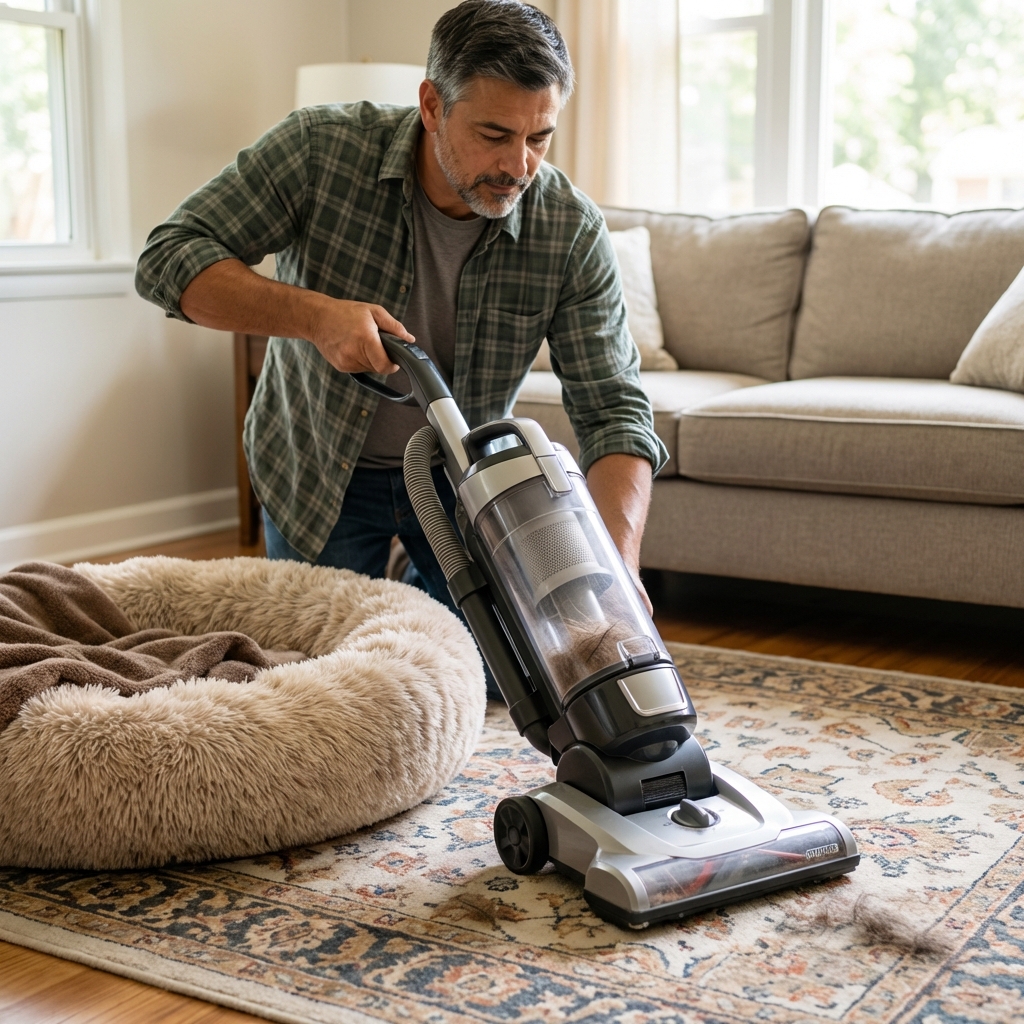
Step 2: Indoor cleanup that actually removes eggs and larvae
Cleaning is not “optional.” It is how you physically remove eggs and larvae and it can help stimulate pupae to emerge (through vibration, heat, and activity) so they can be picked up by your plan.
Vacuum like you mean it
- Vacuum carpets, rugs, baseboards, under furniture, and pet hangout zones.
- Go slow and use the crevice tool along edges and cracks.
- Vacuum daily for 7 to 14 days if the problem is active, then keep going several times per week. Some infestations take longer to fully clear because pupae can keep emerging.
- Empty the canister outdoors immediately, or seal the bag in a plastic bag and remove it.
Wash and heat-dry fabrics
- Pet bedding, throw blankets, slipcovers, and washable rugs.
- Heat is your friend: hot wash plus hot dry is a simple, effective combo.
Don’t forget hidden zones
- Closets where pets sneak naps.
- Entryways near the yard.
- Basements or mudrooms with cracks and storage clutter.
Step 3: Choose an indoor treatment you can stick with
For many homes, the best results come from a combination of cleaning and a product that targets developing fleas, not only adults.
What to look for
- IGR (Insect Growth Regulator) products. These interrupt development so eggs and larvae do not mature. Common IGRs you may see on labels include methoprene and pyriproxyfen.
- Targeted sprays for carpets and cracks rather than whole-house foggers.
What to avoid (most of the time)
- Foggers or “bombs” can miss the places fleas actually live (deep in carpet and under furniture) and add unnecessary pesticide exposure.
Safety basics: Follow label directions exactly, keep kids and pets out until dry, ventilate the space, and avoid applying to pet skin or bedding unless the label specifically allows it.
Step 4: Outdoor flea control for gardeners (without nuking your yard)
Most yards do not need a full blanket treatment, especially if the problem is mainly indoors. Fleas usually cluster in cool, humid, sheltered areas. That is good news because it means you can focus your effort. If you have a severe infestation, sandy soil, or heavy wildlife traffic, you may need a broader plan.
Start with habitat changes
- Reduce deep shade and humidity: prune low branches, thin dense shrubs, and improve airflow where pets rest.
- Rake up leaf litter, especially under shrubs and along fence lines.
- Mow and edge tall grass at shady borders.
- Move pet rest areas to sunnier, drier spots when possible.
Targeted yard treatments
If you need more than cleanup, focus on the spots where fleas thrive:
- Under decks and porches.
- Under shrubs, hedges, and dense groundcover.
- Along shaded fence lines.
- Dog run corners and favorite nap zones.
Consider yard products that include an IGR and are labeled for outdoor flea control. Apply only where needed, and avoid spraying flowers that pollinators visit.
Garden-friendly timing: Treat in the early morning or late evening when bees are not actively foraging, and never spray open blooms.
Wildlife note: Fleas can hitchhike in on raccoons, opossums, feral cats, and other visitors. If activity is heavy, consider blocking access under decks and crawlspaces and removing attractants (like outdoor pet food).
Natural and low-tox options: what helps and what does not
I am all for using the least amount of product necessary. Just keep expectations realistic, because fleas can be stubborn.
Options that can help
- Frequent vacuuming and hot laundering (simple but powerful).
- Nematodes (beneficial species labeled for flea larvae), often Steinernema carpocapsae, in shady, moist yard areas. They work best when temperatures are in their preferred range, the soil is kept lightly moist after application, and the area is protected from strong sun. Results can vary.
- Mechanical cleanup outdoors: raking, mowing, and removing debris in hotspot zones.
Be cautious with these
- Diatomaceous earth: it can irritate lungs. If you use it, use food-grade, avoid creating dust, keep pets and kids away, and do not apply where it will blow around.
- Essential oils: many are unsafe for pets, especially cats. “Natural” does not automatically mean safe.
Reality check: If you have a heavy indoor infestation, natural methods alone often take longer than most families can tolerate. In that case, combine cleaning with an IGR-based product and keep treatments targeted.
A simple flea treatment timeline
Consistency matters more than perfection. Use this schedule as a baseline and adjust to your situation.
Day 1 to 3
- Start pet treatment (vet-recommended) and treat all pets in the home.
- Wash pet bedding and common blankets.
- Vacuum thoroughly (carpets, edges, under furniture).
- Identify outdoor hotspots (white sock test, pet rest zones).
Week 1
- Apply indoor treatment if needed (prefer IGR-based, targeted applications).
- Do habitat cleanup outdoors: rake, mow, prune for airflow.
- Consider targeted outdoor treatment in sheltered pockets if fleas are active.
Week 2 to 4
- Keep vacuuming several times per week (daily is even better in hotspots).
- Rewash bedding weekly.
- Monitor with the sock test outdoors and check pet bedding indoors.
Many homes see noticeable improvement in 1 to 3 weeks with strong pet prevention plus vacuuming and an IGR-based plan. Full resolution can take 4 to 8 weeks in stubborn cases because pupae can keep emerging over time. If fleas persist past a month with solid pet prevention in place, it usually means (1) pupae are still emerging, (2) a hotspot is being missed, or (3) wildlife traffic is contributing. Tightening up the routine or calling a professional can save time.
Common mistakes that keep fleas coming back
- Treating the yard but not the pet, or treating the pet but not the home.
- Not treating every pet in the household at the same time.
- Skipping the vacuum (this is the biggest one).
- Only treating sunny lawn and ignoring sheltered areas under shrubs and decks.
- Using foggers as the main solution and missing where fleas actually hide.
- Stopping too early after you see fewer bites. Flea life stages can lag behind.
When to call a pro
Sometimes the fastest solution is expert help, especially if:
- You have multiple pets and a heavy indoor infestation.
- Someone in the home is highly sensitive to bites.
- You have repeated reinfestations tied to crawlspaces, wildlife, or multi-unit housing.
Ask whether they use an IGR, how they handle indoor vs outdoor hotspots, and what steps you should take before and after treatment.
Quick FAQ
How long does it take to get rid of fleas in a home?
With consistent pet protection, vacuuming, and a solid indoor plan, many homes see noticeable improvement in 1 to 3 weeks. Stubborn cases commonly take 4 to 8 weeks for full resolution because pupae can emerge over time.
Do I need to treat the entire yard?
Usually no. Focus on shaded, humid pockets and pet rest areas. In severe infestations or with heavy wildlife traffic, you may need a more aggressive yard plan.
Will fleas die in winter?
Cold can reduce outdoor activity, but fleas can persist indoors year-round and in protected outdoor microclimates. Do not rely on weather alone.
Bottom line
Flea control is a loop: protect the pet, clean the home hard, and target the sheltered garden pockets where fleas develop. Stay on a simple schedule for a few weeks, and keep prevention going for a while after the last bite. That is how you break the cycle without turning your home and garden into a chemical zone.

Jose Brito
I’m Jose Britto, the writer behind The Country Store Farm Website. I share practical, down-to-earth gardening advice for home growers—whether you’re starting your first raised bed, troubleshooting pests, improving soil, or figuring out what to plant next. My focus is simple: clear tips you can actually use, realistic expectations, and methods that work in real backyards (not just in perfect conditions). If you like straightforward guidance and learning as you go, you’re in the right place.