Fleas are not just a “pet problem”. If your yard has shade, moisture, and wildlife traffic, fleas can set up shop in the soil and leaf litter, then hitch a ride inside on your dog, cat, or pant legs. Essential oils can be a helpful tool for reducing flea pressure in specific outdoor spots, but they work best as part of a bigger plan that targets where fleas actually live.
Below is what I recommend for home gardeners: essential oils that are commonly used for fleas, how to dilute them correctly, where to apply them in a yard, and the safety rules that keep pets, pollinators, and plants in good shape.
How fleas behave in a backyard
Understanding the life cycle is what makes any flea plan work. Adult fleas are only the tip of the iceberg. Most of the population is usually in the environment as eggs, larvae, and pupae.
- Eggs fall off pets and land in soil, mulch, and cracks.
- Larvae avoid light and hide in shaded, protected areas where organic debris builds up.
- Pupae can wait, then hatch when vibration, heat, or carbon dioxide signals a host is nearby.
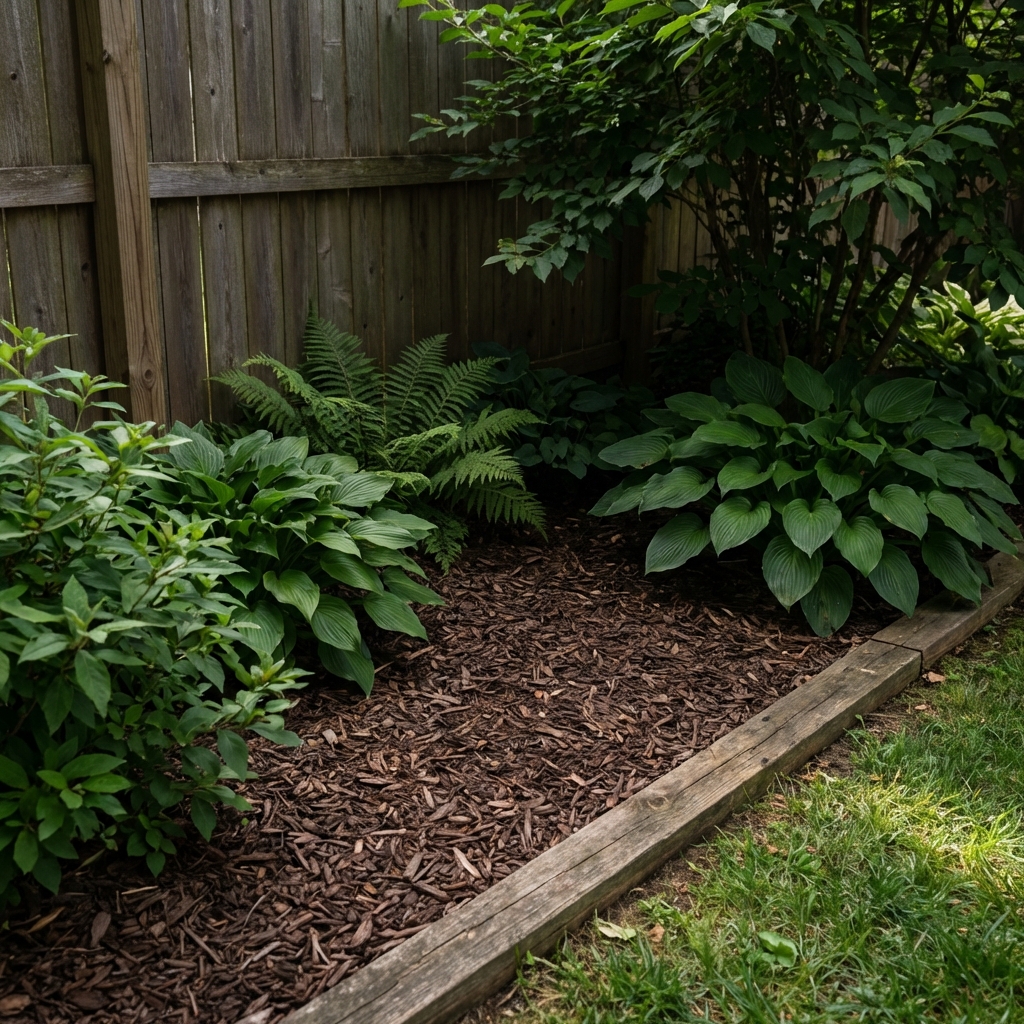
That is why spraying a nice-smelling product once rarely solves anything. Your best targets are the shady, slightly damp areas where larvae develop: under decks, along fences, under shrubs, around dog runs, and anywhere leaf litter sits for weeks.
Essential oils commonly used outdoors
Essential oils do not work like a long-lasting residual insecticide. Outdoors, they tend to act as short-term repellents and can help reduce activity when applied correctly and re-applied as needed. Wind, sun, and rain break them down quickly.
Cedarwood
Cedarwood oil is a common choice for outdoor pest support because it may help repel a range of insects. It is also one of the more practical options for yard perimeter sprays and shaded zones.
Lemongrass
Lemongrass has a strong scent many people use to discourage biting insects. It is potent, so dilution and spot testing are important, especially around tender plants.
Geranium (rose geranium)
Geranium oil is often used in natural repellent blends. It is best suited for targeted applications like dog bedding areas outdoors (not directly on pets) and perimeter zones.
Peppermint
Peppermint is popular and easy to find. Outdoors it can help as a repellent, but it can also irritate sensitive noses and skin. Use it lightly and avoid areas where pets rub or roll.
Lavender
Lavender is sometimes used in blends for a milder scent. It tends to be less “punchy” than lemongrass or peppermint, so think of it as supportive rather than a standalone flea solution.
Important: Many essential oils are not safe for cats and can be risky for dogs, too, depending on dose and exposure. Never apply essential oils directly to cats, and be cautious with diffusers in homes with pets.
Essential oils to avoid
Some oils are commonly mentioned online but are higher risk for pets, especially cats. If your goal is a garden-friendly approach, it makes sense to also choose a pet-responsible approach.
- Tea tree (melaleuca): associated with toxicity in pets when misused or over-applied.
- Pennyroyal: not recommended around pets.
- Wintergreen: high-risk due to methyl salicylate.
- Clove: potent and more likely to irritate skin and mucous membranes.
- Eucalyptus: can be problematic around pets, especially with heavy exposure.
If you are dealing with a serious flea problem and you have pets, it is worth looping in your veterinarian. Yard management plus vet-approved pet prevention is often the fastest route to relief.
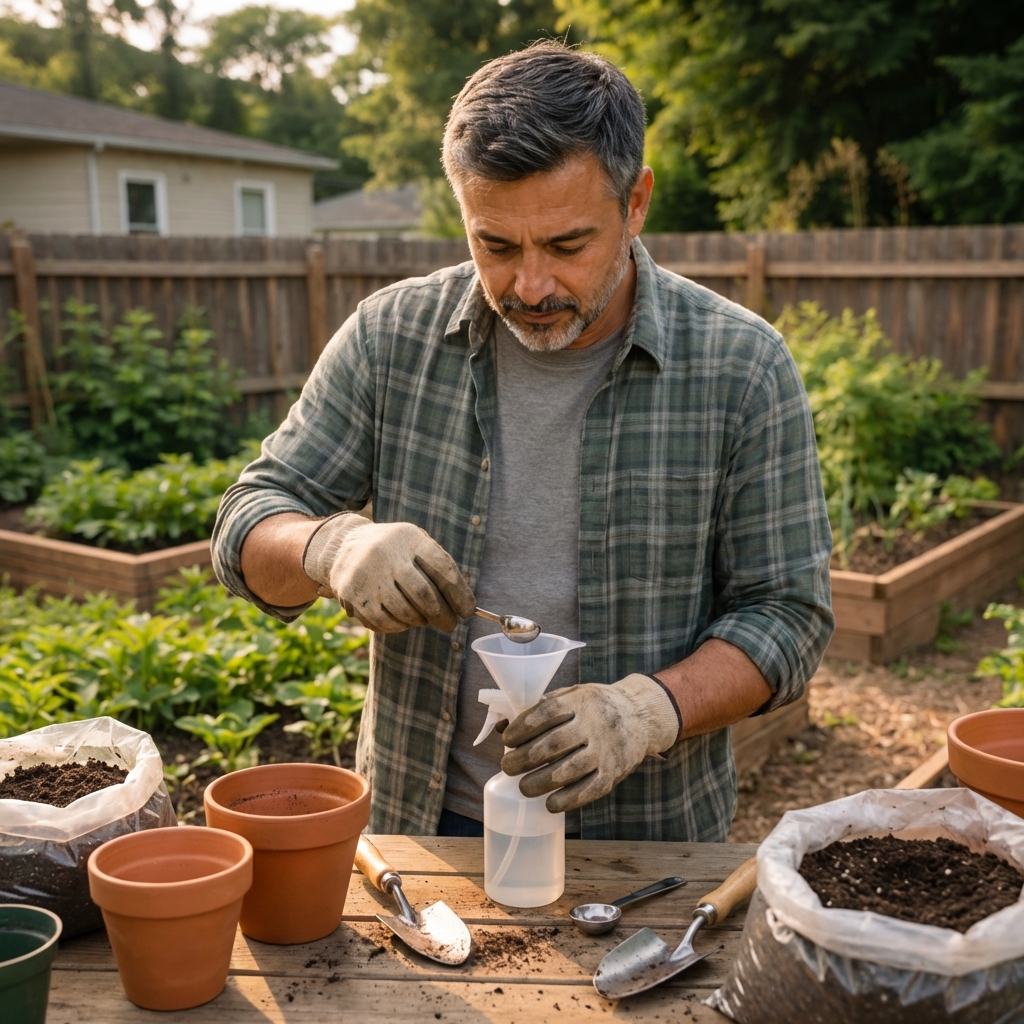
Safe dilution basics
Essential oils are concentrated. “More” is not better. A too-strong mix can burn foliage, irritate skin, and create unnecessary risk for pets and beneficial insects.
Simple outdoor spray dilution
For general yard spot treatments, many DIYers stay around 0.5% to 1% essential oil concentration.
Rule of thumb: About 6 drops per 1 ounce (30 mL) of finished spray is roughly 1%. About 3 drops per 1 ounce is roughly 0.5%. (Drop size varies by bottle, so think “close enough for DIY”, not lab-precise.)
- 0.5% (gentler): about 24 drops per 8 ounces (240 mL) of finished spray.
- 1% (stronger): about 48 to 50 drops per 8 ounces (240 mL) of finished spray.
- Quick small-batch guide: 1 tablespoon is 0.5 oz (15 mL). That is about 3 drops at 1% and about 1 to 2 drops at 0.5%.
Mixing: water needs help
Oil and water do not naturally mix. If you skip this step, you get oil “hot spots” that can irritate skin or burn plant tissue.
- Mild liquid castile soap: a practical DIY surfactant that helps oils disperse more evenly in water. Use a small amount, mix the oil into the soap first, then add water. Do not overdo it, since soap can cause leaf burn on some plants and can harm soft-bodied beneficial insects on contact.
- Witch hazel or alcohol: these can help as solvents, but they are not true emulsifiers. The oil can still separate, so you must shake hard before spraying. Alcohol can also increase leaf burn risk, especially on tender foliage.
Whatever base you use, label the bottle and shake well before use.
What to use as a base
- Water: fine for quick applications, but least durable.
- Witch hazel: dries quickly and is common in DIY sprays, but separation happens fast.
- Alcohol (like vodka): can help disperse oils, but can be harsher on plants if overdone.
Plant safety tip: Always spray a small test area first, especially on tender ornamentals. Avoid spraying in full sun. Early morning or evening is safer for plants and pollinators.
Where sprays help most
Think “targeted zones”, not blanket spraying your whole lawn.
- Under decks and porches where it stays shaded
- Along fence lines with leaf litter buildup
- Under shrubs and hedges where pets like to rest
- Dog run edges and the shaded side of a kennel area
- Mulched beds only if you can keep spray off edible leaves and flowers
Skip spraying directly on blooms where pollinators forage. If you need to treat near flowering plants, aim for the soil and lower stems, not the flowers.
When not to spray: windy days (drift), right before rain or irrigation (wash-off), or during peak pollinator activity.
Easy recipes
These are outdoor-only mixes meant for yard hot spots. Do not spray pets with these. Keep pets out of treated areas until the spray has fully dried.
Cedarwood yard spot spray (8 oz / 240 mL)
- 8 oz water
- 1/4 to 1/2 teaspoon mild liquid castile soap (mix oil into soap first)
- 24 drops cedarwood essential oil (about 0.5%)
Shake well. Spray shaded edges, under shrubs, and leaf litter zones. Reapply every 2 to 4 days at first, then weekly if pressure drops.
Lemongrass blend for stubborn areas (8 oz / 240 mL)
- 8 oz water
- 1/4 to 1/2 teaspoon mild liquid castile soap
- 24 drops lemongrass
- 24 drops cedarwood
This lands around a 1% total oil dilution and is stronger smelling. Keep it away from tender seedlings, and do a spot test.
Milder lavender support spray (8 oz / 240 mL)
- 8 oz water
- 1/4 to 1/2 teaspoon mild liquid castile soap
- 24 drops lavender
- 24 drops cedarwood
This is also around a 1% total oil dilution, but the scent reads “softer” to most people than lemongrass. Best for light flea pressure and maintenance after you have cleaned up the main problem spots.
If you prefer witch hazel: You can swap the soap for 1 to 2 teaspoons witch hazel, but expect separation and shake hard before spraying. Avoid alcohol-heavy mixes on tender plants.

The garden-first flea plan
If you want results that last longer than a few nice-smelling days, stack methods. Here is the realistic backyard approach I have seen work best.
1) Dry out flea habitat
- Rake out leaf litter and old grass clippings in shady corners.
- Trim back dense groundcover and lower branches to let air and light in.
- Fix overwatering or leaky spigots that keep soil damp.
2) Treat the hot spots repeatedly
Fleas hatch in waves. Plan on re-treating shaded zones on a schedule, especially after rain.
3) Consider beneficial nematodes
For many home gardens, beneficial nematodes can be more effective than essential oils because they actively target immature stages in soil, including flea larvae. Look for products labeled for fleas and follow directions closely. As an example, some products contain species such as Steinernema carpocapsae. They need moist soil and the right temperatures to work.
4) Keep pets protected
If your pet is bringing fleas back in, yard treatments will feel like you are bailing water with a spoon. Talk to your vet about prevention that fits your animal and your region.
5) Do not ignore the house
If fleas are getting indoors, outdoor sprays will not solve the full problem on their own. Treat pets and address indoor hot spots (like pet bedding and carpets) at the same time so you are not stuck in a loop.
Safety rules
- Do not apply essential oils directly to cats. Many oils can be harmful even in small amounts.
- Keep pets off treated areas until fully dry. Dry time is your simplest safety buffer.
- Avoid spraying flowers. Apply to soil, mulch, and lower non-blooming foliage instead.
- Do not spray edible crops unless you are confident in the oil choice and dilution. If you do, avoid edible portions and wash harvests thoroughly.
- Store oils securely. A spilled bottle is a bigger hazard than most people realize.
- Dispose of leftovers responsibly. Mix only what you will use that day when possible. Do not dump leftover spray into ponds, storm drains, or waterways.
If anyone in the household has asthma or fragrance sensitivity, go extra light and treat outdoors only.
FAQ
Will essential oils kill fleas in the yard?
Outdoors, essential oils are better viewed as repellent and activity reducers with short-lived effect. They can support a flea plan, but drying out habitat, repeated treatments, and pet prevention usually matter more.
How often should I reapply?
In active flea season, every 2 to 4 days for hot spots is common, then weekly for maintenance. Reapply after rain or heavy watering.
What is the most garden-friendly option?
Targeted sprays using cedarwood (light dilution, applied to shaded soil and mulch, not flowers) are often a practical starting point. Pair that with habitat cleanup for the best payoff.
Takeaway
If fleas are stressing your garden life, focus on the places fleas actually develop: shaded, protected, slightly damp spots. Use essential oils as a spot treatment, keep dilutions sensible, and protect pets and pollinators by applying carefully and letting everything dry. Combine that with yard cleanup, indoor support if needed, and a pet plan, and you will usually see a real drop in flea pressure over a couple of weeks.

Jose Brito
I’m Jose Britto, the writer behind The Country Store Farm Website. I share practical, down-to-earth gardening advice for home growers—whether you’re starting your first raised bed, troubleshooting pests, improving soil, or figuring out what to plant next. My focus is simple: clear tips you can actually use, realistic expectations, and methods that work in real backyards (not just in perfect conditions). If you like straightforward guidance and learning as you go, you’re in the right place.