
Thistle is one of those weeds that feels personal. You pull it once, it shows up again. You cut it down, it pops right back up. The good news is you can get rid of thistle naturally. The trick is matching your method to the kind of thistle you have, then repeating the right steps at the right time.
Below is a practical backyard approach: minimal gear, no harsh herbicides, and a focus on stopping regrowth and preventing new seeds.
Know your thistle (it changes the game)
“Thistle” is a big bucket. Some types mostly spread by seed, while others spread by creeping roots. If you treat them the same, you can waste a whole season.
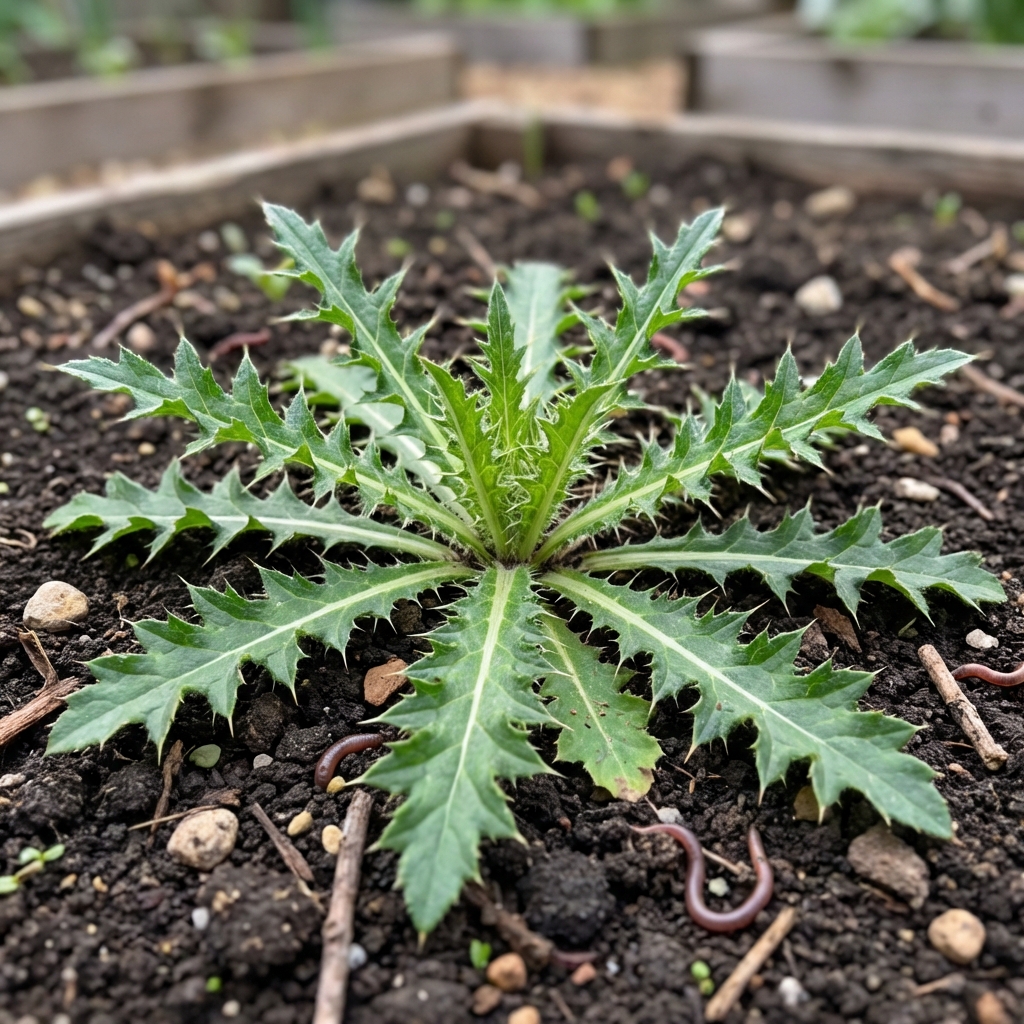
Bull thistle (Cirsium vulgare) is usually biennial
- Year 1: a flat spiky rosette close to the ground.
- Year 2: a tall flowering stalk that sets lots of seed.
Natural control is straightforward: remove the rosette or prevent flowering and you break the cycle. (In mild climates, some plants can behave more like short-lived perennials, so keep an eye out for resprouts.)
Canada thistle (Cirsium arvense) is perennial with spreading roots
- Forms patches and keeps returning from creeping roots.
- Cutting once rarely solves it. It needs repeated depletion.
Quick ID clues (helpful, not perfect)
- Bull thistle: typically a more solitary plant, very spiny, often looks hairy or rough on the leaves and stem.
- Canada thistle: usually shows up as a colony, leaves are narrower and less deeply lobed, spines are smaller, stems are often smoother.
If you are not sure: Single plants popping up can be seed-driven, and spreading colonies often point to creeping roots. It is a useful clue, not a guarantee. When in doubt, treat it like a root-driven problem and focus on preventing flowering.
Before you start: safety and basic tools
Thistles fight back. A few small precautions make the work faster and a lot less painful.
- Gloves: thick leather or thorn-resistant garden gloves.
- Long sleeves and eye protection: especially when cutting flowering heads.
- Tools: hand weeder or hori-hori knife, narrow spade, pruners, a digging fork, and a tarp or bucket for debris.
If thistle is growing where you want to plant food, stick to mechanical removal and smothering first. Reserve any “natural sprays” for spots away from desirable plants.
Spines and disposal (save yourself a headache)
- Do not drag pulled thistles across lawns or paths. Use a tarp, bucket, or bag.
- Bag anything with buds, flowers, or fluff right away.
- Watch the crown: if a chunk of crown or root comes up, treat it like it can regrow. Do not casually toss it in a cool compost pile.
The most effective natural strategy (in plain terms)
Natural thistle control works best when you combine three goals:
- Stop seed production so you do not add next year’s problem.
- Remove or weaken the root system so it cannot rebound.
- Reclaim the space with mulch and dense plants so thistle has less opportunity.
Method 1: Dig thistle out (best for isolated plants and rosettes)
If you catch thistle in the rosette stage, digging is one of the cleanest, most satisfying fixes.
Best timing
- Early spring when rosettes are small.
- Fall when soil is moist and plants are easier to pull cleanly.
Step-by-step
- Water first if the soil is dry. Damp soil releases roots more cleanly.
- Cut around the plant with a narrow spade or hori-hori 2 to 4 inches from the crown.
- Pop the crown out by levering underneath.
- Pull as much root as you can. For taprooted thistles, that can be several inches to a foot depending on your soil. The more you get, the fewer resprouts you will chase.
- Recheck the hole for broken crown or root pieces and pull them out.
- Fill and mulch the disturbed soil. Bare soil invites more weeds.
If the root breaks: do not panic. Mark the spot and check it weekly. If it resprouts, dig again or switch to repeated cutting until it runs out of steam.

Method 2: Repeated cutting or mowing (best for large patches)
For thistle that comes back from roots, think in terms of energy. Every time the plant sends up leaves, it spends stored energy. If you remove the top growth repeatedly, you force it to spend and spend until it runs low.
How to do it
- Start early when stems are 6 to 12 inches tall.
- Cut very low, at ground level or just below the soil surface if you can do it safely. The goal is to remove the growing points and as many leaves as possible.
- Repeat on a schedule every 2 to 3 weeks through the main growing season (more often if regrowth is fast).
- Do not let it flower. Once buds form, cut immediately. For Canada thistle, consistent cutting right at bud stage (before flowers open) can be especially effective for depletion.
What to expect: With Canada thistle, this is usually a multi-month project and sometimes a two-season project. Consistency matters more than brute force.
Avoid this mistake
Do not rototill Canada thistle patches. Chopping creeping roots into pieces can spread the problem by creating lots of new starting points.
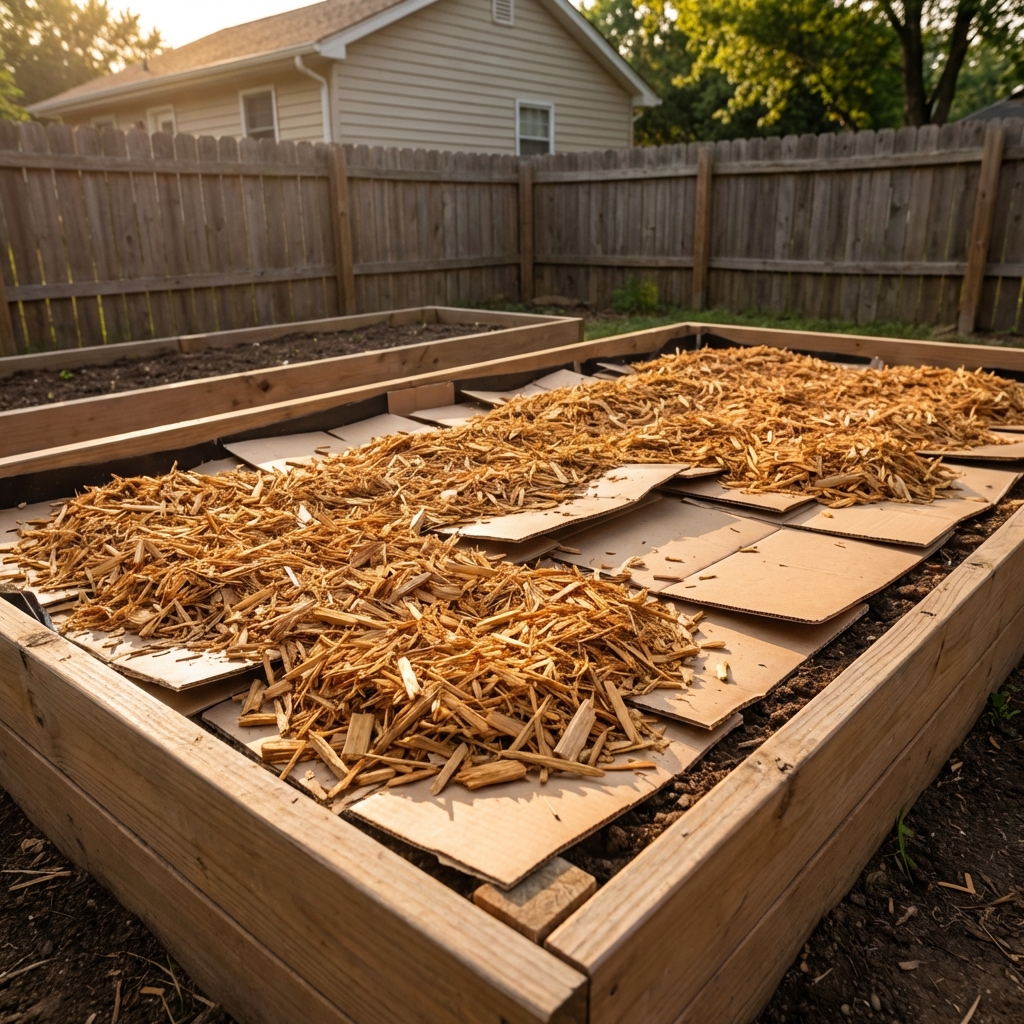
Method 3: Smothering (best for beds and tidy edges)
Smothering blocks light and makes it harder for thistle to keep producing leaves. It works especially well when you combine it with cutting first.
Materials that work
- Plain cardboard (remove tape and glossy coatings)
- Paper yard-waste bags split open
- Wood chips or shredded leaves as a top layer
Step-by-step
- Cut thistle down as low as you can.
- Lay cardboard with 6 to 8 inches of overlap so shoots cannot find gaps.
- Wet the cardboard thoroughly so it molds to the soil.
- Top with 3 to 6 inches of mulch.
- Check edges monthly and re-cover any breaks.
Timeline: Smothering often needs a full growing season. If you lift the cardboard and see pale, weak shoots, you are winning. Re-cover and keep going.
Method 4: Solarization (hot-sun option for open ground)
If you have a sunny area you can take out of service, solarization can reduce thistle and other weeds by overheating the top layer of soil.
- Best during the hottest part of summer.
- Works best on moist soil.
- Uses clear plastic pulled tight and sealed at the edges.
How long: Plan on 4 to 6 weeks in peak summer heat. In cooler or coastal climates, it can take 6 to 10+ weeks.
Reality check: Solarization is more effective on annual weeds and surface seeds than on deep creeping roots, but it can still help weaken thistle when paired with cutting and follow-up.
Natural spot treatments: what works, what to skip
A lot of “natural weed killer” recipes online cause more harm than help, especially in a garden bed. Here is the straight version.
Vinegar sprays
Household vinegar can burn leaf tissue, but it usually does not kill established thistle roots. Stronger horticultural vinegar works better but is still mainly a top-burner and can injure skin and eyes.
- Use it for: tiny seedlings in gravel or cracks.
- Avoid it for: beds, lawns, and near desirable plants.
Salt
Skip it. Salt can linger and damage soil structure and plants long after the thistle is gone.
Boiling water
Useful for hardscape areas, not for garden beds. It is non-selective and can harm nearby roots.
Stop thistle from seeding (this is non-negotiable)
If thistle is already flowering, your top priority is preventing seeds. One plant can produce a lot of fluffy seeds that travel.
What to do when you see buds or flowers
- Cut the flower head into a bucket or bag before it opens fully.
- Do not shake it around the yard.
- If heads are mature and fluffy, handle gently and bag immediately.
Compost or trash? If your compost does not reliably get hot, do not compost anything with buds, flowers, seeds, crowns, or root pieces. Bag and dispose of it, or dry it fully in the sun in a sealed container before discarding. For plain leaves and stems, compost is usually fine only if there are no crowns or roots attached.
After removal: keep it from coming back
Thistle loves open, disturbed soil and thin turf. Prevention is mostly about filling space and improving conditions so thistle is not the first thing to volunteer.
In garden beds
- Mulch consistently (2 to 4 inches, topped up as it breaks down).
- Plant densely so the soil is shaded.
- Edge maintenance: thistle often creeps in from fence lines, ditches, and neglected corners.
In lawns
- Mow high to keep turf competitive.
- Overseed thin spots in early fall.
- Improve soil with aeration and organic matter if compaction is an issue.
Seasonal game plan
Spring
- Look for rosettes and dig them out.
- Start cutting young shoots in patches on a regular schedule.
- Smother problem zones before planting if possible.
Summer
- Do not let plants flower. Cut buds immediately.
- Keep up the cutting schedule for perennial patches (every 2 to 3 weeks is a solid baseline).
- Maintain mulch depth and cover bare spots.
Fall
- Continue removal. Perennial thistles often store energy for winter, so cutting still helps.
- Overseed lawns and thicken ground cover.
Troubleshooting
You only pulled the top
If the crown and roots remain, thistle can regrow fast. Digging needs to remove the crown, not just leaves.
You cut once and stopped
Perennial thistle treats a single cut like a minor inconvenience. Repeated cuts are what drains it.
Seeds are blowing in from nearby areas
If you have thistle in a neighbor’s lot, roadside, or ditch, focus on stopping your own plants from seeding and keeping your soil covered. You may also need seasonal patrol pulls for new seedlings.
Quick checklist
- Identify: likely seed-driven (biennial) or root-driven (perennial), with a little humility.
- Remove rosettes early with a spade or weeder.
- For patches: cut very low on a regular schedule through the growing season.
- Smother with overlapped cardboard plus mulch.
- Never let flowers turn to fluff.
- Replant or mulch to keep soil covered.
When to escalate
If thistle is taking over a large area and you cannot keep up with repeated cutting, consider these still low-chemical options:
- Targeted mechanical control: a stirrup hoe in open areas, or weekly trimming with a string trimmer.
- Professional help: especially for large Canada thistle infestations on acreage.
Natural control works, but it rewards persistence. If you stay ahead of flowering and keep pressure on regrowth, most home gardens can get thistle down to a manageable, occasional weed instead of a season-long headache.

Jose Brito
I’m Jose Britto, the writer behind The Country Store Farm Website. I share practical, down-to-earth gardening advice for home growers—whether you’re starting your first raised bed, troubleshooting pests, improving soil, or figuring out what to plant next. My focus is simple: clear tips you can actually use, realistic expectations, and methods that work in real backyards (not just in perfect conditions). If you like straightforward guidance and learning as you go, you’re in the right place.