Garlic is one of those crops that feels almost too easy. You put a clove in the ground, it roots through the cold season, then takes off in spring and turns into a full bulb months later. The catch is that garlic is picky about a few things: drainage, timing, and healthy seed cloves. If you get those right, you will usually get a solid harvest even in an imperfect backyard bed.
This page walks you through step-by-step planting, plus the identification and control of common garlic problems like rot, pests, and leaf diseases.
Identify the right clove to plant
When you plant garlic from a clove, you are planting a piece of a bulb that is basically a clone of the parent. So the quality of that clove matters a lot.
Hardneck vs softneck (quick ID)
- Hardneck: Usually has fewer, larger cloves in a single ring and a stiff central stem inside the bulb. Often better flavor, produces scapes, but stores for a shorter time. Tends to be a strong choice for colder winter climates.
- Softneck: More cloves in multiple layers and no stiff central stem. Stores longer, often the type sold braided. Tends to do well in milder winter climates.
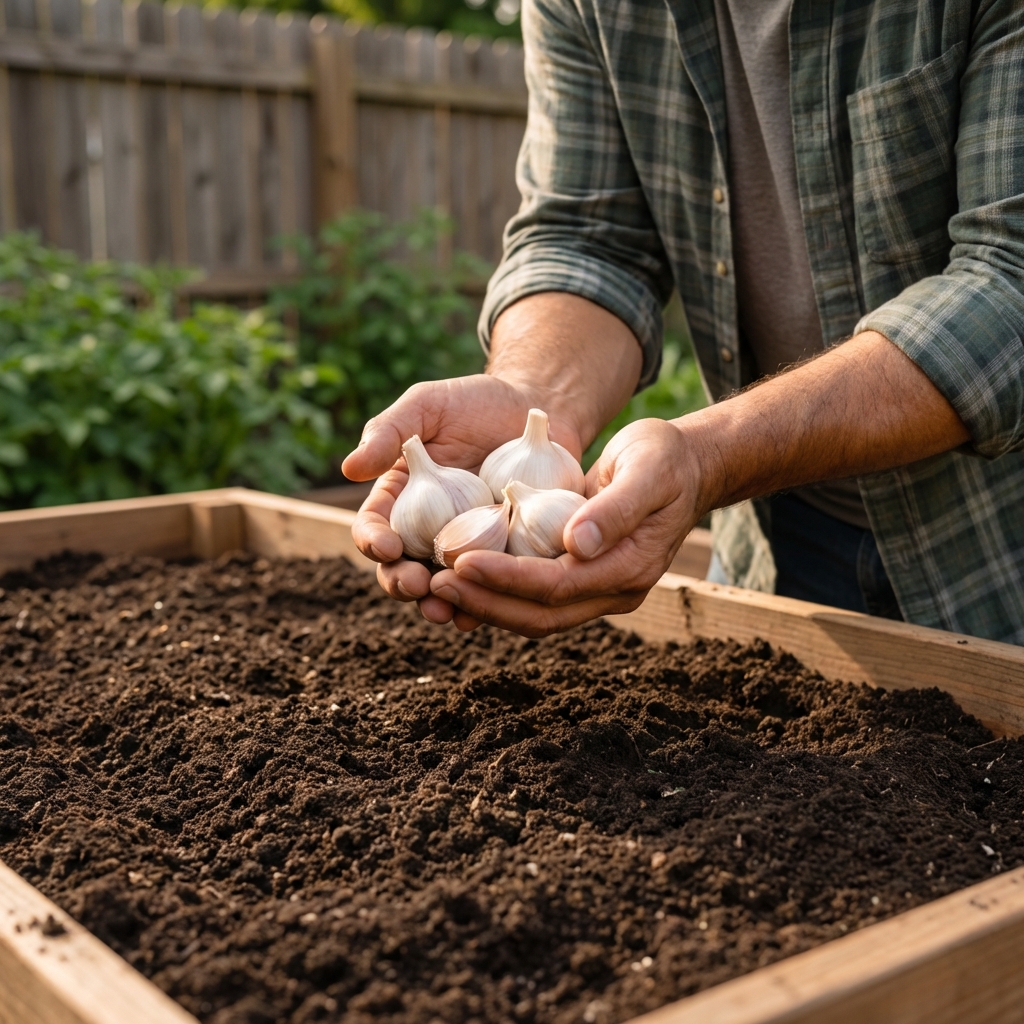
What a good “seed clove” looks like
- Firm, heavy for its size, and tight skin
- No soft spots, mold, or shriveling
- Big cloves make bigger bulbs more reliably than tiny interior cloves
Avoid these cloves
- Cloves with brown, sunken spots on the base plate (bottom) or any sour smell
- Cloves that are already drying out, hollowing, or feel spongy
- Questionable grocery store garlic if you can help it, since some is treated to reduce sprouting or may carry disease
Best practice: Buy seed garlic or use bulbs from a healthy crop you grew yourself. It costs more upfront but saves frustration later.
When to plant garlic
Garlic usually wants to be planted so it can grow roots before hard winter weather, then resume strong growth in spring.
- Cold winter climates: Plant in fall, about 2 to 4 weeks before the ground freezes hard.
- Mild winter climates: Fall planting still works, but late fall to early winter is common. In the warmest areas, some gardeners chill cloves in the refrigerator before planting to help with bulbing, but the need and timing vary by variety and region. If you go this route, check local guidance and your cultivar requirements (often 4 to 8 weeks or more of chilling).
If you plant too early and get lots of top growth going into winter, the plant can be more vulnerable to damage. If you plant too late, cloves might not root well and you can end up with smaller bulbs.
Step-by-step: growing garlic from a clove
Step 1: Pick the right bed
Garlic hates wet feet. Choose a spot with full sun and soil that drains well. Raised beds are great for garlic because they dry out faster than flat ground.
Step 2: Prep the soil (simple and effective)
- Loosen soil 6 to 10 inches deep.
- Mix in compost if your soil is lean, sandy, or heavy and clayey.
- Aim for soil that holds moisture but does not stay soggy.
If your bed puddles after rain, fix drainage before planting. Garlic is quick to punish poor drainage with rot.
Bonus tip: Garlic generally prefers near-neutral soil, roughly pH 6.0 to 7.0. If your garden struggles year after year, a simple soil test can be worth it.
Step 3: Separate cloves the day you plant
Break apart the bulb into individual cloves right before planting. Keep the papery skin on. It helps protect the clove from rot and pests.
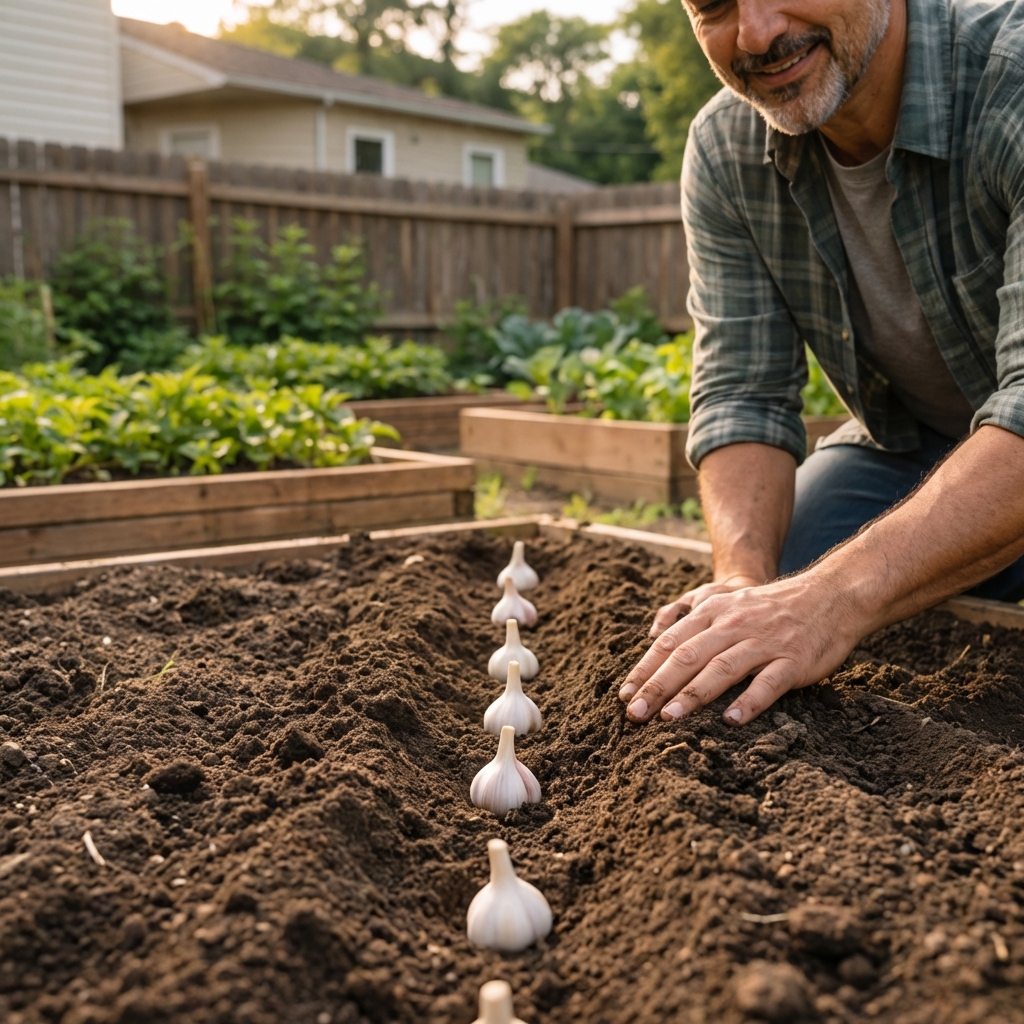
Step 4: Plant at the right depth and orientation
- Plant each clove with the pointy end up and the flat root end down.
- Depth: about 2 inches of soil covering the top of the clove in most gardens. In colder regions, some gardeners go slightly deeper for winter protection.
- Spacing: 4 to 6 inches apart in rows, with 8 to 12 inches between rows.
Step 5: Water in, then back off
Water after planting to settle soil and start root growth. After that, keep soil lightly moist but never swampy. Overwatering is a common cause of early rot.
Step 6: Mulch for winter (especially in cold climates)
Add 3 to 6 inches of clean straw, shredded leaves, or similar mulch. Mulch helps with temperature swings, winter heaving, and weeds.
Step 7: Spring feeding and basic care
- Pull mulch back a bit when shoots are 3 to 6 inches tall if your bed stays too wet.
- Keep weed pressure low. Garlic does not compete well with weeds.
- Garlic likes nitrogen early in spring, then less later as bulbs size up.
Easy feeding plan: When growth starts in early spring, side-dress with compost and, if needed, a nitrogen source labeled for gardens (examples: blood meal, fish emulsion, or a balanced organic fertilizer). Once bulbs start sizing (often around scape time for hardnecks), ease off heavy nitrogen so plants focus on bulbing instead of endless leaves.
Step 8: Hardneck scapes (what to do)
If you planted hardneck garlic, it will send up a curly flower stalk called a scape in late spring or early summer. Cutting scapes (once they curl) generally helps push energy into the bulb. You can snap them off or cut them, leaving a couple inches of stalk. Bonus: scapes are delicious.
Identification: what healthy garlic should look like
- Fall: Shoots may or may not emerge before winter depending on timing and climate.
- Early spring: Upright, narrow leaves that are blue-green to green. Even growth across the bed is a good sign.
- Late spring: Strong leaf growth. Hardnecks start scapes.
- Early summer: Lower leaves begin yellowing as bulbs mature. This is normal in moderation.
Concern starts when you see patchy yellowing, leaf spots, twisting, stunting, or plants collapsing in wet soil.
Control: the biggest garlic problems (and what to do)
Here are the most common issues home gardeners run into. The key is learning what the symptoms mean so you can respond early.
1) Rot (basal rot and general bulb rot)
What you see: Yellowing that starts from the bottom, weak growth, plants that pull out too easily, soft cloves, brown decay at the base plate. Often worse in low spots or heavy soil.
What causes it: Several fungi can cause rot. Wet soil, poor drainage, and stressed plants make it much more likely, but it can still show up even when things look “mostly fine.”
Control:
- Improve drainage first: raised beds, add organic matter, avoid compacted soil.
- Do not overwater. Garlic needs moisture, but it should not sit in it.
- Remove badly affected plants and do not compost them.
- Rotate out of allium crops (garlic, onions, leeks) for at least 3 to 4 years if rot is a recurring problem.
2) White rot (serious soilborne disease)
What you see: Leaves yellow and die back, plants wilt, and the bulb base develops white fluffy growth. Tiny black seed-like specks can form in that white growth.
Control:
- Bag and trash infected plants. Do not compost them.
- Avoid moving contaminated soil around the garden. Clean tools and boots.
- Important: White rot can persist in soil for decades (20+ years). If it is confirmed in a bed, the safest home-garden plan is to avoid planting alliums in that specific spot indefinitely.
If you suspect white rot, treat it as a “do not spread” situation. Also note that digging out lots of soil can backfire by spreading it, so focus on containment and not moving soil around.
3) Downy mildew and leaf blights
What you see: Pale patches, grayish or purplish fuzz in humid weather, leaf tips dying back, and reduced vigor.
Control:
- Increase airflow: proper spacing, weed control, avoid overcrowding.
- Water at soil level, not over the leaves, and water early in the day.
- Remove heavily infected leaves to slow spread.
- If you use a spray, choose only products labeled for edible crops and follow label directions. Prevention and airflow do more than most sprays.
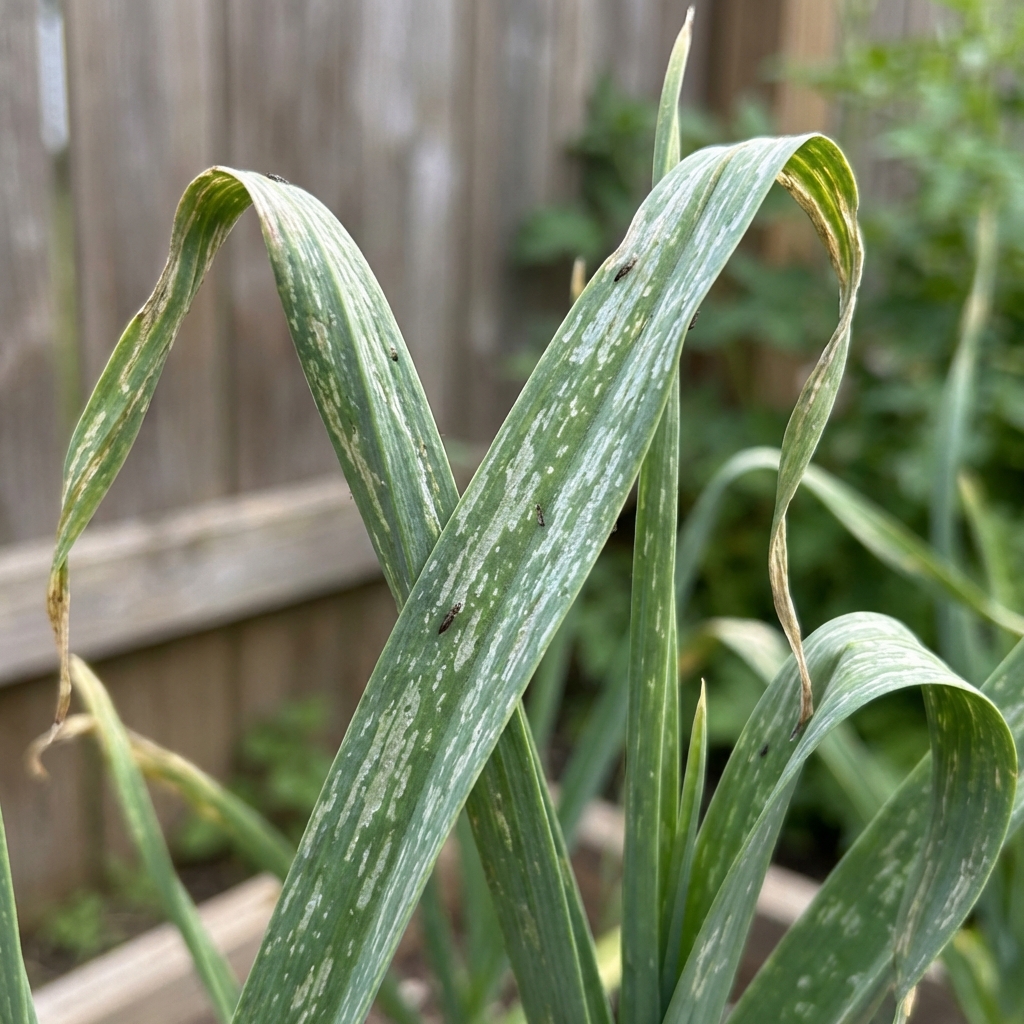
4) Thrips (common, especially in hot dry weather)
What you see: Silvery streaking on leaves, curling, and stunted growth. You might spot tiny, slender insects in leaf folds.
Control:
- Keep plants evenly watered. Drought stress makes thrips worse.
- Blast leaf folds with water to dislodge them.
- Use insecticidal soap or horticultural oil if pressure is high, applied in the evening and repeated as needed.
- Follow label directions and avoid spraying in hot sun or high heat to reduce the risk of leaf burn.
- Remove nearby weeds that host thrips.
5) Onion maggots (and other root feeders)
What you see: Plants suddenly wilt, yellow, or collapse. When you pull a plant, roots and the base may look chewed or decayed, sometimes with small maggots present.
Control:
- Use row cover early in the season to block egg-laying flies.
- Clean up all allium debris. Do not leave cull bulbs in the bed.
- Rotate crops and avoid planting alliums in the same spot year after year.
6) Nematodes (hard to confirm, but worth knowing)
What you see: Stunted plants, distorted leaves, weak root systems, bulbs that do not size up, and sometimes soft bulbs in storage.
Control:
- Start with clean seed garlic from a reputable source.
- Rotate and avoid replanting alliums in the same soil if symptoms repeat.
- If you suspect nematodes strongly, consider a soil test through a local extension service.
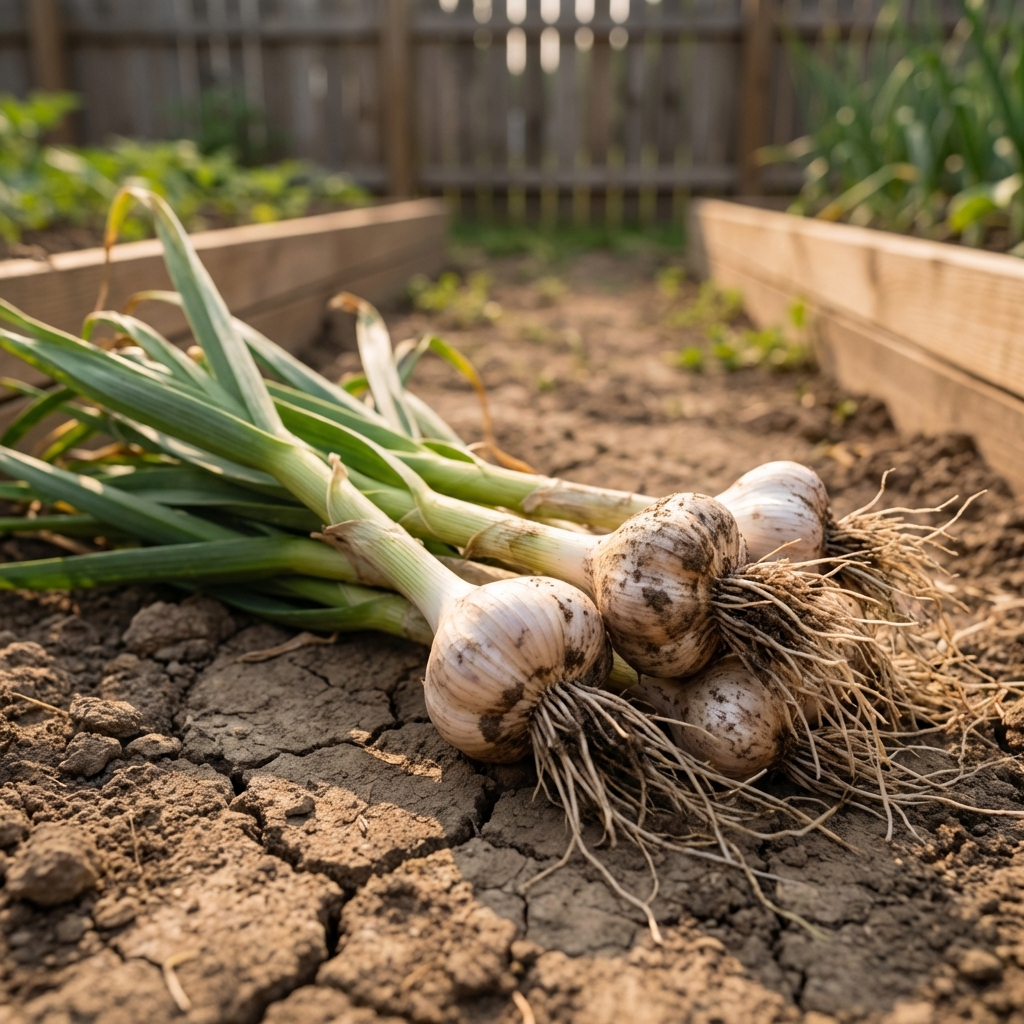
Harvest timing (the part most people guess wrong)
Harvest too early and bulbs are small and do not store well. Harvest too late and wrappers split, which also hurts storage.
Rule of thumb: Harvest when the bottom 3 to 5 leaves are brown, but the upper leaves are still mostly green. Those leaves correspond to wrapper layers around the bulb.
If your plants have fewer leaves or look stressed: A safer target is when about half the leaves have browned and half remain green. This helps you avoid waiting too long and ending up with split wrappers.
Tip: Stop watering about 1 to 2 weeks before harvest (if weather allows). This helps skins dry down, reduces mud stuck to bulbs, and lowers the odds of mold during curing.
- Loosen soil with a fork or trowel. Do not yank by the stalk if the soil is tight.
- Brush off loose dirt, but do not wash bulbs for storage.
Curing and storage (how to prevent post-harvest rot)
Curing is simply drying garlic in good airflow so the necks and wrappers tighten up.
- Cure in a shady, dry spot with airflow for about 2 to 4 weeks.
- Keep bulbs out of direct sun to avoid sunscald.
- After curing, trim roots and cut stems, or braid softnecks if you like.
Storage tips: Store in a cool, dry, well-ventilated place. Many home growers get good results around 50 to 60°F with low humidity. Avoid sealing garlic in airtight containers. If bulbs get soft or smell off, separate them from the rest right away.
Quick troubleshooting checklist
- Yellowing in wet areas: suspect rot, improve drainage, water less.
- Silvery streaks and curling leaves: thrips, increase moisture consistency and treat if needed.
- Leaf spots in humid weather: improve airflow, avoid overhead watering.
- Small bulbs: planted too late, cloves too small, too much competition from weeds, not enough spring nutrition, or too much nitrogen late.
- Bulbs splitting open: harvested too late or uneven moisture late in the season.
Simple plan for your next garlic planting
If you want the most reliable results without overcomplicating it, do this:
- Plant the biggest, cleanest cloves you can get in a sunny, well-drained bed.
- Mulch for winter, weed early, and keep moisture steady in spring.
- Feed lightly in early spring, then ease off heavy nitrogen once bulbing starts.
- Cut hardneck scapes, then watch leaf color for harvest timing and stop watering 1 to 2 weeks before harvest.
- Cure in shade with airflow, then store cool and dry.
Garlic rewards consistency more than perfection. If you get one good crop under your belt, you will feel confident growing it every year.

Jose Brito
I’m Jose Britto, the writer behind The Country Store Farm Website. I share practical, down-to-earth gardening advice for home growers—whether you’re starting your first raised bed, troubleshooting pests, improving soil, or figuring out what to plant next. My focus is simple: clear tips you can actually use, realistic expectations, and methods that work in real backyards (not just in perfect conditions). If you like straightforward guidance and learning as you go, you’re in the right place.