Bed bugs are sneaky, but they are not invisible. If you know what you are looking for and you check the right places in the right order, you can often find convincing evidence in one focused session. In very light or early infestations, you may need a few nights of monitoring to confirm activity. The goal is not to panic-clean the whole house. The goal is to find evidence and pinpoint the hot spots so your next steps actually work.
Below is a practical how-to for homeowners and renters: what bed bugs look like, the signs they leave behind, the exact hiding spots to inspect, and a simple way to confirm whether you are dealing with bed bugs or something else.

What bed bugs look like (and what they do not)
Correct identification matters because a lot of people chase the wrong culprit for weeks. Here is what to know before you start tearing things apart.
Adult bed bugs
- Size: about the size of an apple seed (roughly 4 to 7 mm).
- Shape: flat and oval when unfed, more rounded after feeding.
- Color: brown to reddish-brown.
- Movement: they crawl. They do not jump or fly.
Nymphs (young bed bugs)
- Smaller and lighter: tiny, pale, and can look almost translucent.
- Easier to miss: nymphs often show up as small moving “specks” near seams and cracks.
Eggs
- Appearance: pearly white, about 1 mm, often stuck into cracks and seams.
- Where: tight protected areas like mattress piping, bed frame joints, and along baseboards.
Common lookalikes
Ticks, carpet beetles, roach nymphs, and even lint can get mistaken for bed bugs. If you find a bug, capture it in clear tape or a small sealed container so you can confirm it before you treat.
Signs bed bugs are present
You do not need to see a live bug to have a strong case. Bed bugs leave clues. The more of these you find in the same area, the more likely you have an active problem.
- Fecal spots: tiny dark dots that look like ink marks. They often soak into fabric and do not brush off easily.
- Shed skins: papery, tan shells from growing nymphs, often tucked into seams.
- Eggs and eggshells: small white specks in protected cracks.
- Blood smears: small rust-colored stains on sheets or pillowcases.
- Musty odor: in heavier infestations, some people notice a sweet, musty smell near the bed.
About bites: bites alone do not confirm bed bugs. Some people react strongly, others not at all. Use bites as a reason to inspect, not as proof.
Tools that make finding them much easier
You can do a basic check with a phone flashlight, but a few simple tools can turn a frustrating search into a clearer yes or no.
- Bright flashlight: a small LED light helps you spot shadows in seams and cracks.
- Thin card: an old gift card helps you scrape along seams and coax bugs out.
- Disposable gloves: for comfort and to avoid spreading debris.
- Clear tape: to capture evidence (bugs, skins) for identification.
- Zip-top bags: to bag bedding or small items while you inspect.
- Magnifying glass: helpful for eggs and tiny nymphs.
- Interceptor traps: plastic cups that go under bed legs to catch bugs moving to or from the bed.
If you can only do one upgrade, interceptors are hard to beat for monitoring. If your bed has no legs (platform beds) or interceptors are not practical (very heavy frames, uneven floors), consider passive monitors, a careful nighttime check, or a professional inspection instead.
Start with the bed (where the evidence usually is)
Bed bugs prefer to be close to a sleeping human. That does not mean they only live in beds, but the bed is the best first place to look.
Step 1: Strip the bed carefully
- Remove sheets and pillowcases slowly so you do not flick bugs or debris.
- Bag linens immediately in a sealed bag if you plan to carry them through the home.
- Scan seams and corners as you remove each layer.
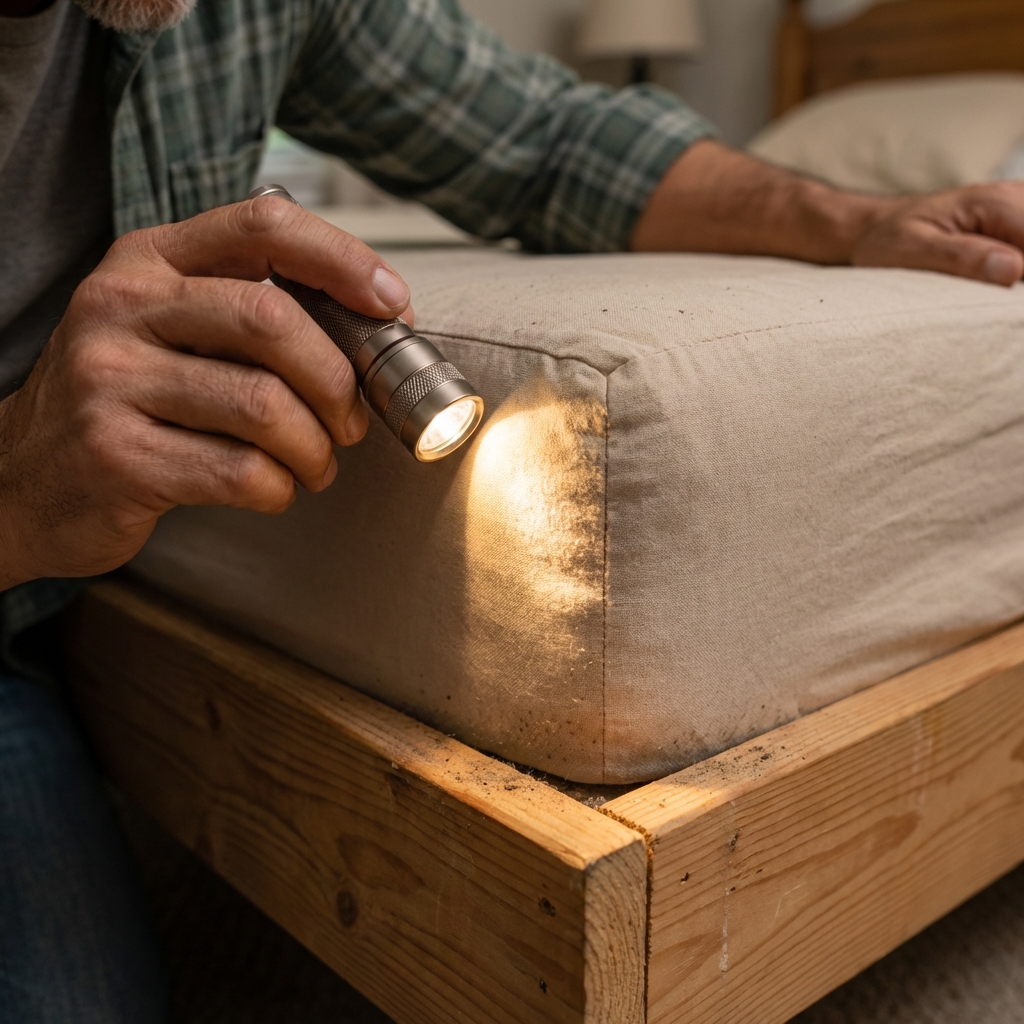
Step 2: Inspect the mattress seams and piping
Use your flashlight and the edge of a card to work along:
- Mattress piping and seams
- Tufts and stitched folds
- Under the mattress tag area
- Any small tears or holes
Look for fecal spots (dark ink dots), shed skins, and eggs in the tightest folds.
Step 3: Check the box spring or foundation
This is a very common hiding spot, especially along the underside.
- Inspect the fabric dust cover underneath. If it is stapled on, inspect edges and staples.
- Look inside corners and along wooden slats.
- Check where the foundation sits on the frame.
Step 4: Inspect the headboard and bed frame joints
Bed bugs love cracks, screw holes, and tight joints.
- Look behind the headboard, especially where it meets the wall.
- Inspect bolt holes, brackets, and joints on the frame.
- If you have a wooden frame, inspect along grain cracks and corners.
Tip: If you see black dots clustered around a joint, wipe with a slightly damp tissue. Bed bug fecal spots often smear like ink.
Then expand outward in a smart radius
If you find evidence on the bed, do not stop there. If you do not find evidence on the bed, still expand outward because bed bugs can shift to nearby hiding spots.
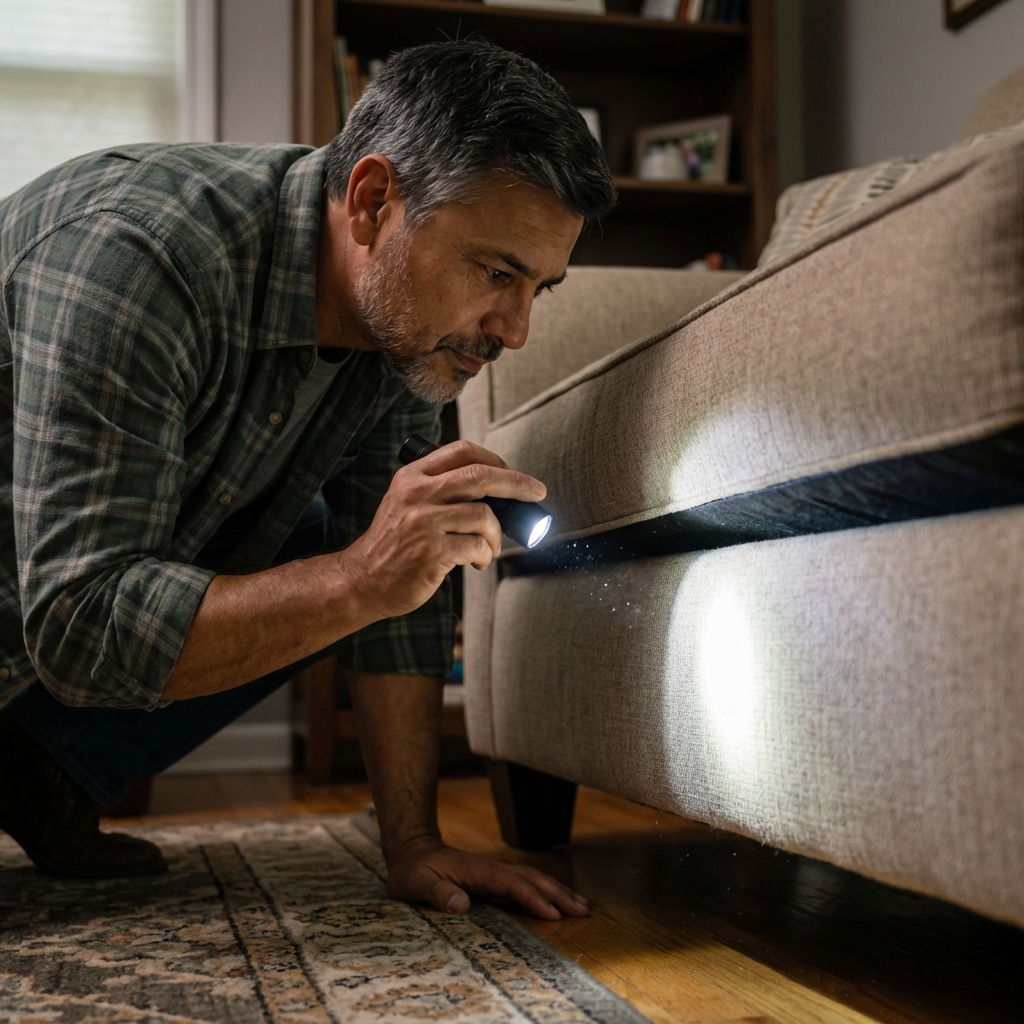
Within 3 to 6 feet of the bed
- Nightstands: inspect drawer corners, drawer slides, screw heads, and the underside.
- Upholstered chair or bench: inspect seams, zippers, and where fabric is stapled under the frame.
- Curtains: inspect the top hem and pleats closest to the bed.
- Wall plates: look around outlets and switch plates near the bed. Do not spray liquids near electricals, and do not open electrical boxes unless the power is off and you know what you are doing.
- Baseboards: inspect where carpet meets the wall and any gaps.
6 to 15 feet and beyond
In larger or longer infestations, bed bugs can spread.
- Closets and stored items near the bedroom
- Adjacent rooms, especially shared walls
- Living room couch and recliners if people nap there
- Laundry area if bedding is frequently carried there
Where bed bugs hide most often (quick checklist)
If you want a fast hit list, these are the spots that produce evidence again and again.
- Mattress seams, piping, and tufts
- Box spring edges and underside
- Headboard mounting points
- Bed frame joints and screw holes
- Behind nightstand drawers and along drawer slides
- Under lamps, alarm clocks, and items kept on the nightstand
- Baseboard gaps and carpet tack strip edge
- Upholstered furniture seams and under dust covers
- Luggage, especially seams and pockets
- Clutter beside the bed, including books and bedside storage bins
How to confirm bed bugs when you cannot find a live one
It is common to suspect bed bugs but not see them during a quick look. They are excellent at staying hidden, especially in light infestations. Use confirmation methods that work over a few nights.
Use interceptor traps under bed legs
- Place interceptors under each bed leg (and under couch legs if needed).
- Keep bedding from touching the floor so bugs must climb the legs.
- Check traps daily for 7 to 14 days.
Finding even one bed bug in an interceptor is strong confirmation.
Reduce “noise” during your test window
For the best read, try to avoid moving sleeping locations around nightly. Bed bugs follow carbon dioxide, heat, and human scent. If everyone sleeps on the couch for a week, you may just move the problem.
Try a controlled flashlight check
Bed bugs are more active at night. If you are comfortable doing it, check 1 to 2 hours after lights out with a flashlight, focusing on mattress seams and the headboard area.
If you find evidence, what to do next
Finding bed bugs is stressful. The best next move is a calm one. Your goal is to stop spread and prepare for treatment.
Do not move items room to room
Moving clothes, pillows, and blankets into other rooms is a common way infestations spread.
Bag and contain
- Bag bedding and clothes from the affected area.
- Seal bags before carrying them through the home.
- Keep bags sealed until you can launder or heat-treat.
Launder with heat in mind
- Wash with regular detergent if items can be washed.
- Dry on high heat and avoid overloading so heat can circulate. Many guidelines recommend running the dryer for about 30 minutes after items are fully hot, but total time varies by dryer and load.
- For items that cannot be washed, drying on high heat (if safe for the material) can still help.
Document what you found
Take clear photos of spots, skins, and any bugs you capture. Note the exact location. This is useful if you are dealing with a landlord, a hotel, or a pest professional.
Consider encasements as containment
After you have inspected, a quality mattress and box spring encasement can help trap bugs inside and make future inspections easier. It is not a complete treatment by itself, but it can reduce hiding places and support a larger plan.
Notify the right people early
If you rent, or if you live in a multi-unit building, notify your landlord or property manager in writing and include your documentation. Early coordination can prevent spread between units.
Consider professional help early
DIY can work for very light infestations, but bed bugs are notoriously persistent. If you are finding evidence in multiple rooms, seeing bugs in daylight, or getting repeated bites despite steps, it is time to call a reputable pest control company for an inspection and treatment plan.
Mistakes that make bed bugs harder to find
- Panic spraying: random insecticide use can push bed bugs deeper into walls or into new areas.
- Throwing out the mattress immediately: you can spread bugs through hallways, and the infestation may still be in the frame, baseboards, or nightstand.
- Not checking the box spring: many people only look at the top of the mattress and miss a major hiding area.
- Assuming bites equal bed bugs: rule out fleas, mosquitoes, and allergies with evidence-based inspection.
- Skipping follow-up: one clean inspection does not always mean clear. Use interceptors and re-check.
When to treat this like an emergency
Call a professional sooner rather than later if:
- You see bed bugs during the day or in multiple areas.
- You live in a multi-unit building (apartments, condos, dorms), where spread between units is common.
- Someone in the home has severe reactions, anxiety, or sleep loss that is escalating.
- You have already tried DIY steps and activity continues for more than 2 to 3 weeks.
Early action is usually cheaper and more effective than waiting until the problem is widespread.
Quick recap: a simple bed bug search plan
- Step 1: Gather a flashlight, card, tape, and bags.
- Step 2: Strip the bed and inspect mattress seams closely.
- Step 3: Inspect the box spring underside and edges.
- Step 4: Check the headboard and frame joints.
- Step 5: Expand 3 to 6 feet outward (nightstand, baseboards, nearby furniture).
- Step 6: Set interceptors (if feasible) and monitor for 7 to 14 days.
If you find consistent signs in the same zone, you have your answer and you have a map of where to focus next.

Jose Brito
I’m Jose Britto, the writer behind The Country Store Farm Website. I share practical, down-to-earth gardening advice for home growers—whether you’re starting your first raised bed, troubleshooting pests, improving soil, or figuring out what to plant next. My focus is simple: clear tips you can actually use, realistic expectations, and methods that work in real backyards (not just in perfect conditions). If you like straightforward guidance and learning as you go, you’re in the right place.