Silverfish are one of those pests that make your skin crawl because they show up in places that are supposed to feel clean, even if those areas are a little damp and out of sight. The good news is you usually do not need anything fancy to get rid of them. You need a plan that removes what they want most: humid air, hiding spots, and easy food.
This guide walks you through what to do first, what to use, and how to keep them from coming back.
What silverfish are and why they show up
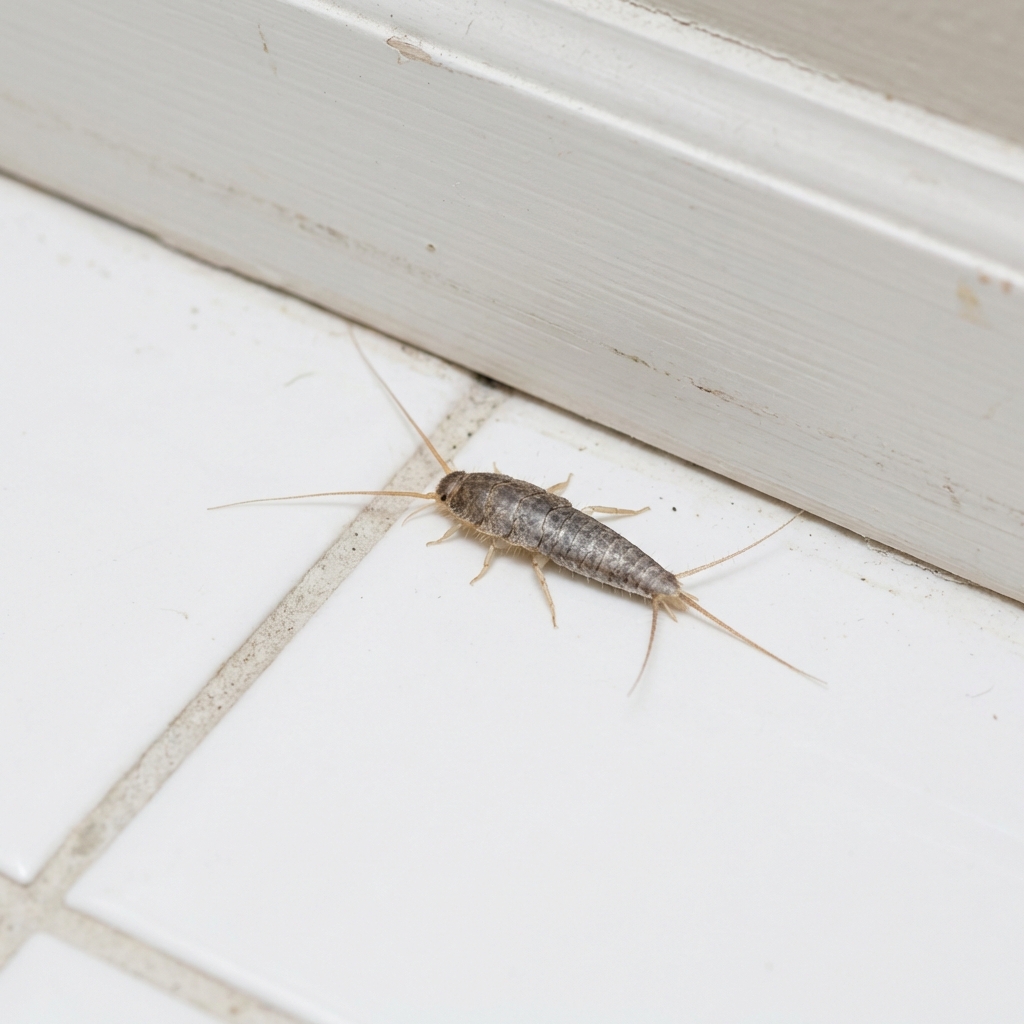
Silverfish are small, wingless insects with a silvery gray body that moves in a quick, fish-like wiggle. They are most active at night and often dart away when you flip on a light. They prefer quiet, humid areas.
They sneak indoors for the same reasons most pests do: shelter, moisture, and food. In many homes, the biggest trigger is humidity.
- They love moisture. Bathrooms, basements, laundry rooms, crawl spaces, under-sink cabinets, and areas near tubs and showers are prime real estate.
- They eat starchy stuff. Paper, cardboard, book bindings, wallpaper paste, flour, cereal crumbs, and even some fabrics.
- They hide in cracks. Baseboards, gaps around plumbing, behind cabinets, inside storage boxes, and wall voids.
How to confirm it is silverfish
Before you treat, make sure you are targeting the right pest. Silverfish are often confused with firebrats and young cockroaches.
- Silverfish: silvery, carrot-shaped body, long antennae, and three bristles at the tail end.
- Firebrats: similar shape but more mottled brown, and they prefer warmer spots, like near furnaces or hot water heaters.
- Roach nymphs: usually darker, more oval, and they do not have the three long tail bristles like silverfish.
Common signs include tiny black pepper-like droppings, shed skins (they look like pale, papery husks), and irregular holes in paper goods or pantry items. You may also notice small stains or scuffed-looking areas on paper or cardboard, especially in damp storage, but that can overlap with other moisture issues so do not rely on that sign alone.
Start here: a quick 30-minute cleanup
If you do only one thing today, do this. It reduces hiding spots and removes food sources so any trap or treatment works better.
- Vacuum edges and corners where dust collects: baseboards, behind toilets, under sinks, pantry corners, closet floors, and around floor drains if you have them.
- Remove cardboard from damp areas. Swap to plastic bins with tight lids.
- Wipe up crumbs in pantries and under appliances.
- Fix obvious moisture problems like a dripping P-trap, slow leak under the sink, a sweating pipe, or a damp bath mat that never dries.
Empty the vacuum outside right after. Silverfish can survive in vacuum debris, especially if it stays damp, and may crawl back out later.
The real key: lower humidity
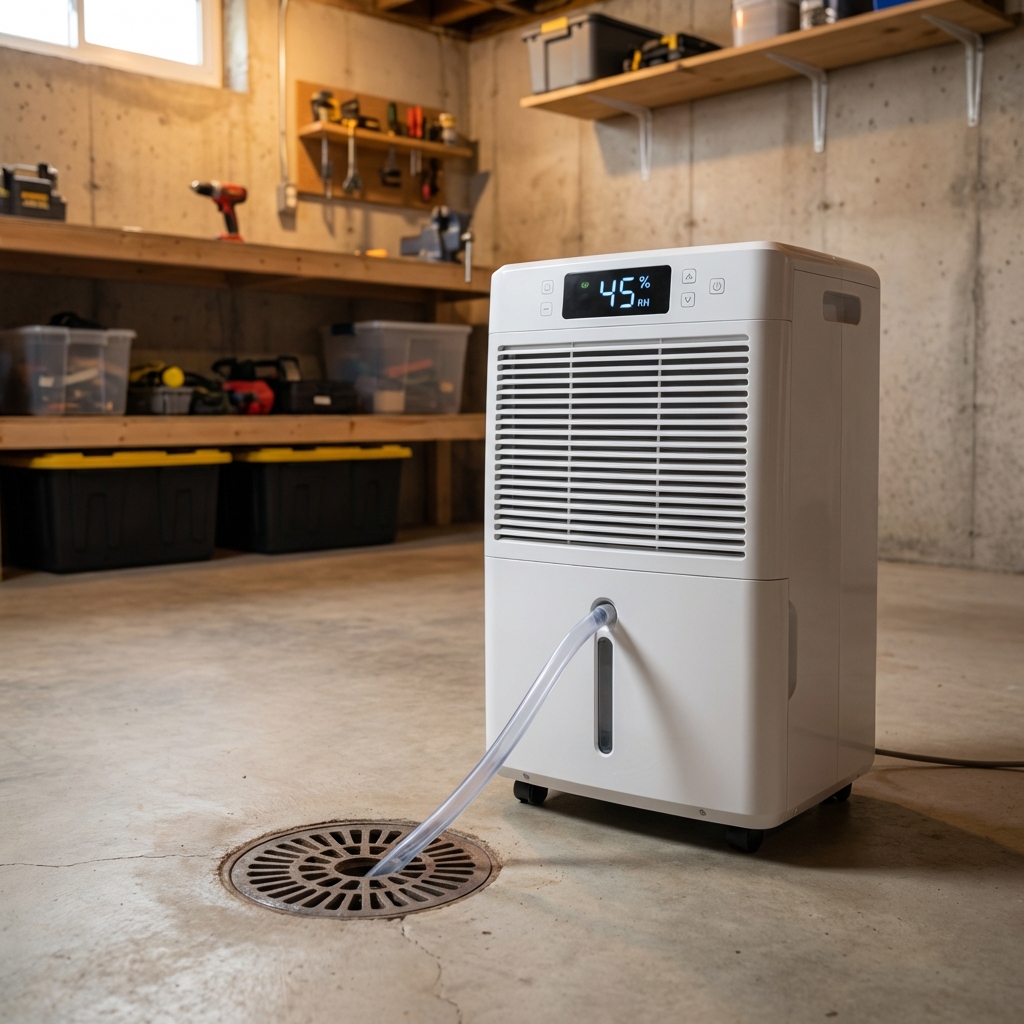
Silverfish control gets dramatically easier when you dry the space. Many homes do best around 30 to 50 percent indoor humidity. As a rule of thumb, once your home stays above about 60 percent, silverfish tend to hang on.
- Run bathroom fans during showers and for 20 to 30 minutes after.
- Use a dehumidifier in basements and laundry rooms. Empty and clean it regularly.
- Improve airflow by cracking closet doors open and avoiding overstuffed storage areas.
- Dry out under-sink cabinets and do not store paper goods directly under plumbing.
DIY traps that work
Traps help you reduce the population and also tell you where silverfish are active. Put traps where they travel, not in the middle of the room.
Sticky traps
These are the easiest for beginners and work well for monitoring.
- Place along baseboards, behind toilets, under sinks, behind the fridge, near tubs or showers, and in pantry corners.
- Use multiple traps. Two or three in one room is normal if you suspect activity.
- Replace every 1 to 2 weeks, or sooner if dusty.
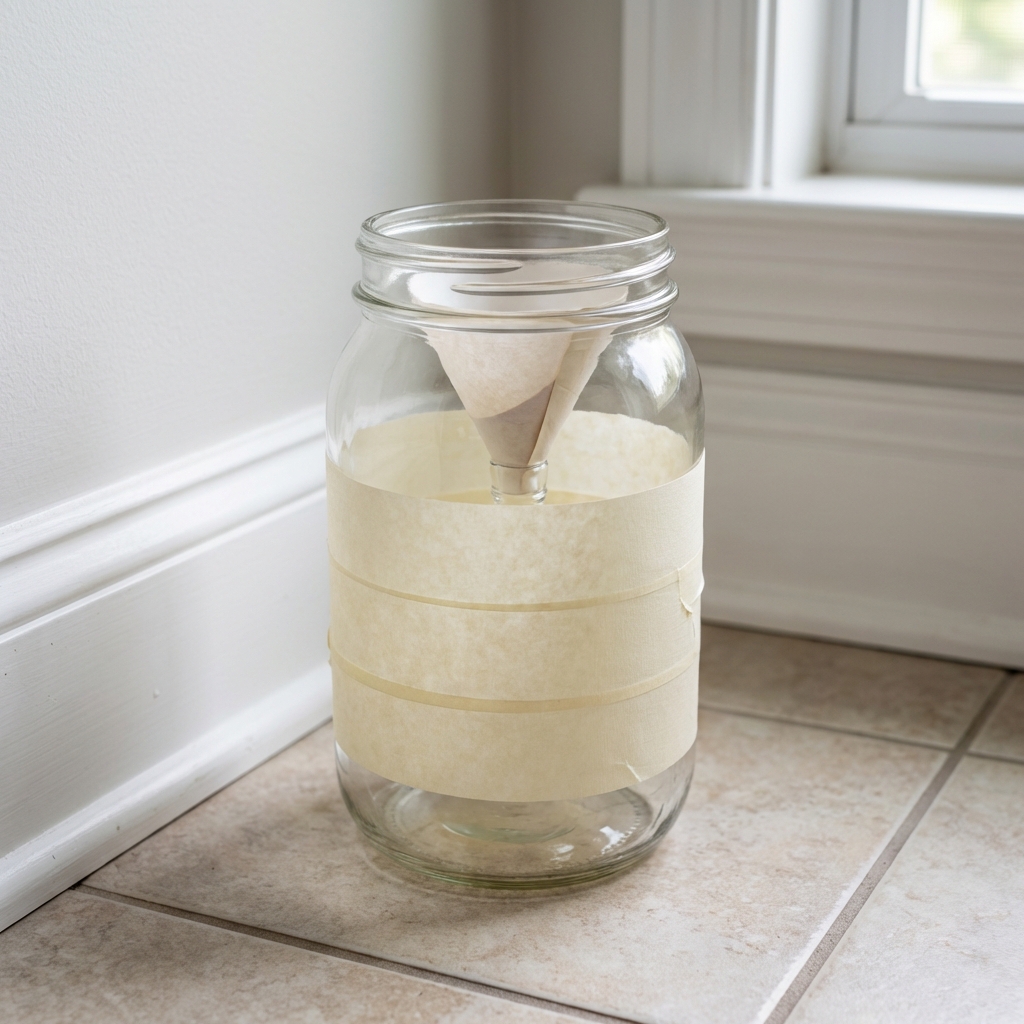
Jar trap
Wrap the outside of a glass jar with masking tape so silverfish can climb up. Put a small piece of bread, oatmeal, or flour inside as bait. They climb in and cannot climb back out on smooth glass.
Targeted treatments: pick one
Once you have cleaned and lowered humidity, you can add a treatment if you still see silverfish. You do not need to throw everything at the problem. Pick one method and do it well.
What not to do: Avoid indiscriminate spraying, especially in bathrooms and pantries. Sprays rarely fix the root cause and can interfere with bait products. Also avoid dumping piles of dust. A thin film works better and is safer.
Option A: Silica gel or diatomaceous earth
These powders work by drying out insects. They are useful in cracks and voids where silverfish hide.
- Apply a thin, barely visible layer in cracks along baseboards, under sinks, behind toilets, and in wall voids if accessible.
- Keep powders dry. They work poorly when wet.
- Avoid open, dusty piles. The goal is a light film, not a mound.
Safety note: Use a dust mask when applying and avoid creating airborne dust. Keep it away from kids and pets. Follow the product label. If you choose diatomaceous earth, look for a product labeled for pest control and follow its directions. Food-grade labeling is not the same thing as a pesticide label.
Option B: Boric acid
Boric acid can work well in dry, hidden areas, but it is not my first pick for a busy family home because it needs careful placement.
- Use only in cracks and voids where it will not be touched.
- Never apply on countertops, dishes, or food storage shelves.
- Do not use where pets can sniff or lick.
Option C: Silverfish bait stations
Commercial bait stations can be a good beginner option because they are contained and easy to place.
- Choose a product labeled for silverfish and follow the label placement instructions.
- Place near known activity areas and along walls.
- Do not spray insecticide near bait stations, since sprays can reduce bait effectiveness.
Seal hiding spots
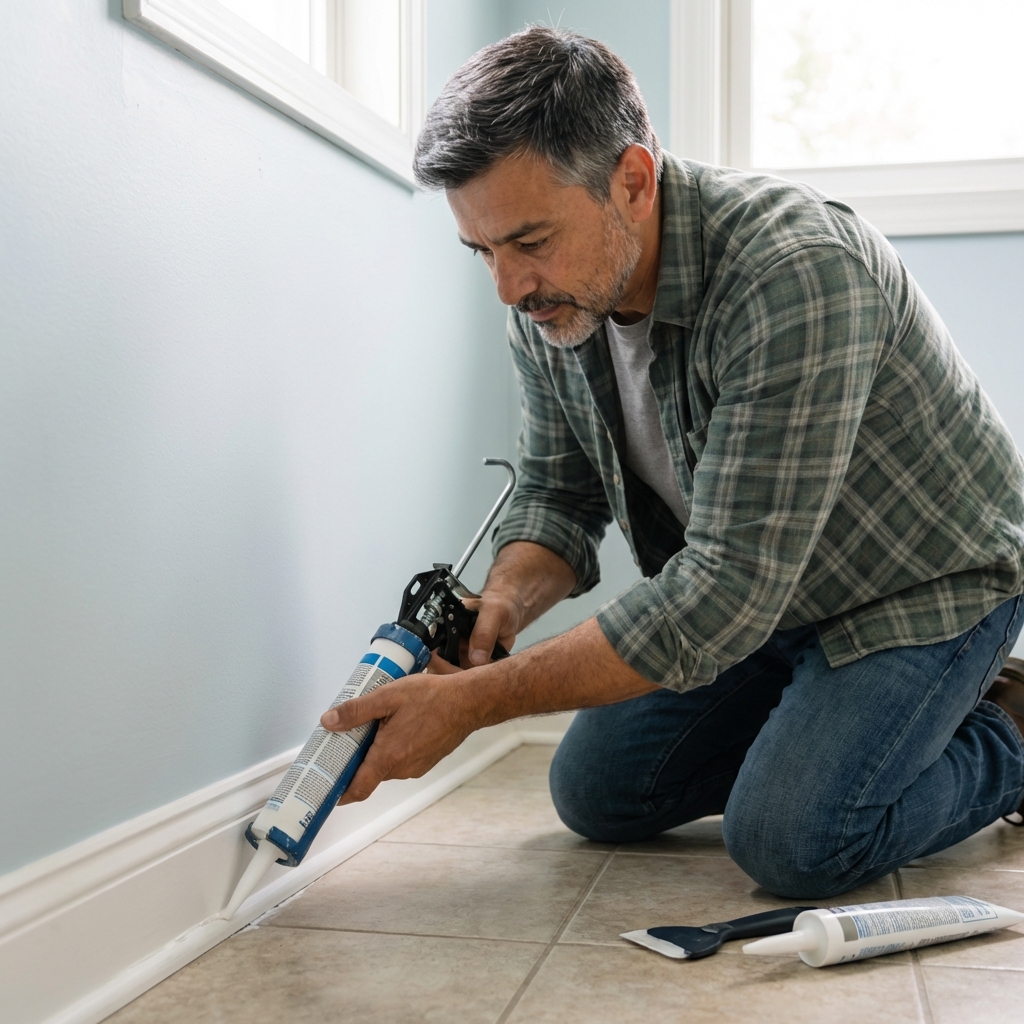
Silverfish flatten themselves into tiny gaps. Sealing does not fix an active infestation by itself, but it prevents new hiding spots and helps your traps and treatments finish the job.
- Caulk gaps where baseboards meet walls and where trim meets flooring.
- Seal around plumbing penetrations under sinks and behind toilets.
- Repair loose wallpaper edges and peeling paint in humid rooms.
- Add door sweeps if you suspect they are moving from basement or garage spaces.
Protect paper, pantry items, and clothing
Silverfish damage tends to show up where we store paper and dry goods. A few storage tweaks prevent headaches later.
- Pantry: store flour, cereal, oats, and pet food in airtight containers.
- Books and papers: keep off basement floors, avoid cardboard boxes, and use sealed plastic totes.
- Linens and clothes: store clean and fully dry, especially in humid closets.
- Seasonal decor: avoid storing paper items in damp garages or crawl spaces.
Outdoor fixes that reduce pressure
Silverfish can live and breed indoors, and damp outdoor areas around your home can keep conditions favorable and increase the odds of indoor activity.
- Clean gutters and make sure downspouts move water away from the foundation.
- Keep mulch and dense ground cover a few inches back from the foundation where possible.
- Store firewood away from the house and off the ground.
- Trim plants so siding and foundation areas can dry out after rain.
Beginner-friendly 14-day plan
If you want a simple timeline, follow this. It is realistic for most homes.
Day 1 to 2
- Vacuum edges, declutter cardboard, wipe pantry crumbs.
- Set 6 to 12 sticky traps across problem rooms.
- Start dehumidifier or increase fan use.
Day 3 to 7
- Check traps to find hotspots.
- Seal obvious gaps and fix leaks.
- Apply one targeted treatment in hidden areas where traps show activity.
Day 8 to 14
- Replace traps as needed.
- Keep humidity down consistently.
- Reapply dust treatment only if it was disturbed or got wet.
Expect a noticeable drop in 1 to 2 weeks once moisture is handled, but do not be surprised if you still see an occasional one for a few weeks. Eggs and hidden pockets take time to work through, especially in wall voids and storage areas.
When to call a pro
DIY works for most silverfish issues, but it is worth calling pest control if:
- You are seeing silverfish daily in multiple rooms after 2 to 3 weeks of drying and trapping.
- You have a chronic moisture problem you cannot locate, like a hidden leak.
- You are dealing with extensive paper or book damage and want a thorough inspection.
FAQ
Are silverfish harmful to people?
They do not bite and they are not known as major disease spreaders. The main issues are nuisance and damage to paper goods, pantry items, and fabrics. In some homes, pest debris can contribute to allergies, so reducing the population and keeping dust down is still a good idea.
Will bleach kill silverfish?
Bleach can kill on contact, but it does not solve the cause. If humidity stays high and hiding spots remain, more will show up. Use bleach for cleaning if you want, but rely on moisture control, traps, and targeted treatments for lasting results.
Do silverfish mean my house is dirty?
No. They show up in clean homes all the time, especially where humidity is high or there is stored cardboard, paper, or pantry goods. Think “damp and hidden,” not “dirty.”
Bottom line
To get rid of silverfish, focus on drying the space first, then remove hiding spots, set traps, and use one targeted treatment in cracks and voids. When you take away moisture, silverfish usually lose the battle fast.

Jose Brito
I’m Jose Britto, the writer behind The Country Store Farm Website. I share practical, down-to-earth gardening advice for home growers—whether you’re starting your first raised bed, troubleshooting pests, improving soil, or figuring out what to plant next. My focus is simple: clear tips you can actually use, realistic expectations, and methods that work in real backyards (not just in perfect conditions). If you like straightforward guidance and learning as you go, you’re in the right place.