Most sod “failures” are not about bad grass. They come from rushed prep: bumps that scalp, low spots that stay soggy, compacted soil that roots cannot penetrate, and weeds that push right through seams. If you do a few key steps before the pallet arrives, you will get tighter seams, faster rooting, and a lawn that needs less babying.
This guide focuses on the practical stuff that works in real backyards: what to fix first, what to ignore for now, and how to solve common prep problems without turning the whole project into a month-long construction job.

Before you start: plan like you only get one shot
Sod is perishable. Once it is delivered, the clock is ticking. The smart move is to do your messy work first, then schedule delivery when the site is truly ready.
- Pick a window with mild weather: spring and early fall are easiest in many cool-season regions. In warm-season areas, late spring through summer is often prime sod season. If you can water consistently, you can make more windows work.
- Know your irrigation plan: hoses and sprinklers are fine, but test coverage before sod arrives.
- Measure the area accurately: order 5 to 15 percent extra depending on layout. Simple rectangles are closer to 5 percent, while curves and odd edges can push you toward 10 to 15 percent.
- Confirm access: pallets are heavy. Make sure the delivery spot is close enough to reduce carrying and prevent rolled edges from drying out.
- Locate utilities before you dig: call your local utility marking service before you till, regrade, or trench for irrigation. It is fast, and it prevents expensive mistakes.
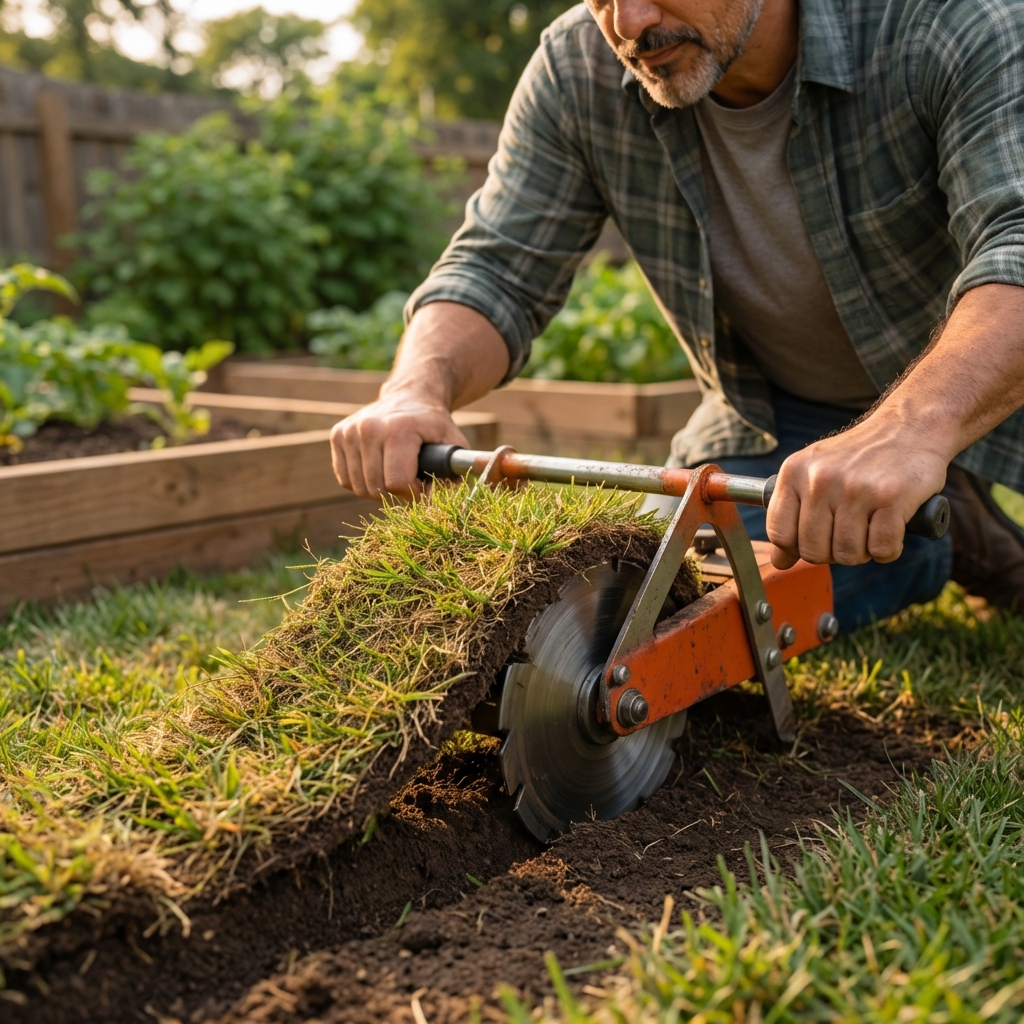
Step 1: clear the site the right way
Remove old grass and weeds
You have three common options. Choose based on your timeline and how much existing vegetation you have.
- Sod cutter: fastest and cleanest for removing existing turf. Great if you want immediate results and less debris.
- Herbicide (non-selective): effective for heavy weeds, but requires lead time. Apply, wait for dieback, then remove debris. Follow label directions carefully, and check the label for re-entry and planting or sodding intervals. Some products require a waiting period before you can lay new sod.
- Manual removal: workable for small patches. Use a flat shovel or grub hoe and expect it to be slow.
Skip the shortcut of laying sod over existing grass. It almost always leads to uneven settling and poor rooting.
Deal with rocks, construction debris, and buried junk
It is not glamorous, but it matters. Pull out rocks, roots, and chunks of concrete. Anything left behind can create a dry spot or a bump you will feel every time you mow.
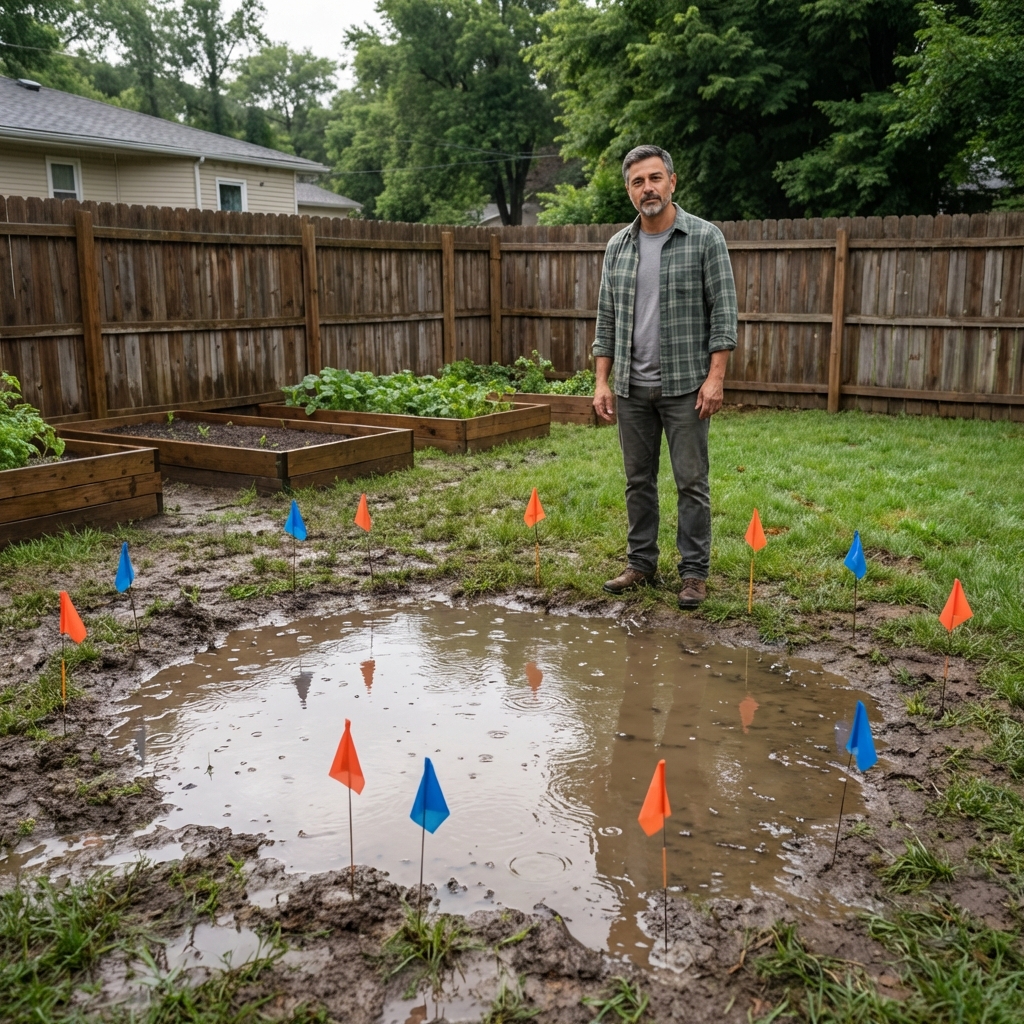
Step 2: fix grading and drainage first
Grade is the difference between a lawn that looks smooth and a lawn that constantly fights puddles, scalping, and thin spots. Soil amendments usually cannot fix bad drainage by themselves. Grading often can.
What “good grade” looks like
- Slope away from your house: as a common rule of thumb, aim for about 2 percent slope (roughly 1/4 inch per foot) away from the foundation for the first 6 to 10 feet, if your site allows. Follow local codes and your property’s constraints.
- No birdbaths: low spots should not hold water after irrigation or rain.
- Smooth transitions: especially near sidewalks, driveways, patios, and sprinkler heads.
Quick ways to check your grade
- After a rain, flag puddles and soft spots.
- Use a long straight board with a level to find high and low areas.
- Watch where downspouts discharge. Redirect if needed.
Smart solution: If you have one stubborn low spot, do not keep “topdressing forever.” Bring in enough soil to actually raise it, compact lightly, and re-check the slope.
Watch-outs: Avoid piling soil against siding or burying brick weep holes. Near trees, do not bury major surface roots or raise grade dramatically under the canopy.
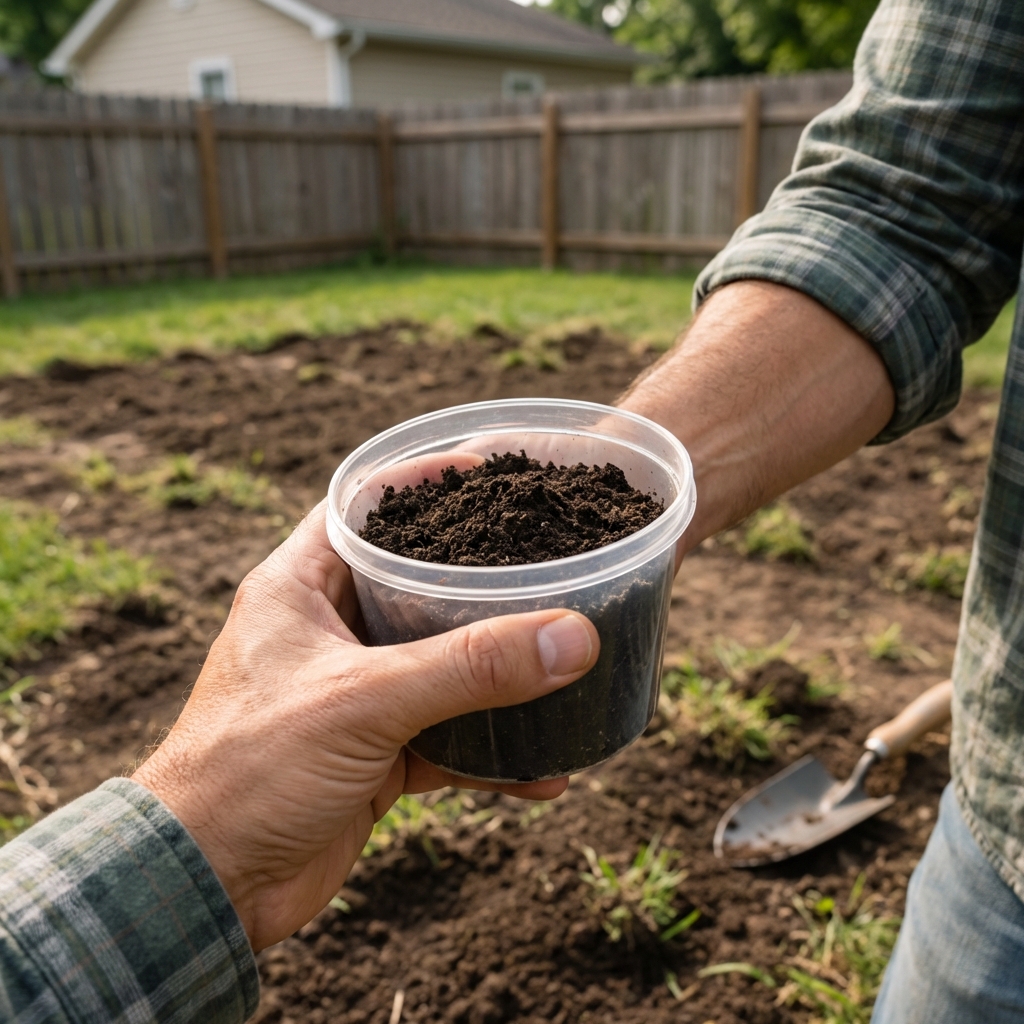
Step 3: test your soil, then amend with purpose
Blindly dumping compost, sand, or fertilizer is how people waste money and still end up with weak sod. A basic soil test helps you avoid guesswork and gives you a target for pH and nutrients.
What to look for
- pH: many lawn grasses do best around slightly acidic to neutral.
- Phosphorus and potassium: important for root development and stress tolerance.
- Organic matter: low organic matter often means low water holding and poor structure.
Common amendments and when they help
- Compost: improves structure in both sandy and clay soils. A thin layer worked into the topsoil is usually more helpful than thick piles.
- Lime or sulfur: only if your soil test calls for it to correct pH.
- Starter fertilizer: useful at install time when recommended for your grass type and region. Follow the bag rate. More is not better. Note: in some areas, phosphorus use is restricted unless a soil test indicates you need it.
Reality check: If your soil is hard as a sidewalk, compost alone will not fix compaction. You need cultivation next.
Step 4: loosen compacted soil so roots can grab
Sod roots need oxygen and contact with soil. If the soil is compacted, the sod may stay green for a couple weeks from frequent watering, then thin out because it never truly rooted.
How deep to work the soil
- New lawn area: loosen the top 4 to 6 inches if you can.
- Tight clay: focus on breaking it up and mixing in compost evenly, not creating a compost layer on top of clay.
Tools that make sense
- Rototiller: fast for larger areas, but can leave fluffy soil if you do not re-firm it.
- Garden fork or broadfork: slower but great for small lawns and less disruptive.
Smart solution: After tilling, lightly water and let the soil settle for a day, then re-grade. Freshly tilled soil almost always sinks later if you skip this.

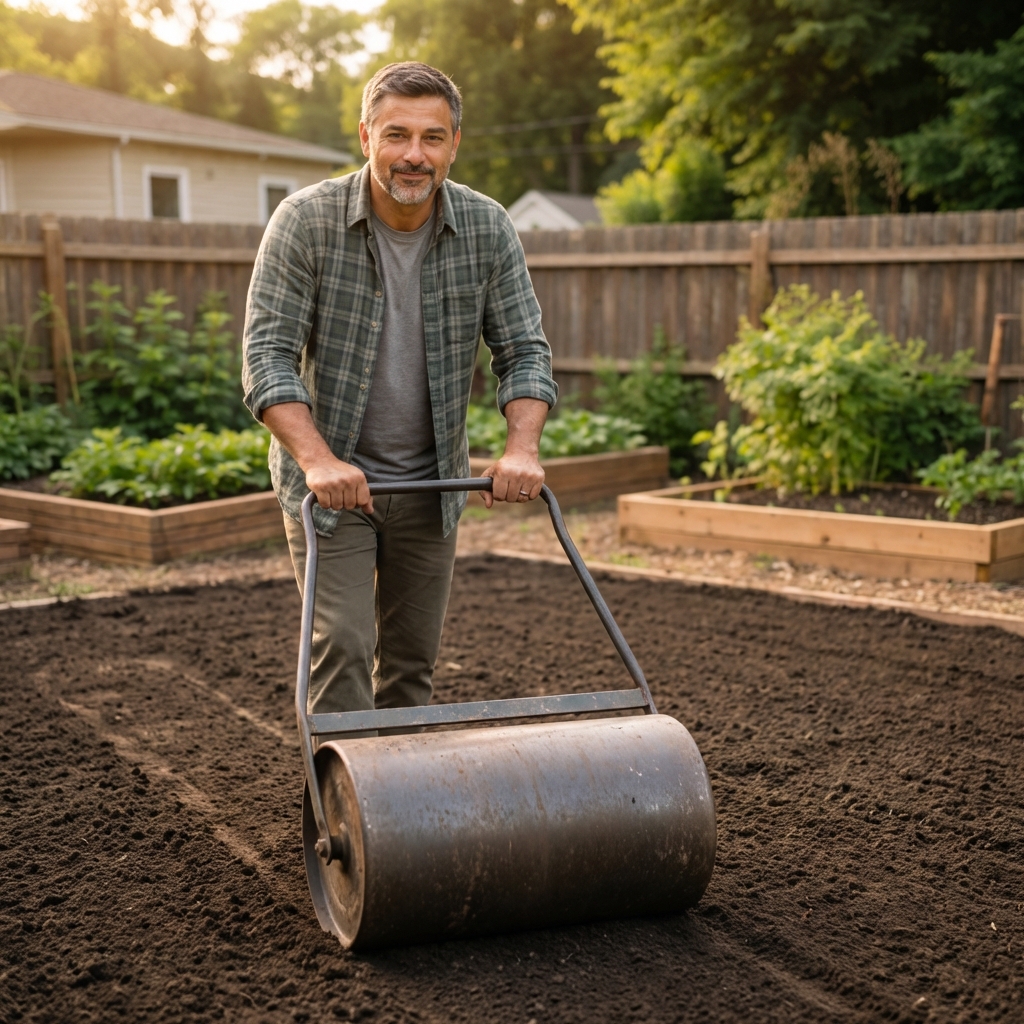
Step 5: set final grade and firm the seedbed
This is where a lawn starts looking professional. Final grading is about smoothness and consistent soil contact.
Do this in order
- Rake smooth: break clods, remove stones, and feather edges at walkways.
- Set sprinkler head height: heads should end up about 1/2 to 1 inch above the soil surface to account for the sod pad thickness, so they are not buried after installation. Adjust based on your sod and your sprinkler model.
- Firm the soil: walk it, or use a lawn roller lightly. You want firm, not packed like concrete.
A simple test: your footprint should be visible but not sink deeply. If you sink, the soil is too fluffy and will settle unevenly under sod.
If you are bringing in topsoil, this is the stage to do it. Use clean screened topsoil when you need to raise grade or replace poor subsoil, then blend it into the existing soil so you do not create a hard layer boundary that slows drainage and rooting.
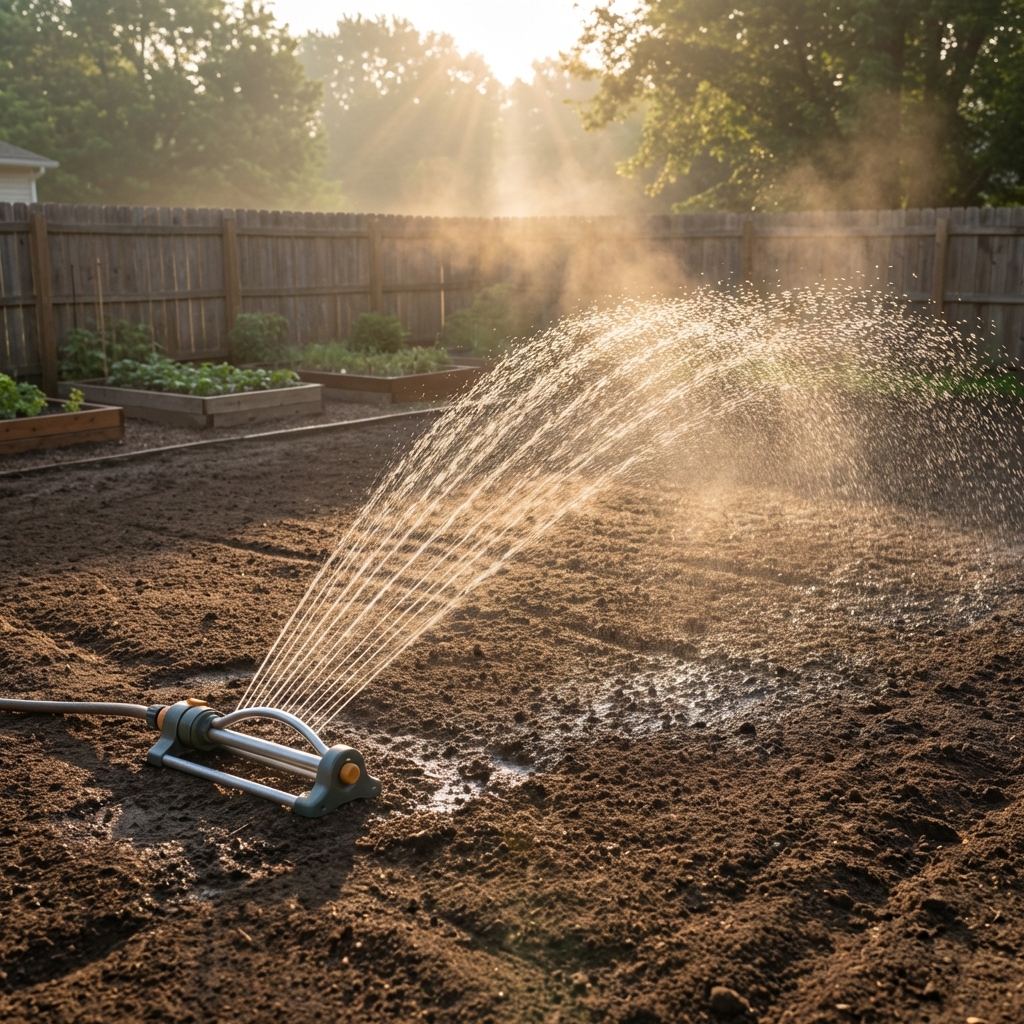
Step 6: pre-water and check irrigation coverage
Dry soil pulls moisture from sod fast, especially on warm or windy days. If your soil is dry, lightly pre-watering can help the sod knit to the soil. If your yard tends to stay wet or you have heavy clay, skip pre-watering and avoid creating mud.
- Moisten, do not saturate: the soil should be damp a couple inches down, not muddy.
- Run sprinklers and watch: confirm head-to-head coverage and note dry corners and strips near pavement.
- Fix problems now: it is much easier before sod is down.
Delivery day checklist
When the sod arrives, your prep should be finished. Use this quick list to confirm you are ready.
- Site cleared and debris removed
- Grade slopes away from house and low spots corrected
- Soil loosened and amended based on a plan
- Final surface raked smooth and firm
- Sprinklers tested and hose plan ready
- Wheelbarrow, knife, rake, and roller available
Common sod prep problems and smart fixes
Problem: clay soil that stays slick and sticky
Solution: Mix compost into the top few inches and improve grade so water moves. Avoid adding straight sand to clay. Unless a soil blend is engineered and thoroughly mixed, sand-only additions can actually make structure worse. For most DIY yards, organic matter and drainage fixes are the better play.
Problem: sandy soil that dries out fast
Solution: Work in compost to increase water holding. Plan for shorter, more frequent watering during the first 2 weeks after installation.
Problem: weeds keep coming back
Solution: Do not skip removal. If you have aggressive weeds, control them before sod and respect any herbicide planting interval on the label. After installation, focus on mowing height and proper watering. Healthy sod crowds out a lot.
Problem: bumps and dips after “leveling”
Solution: Re-check with a straight board. Firm the soil, then rake again. Most dips show up after the soil settles, so do a light watering and give it time before final raking.
Problem: tree shade and root competition
Solution: Be realistic. In deep shade, sod struggles. Consider shade-tolerant varieties if available in your area, reduce foot traffic, and plan for more frequent overseeding later.
How to know you prepped enough
You are ready for sod when:
- The surface is smooth and firm, with no obvious low spots.
- Water drains away from structures and does not pool.
- The topsoil is loose enough for roots, not crusted hard.
- Sprinklers cover the full area without dry stripes.
If you want to do one extra thing that pays off big: take 20 minutes to walk the area slowly and mark anything that feels uneven underfoot. Fixing it now is easy. Fixing it after sod is down is a headache.
Next steps after sod goes down
Prep is half the job. The other half is consistent watering and gentle early care. Once your sod is installed, focus on:
- Keeping the sod and topsoil evenly moist during establishment
- Limiting foot traffic for the first couple weeks
- Mowing only when the sod is rooted enough to resist lifting
- Pressing seams and edges into firm soil contact so there are no air gaps or “hanging” edges that dry out
Do the prep right, and those steps get a whole lot easier.

Jose Brito
I’m Jose Britto, the writer behind The Country Store Farm Website. I share practical, down-to-earth gardening advice for home growers—whether you’re starting your first raised bed, troubleshooting pests, improving soil, or figuring out what to plant next. My focus is simple: clear tips you can actually use, realistic expectations, and methods that work in real backyards (not just in perfect conditions). If you like straightforward guidance and learning as you go, you’re in the right place.