If you have a stump in the yard and you do not want to rent a grinder or dig out a root ball, rotting it down is the slower but very doable option. The trick is understanding what makes wood decompose: steady moisture, warmth, oxygen, and nitrogen. Your job is to create those conditions and then let fungi and bacteria do the hard work.
This beginner guide walks you through a few proven DIY methods, what they cost, how long they typically take, and the common mistakes that keep stumps sitting there for years.
Before you start: what kind of stump are you dealing with?
Not all stumps rot at the same speed. A small softwood stump in a damp area can get punky in a year or two. A big hardwood stump in dry sun can take several years without help.
- Tree type matters: Some woods tend to break down faster (poplar, willow, birch, many pines), while more rot-resistant species often take longer (oak, hickory, black locust). Local climate and how resinous the wood is can change the timeline.
- Size matters: The larger the diameter, the longer the timeline. A 10 inch stump is a different project than a 30 inch stump.
- Fresh vs. old: Freshly cut stumps often respond better because the wood has not fully dried out and hardened.
- Location matters: Shady, moist spots rot quicker than windy, sunny spots.
Quick reality check: Even with the best DIY method, you are usually looking at months to years, not days to weeks. Drought, very large diameter, and rot-resistant species can stretch timelines.
Safety and yard basics
Rotting a stump is low-tech, but there are a few things to get right so you do not create a hazard.
- Confirm ownership: If the stump is near a property line, double-check whose tree it was and where the line runs.
- Check for utilities: Call before you dig if you plan to trench around it or remove roots later.
- Keep kids and pets in mind: Store fertilizer sealed, keep it contained in the drilled holes, and cover the stump so curious hands and paws cannot access it.
- Keep fire in mind: Do not use burn methods during dry conditions or where burning is restricted. Also avoid burning close to structures or roots that run under patios.
- Pest expectations: Rotting wood can attract insects. That is normal outdoors, but you do not want a rotting stump right against your house foundation.
If your stump is sprouting: Rot methods do not instantly stop regrowth. Clip new shoots as they appear. If preventing resprouting is the main goal, that is a different project than decomposition.
Estimated costs (ballpark)
These ranges depend on what you already own and what you can source free.
- Drill bit (spade or auger): $10 to $25
- High nitrogen fertilizer: $10 to $30 (enough for multiple stumps or repeat applications)
- Compost or mulch: free to $50 (bagged or delivered)
- Tarp (optional): $10 to $25
The basic strategy: moisture + nitrogen + oxygen + time
Wood is mostly carbon. Decomposer organisms work faster when they have extra nitrogen available, similar to how compost heats up when you mix in “greens.” Your goal is to get nitrogen and water deep into the stump, not just on the surface, while keeping enough oxygen available for decay fungi to thrive.
That is why the best DIY methods almost always start with drilling holes. Holes create pathways for water and nitrogen to move into the stump and for fungi to colonize.
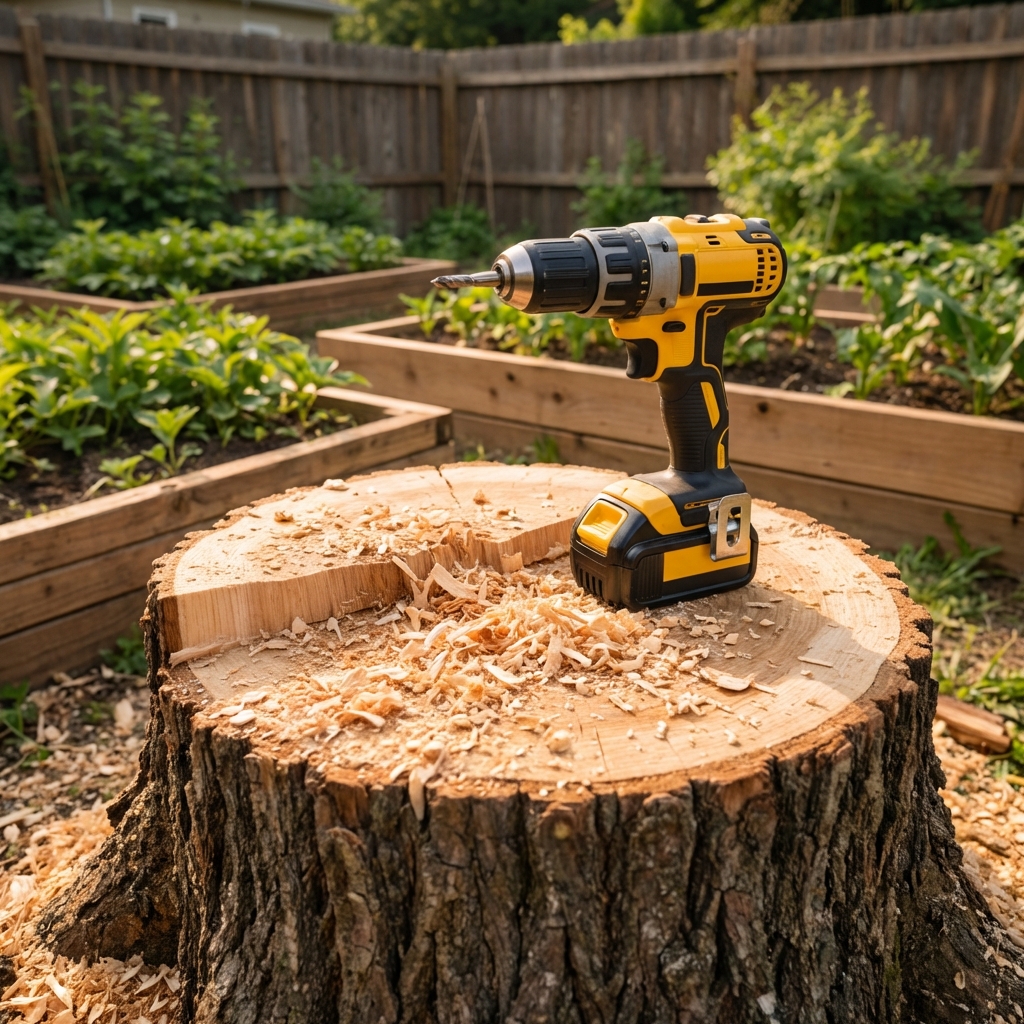
Method 1: Drill holes and feed the stump
This is the most reliable beginner method because it gets moisture and nitrogen into the stump’s core.
What you need
- Cordless drill
- Spade bit or auger bit (1/2 inch to 1 inch is a solid homeowner range)
- High nitrogen source: urea fertilizer (46-0-0), ammonium sulfate, or a lawn fertilizer that is mostly nitrogen
- Watering can or hose
- Compost and wood chips, or mulch, or a tarp to cover
Steps
- Cut it low (optional but helpful): If possible, trim the stump as close to ground level as you safely can. Shorter stump means less wood to rot.
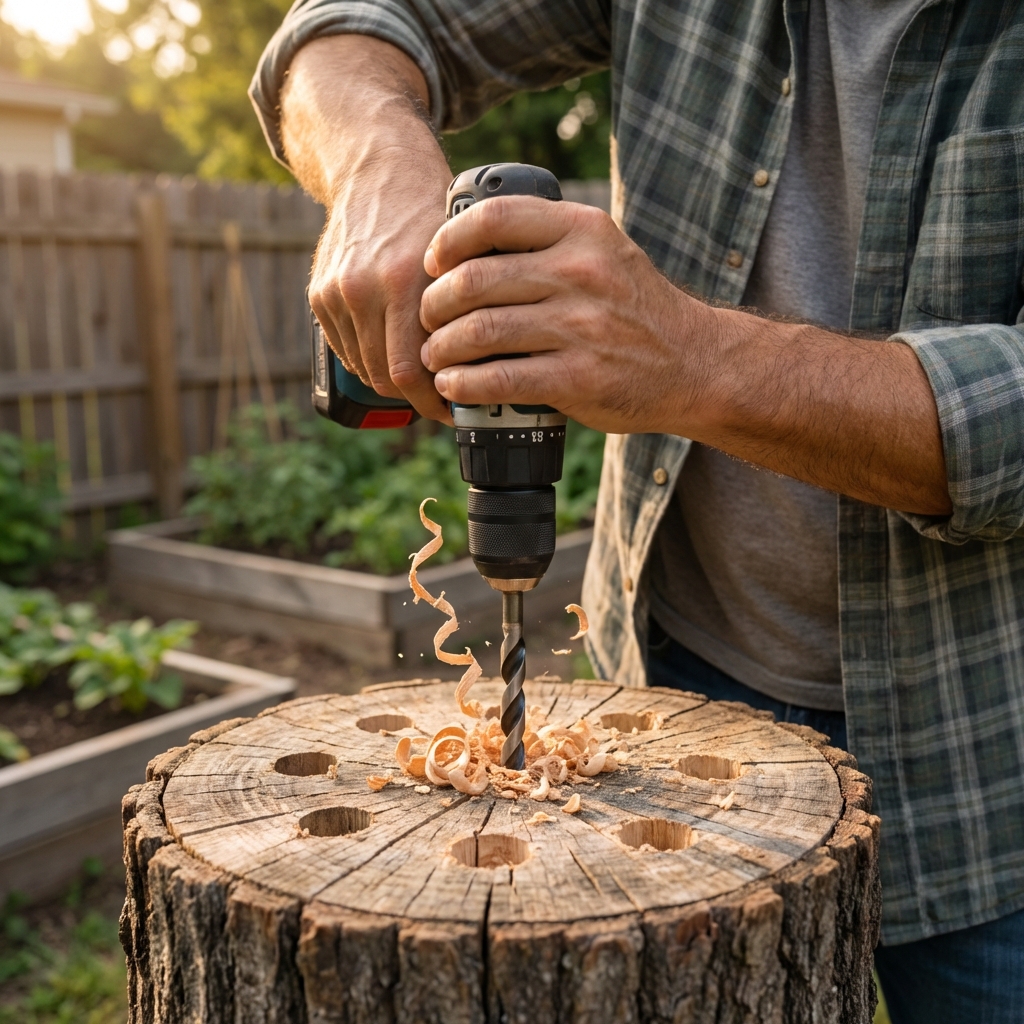
- Drill a grid of holes on top: Drill holes 6 to 10 inches deep (or as deep as you can) spaced about 2 to 3 inches apart.
- Drill angled side holes (optional, speeds things up): If the stump is tall enough, drill holes into the side at a downward angle so they connect with the vertical holes.
- Add nitrogen: Add fertilizer into each hole. A practical starting point is about 1 to 2 teaspoons per hole, then adjust as needed over time. If your product label gives a specific rate, follow the label. Keep fertilizer in the holes, not scattered onto surrounding turf.
- Water it in: Slowly add water to each hole until the stump is thoroughly wet.
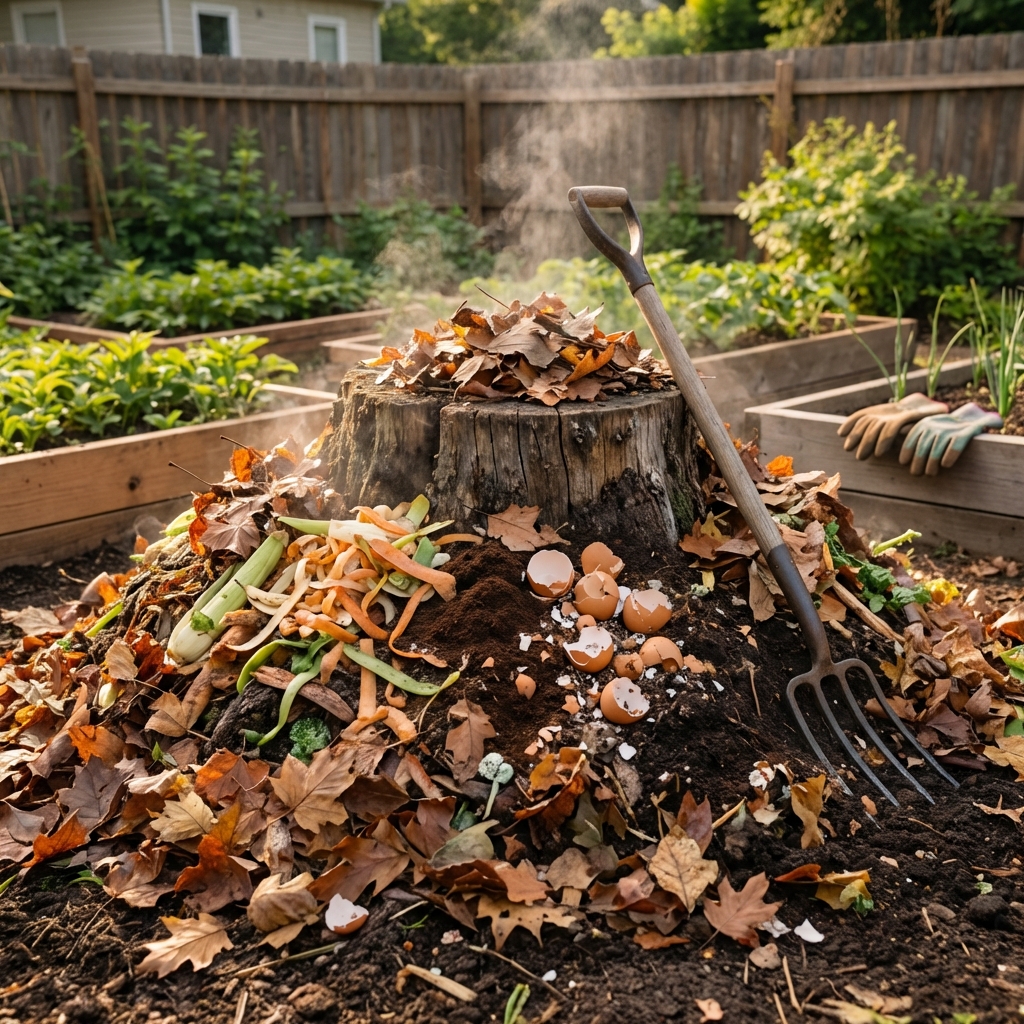
- Cover and keep it damp: Top the stump with 3 to 6 inches of compost, then a layer of wood chips or mulch. If you use a tarp, weigh it down but do not seal it so tightly that rain and your watering cannot get in. The goal is moisture retention with some airflow around the edges.
- Repeat maintenance: Every 2 to 4 weeks in warm weather, re-wet the stump. You can refresh nitrogen a few times during the season, especially after long wet periods or heavy rain that may flush nutrients.
Timeline (typical range)
- 3 to 6 months: the top may begin to soften, holes widen, wood darkens and gets spongy (faster in warm, wet conditions)
- 1 to 2 years: many medium stumps can be broken apart with a shovel or mattock
- 2+ years: large, dry, or rot-resistant stumps may still be stubborn, but should be noticeably weaker
Tips that make a big difference
- Do it in spring or early summer when microbes and fungi are most active.
- Keep it consistently damp like a wrung-out sponge. Dry cycles slow decomposition.
- Use compost as a living cover to introduce decomposers and hold moisture.
- Watch nearby plants: High nitrogen can burn grass and shallow roots if it spills. Keep it contained and avoid overapplying.
Cost
- Typical DIY total: $20 to $80 if you already own a drill (bit + fertilizer + some cover material)
Method 2: Compost pile on top
If you already compost, you can use your pile to rot a stump with minimal tools. This works best for stumps that are already close to ground level.
Steps
- Drill a few holes in the stump if you can. Even a handful helps.
- Pile compost materials directly over the stump: grass clippings, kitchen scraps, manure, and leaves.
- Keep the pile moist and turned as you normally would.
Why it works: Compost creates warmth, moisture, oxygen pockets, and a steady supply of microbes and nitrogen.
Downside: It is not quick, and it can be messy if the stump is in a front yard or high traffic spot.
Cost
- Typical: free to low cost if you already compost; otherwise whatever compost materials cost in your area
Method 3: Fungal inoculation
Fungi are the main engines of wood decay. You can encourage them by keeping the stump damp and adding woody organic matter, or by inoculating with mushroom spawn in the right conditions.
Two beginner-friendly options
- Let local fungi move in: Drill holes, keep the stump moist, and cover with a mix of compost and wood chips. This is simple and often works well if the site stays damp.
- Use plug spawn (optional): You can buy wood-decay mushroom plug spawn from garden and mushroom suppliers. You drill the size holes the product specifies, tap in the plugs, and seal them (often with wax) to prevent drying out. This can help colonize the stump, but it still depends on moisture and season. Shady locations tend to do best.
Important: Inoculation is not magic if the stump dries out. If you want the most reliable plan, Method 1 is still the best starting point for most yards.
Cost
- Typical: $20 to $60 for plug spawn, plus the bit if needed
What about Epsom salt?
Epsom salt gets recommended online a lot, but usually for a different goal. It is often suggested to stress or kill a living stump (for example, to slow sprouting), not to speed up true decomposition.
For rotting, it is unreliable. Magnesium sulfate does not provide the nitrogen that rot organisms crave. And while it is not the same as dumping table salt, using a lot can still throw off soil chemistry over time.
If your goal is faster rot, you will get better results from nitrogen + moisture than from Epsom salt.
Method to avoid: diesel or motor oil
Older advice sometimes mentions soaking stumps in fuel or oil. Do not do this. It can contaminate soil, harm plants, and create a fire hazard. It is not worth the risk.
How to tell the stump is rotting
Rot is not subtle once it gets going. Look for these signs:
- Wood turns darker and looks water-stained
- Surface feels soft or spongy
- Holes widen and edges crumble
- You can push a screwdriver into the wood more than 1/2 inch
- Chunks break off when you strike with a hatchet
Once it is punky, you can often remove it in stages: chip out the center, pry loose sections, and keep feeding moisture and compost into the cavity. You do not have to wait for the whole thing to become mush.
Speed boosters that actually help
1) Keep it wet on purpose
If rainfall is inconsistent, set a reminder to soak the stump every couple of weeks in warm weather. Dry wood does not rot fast.
2) Add compost and wood chips
Compost adds life and nitrogen. Wood chips help hold moisture and support fungal networks. A compost-on-top layer under a chip layer is a great combo.
3) Reduce the stump height
If it is safe, trimming the stump lower reduces the amount of wood and also makes it easier to cover and keep damp.
4) Work during the growing season
Rot slows down in cold weather. A stump treated in spring usually shows faster progress than one treated in late fall.
Common beginner mistakes
- Not drilling deep enough: Shallow holes dry out fast and do not feed the core.
- Doing one watering and forgetting it: Rot needs consistent moisture.
- Overdoing fertilizer: More is not always better. Too much can burn nearby plants and can leach in heavy rain. Start modest, keep it contained, and follow label guidance.
- Expecting instant results: Even “fast” stump rot is still a waiting game.
- Planting a prized shrub right beside it: Decomposing wood and fertilizer can change soil conditions nearby, and the area can settle as the stump collapses.
After the stump softens: cleanup and filling the hole
Once the stump is breaking apart, you have a few options:
- Break it up and bury it: Punky wood can be mixed into soil as organic matter. Expect some settling.
- Compost it (slowly): Small, rotten chunks can go into a compost pile, but woody pieces take time. Mixing with “greens” helps.
- Haul it out: If you want a clean, stable spot for planting or hardscape, remove as much wood as you can and dispose of it per local yard waste rules.
To finish the spot, rake out loose debris, add topsoil, and slightly overfill the area to account for future settling. If you plan to plant something permanent there, give the area time to stabilize.
Can you plant on or near a rotting stump?
You can, but plan for settling and shifting. As the stump breaks down, the ground can sink. If you are creating a garden bed, it is often better to treat the stump like a mini hugelkultur core: cover it with soil and compost, then plant shallow-rooted annuals for the first season or two.
If you plan to plant a tree or large shrub in that exact spot, wait until the stump is mostly gone or remove the bulk of the wood, so the new plant has stable soil and root space.
Quick FAQ
How long does it take to rot a stump naturally?
Often 3 to 10 years depending on species, size, moisture, and climate. DIY treatment can shorten that significantly.
Will drilling holes alone make it rot?
It helps, but drilling plus moisture and nitrogen is where you see real speed gains.
Is stump remover chemical necessary?
Not always. Many stump remover products use nitrates (often potassium nitrate) to help feed decomposition and, in some cases, to make the stump easier to burn where that is legal and safe. High nitrogen fertilizers can also help microbes, though they are not identical products and results can vary by conditions.
Summary checklist
- Drill deep holes across the stump top
- Add a small amount of high nitrogen fertilizer to each hole
- Water thoroughly
- Cover with compost, then wood chips or mulch
- Re-wet every few weeks in warm weather
- After a few months, test softness and start removing punky wood in stages

Jose Brito
I’m Jose Britto, the writer behind The Country Store Farm Website. I share practical, down-to-earth gardening advice for home growers—whether you’re starting your first raised bed, troubleshooting pests, improving soil, or figuring out what to plant next. My focus is simple: clear tips you can actually use, realistic expectations, and methods that work in real backyards (not just in perfect conditions). If you like straightforward guidance and learning as you go, you’re in the right place.