Orchids get a reputation for being fussy, but most problems come down to the same few basics: too much water, not enough light, stale air, or a potting mix that has broken down. Natural remedies can help, but they work best when the growing conditions are dialed in first.
Below is a realistic, home-grower-friendly approach to orchid care using gentle, natural methods. I will focus mainly on common house orchids like Phalaenopsis (moth orchid), and I will call out a few key differences for brighter-light types like Cattleya and Oncidium along the way.
Start with what orchids actually need
Light
Bright, indirect light is the foundation. If an orchid is alive but never blooms, light is often the missing piece. An east window is usually ideal for Phalaenopsis. South or west windows can work if you soften the sun with a sheer curtain.
- Good sign (Phalaenopsis): medium green leaves.
- Note for Cattleya and Oncidium: they generally tolerate and prefer brighter light, so leaves may look lighter, olive, or slightly yellow-green and still be happy.
- Too much light: bleaching, reddish/purple stress color, scorched patches.
- Too little light: very dark green leaves, slow growth, few or no blooms.
Water
Many orchids fail from staying wet too long. In a bark mix, water thoroughly, then let it drain completely. Only water again when the mix is approaching dry.
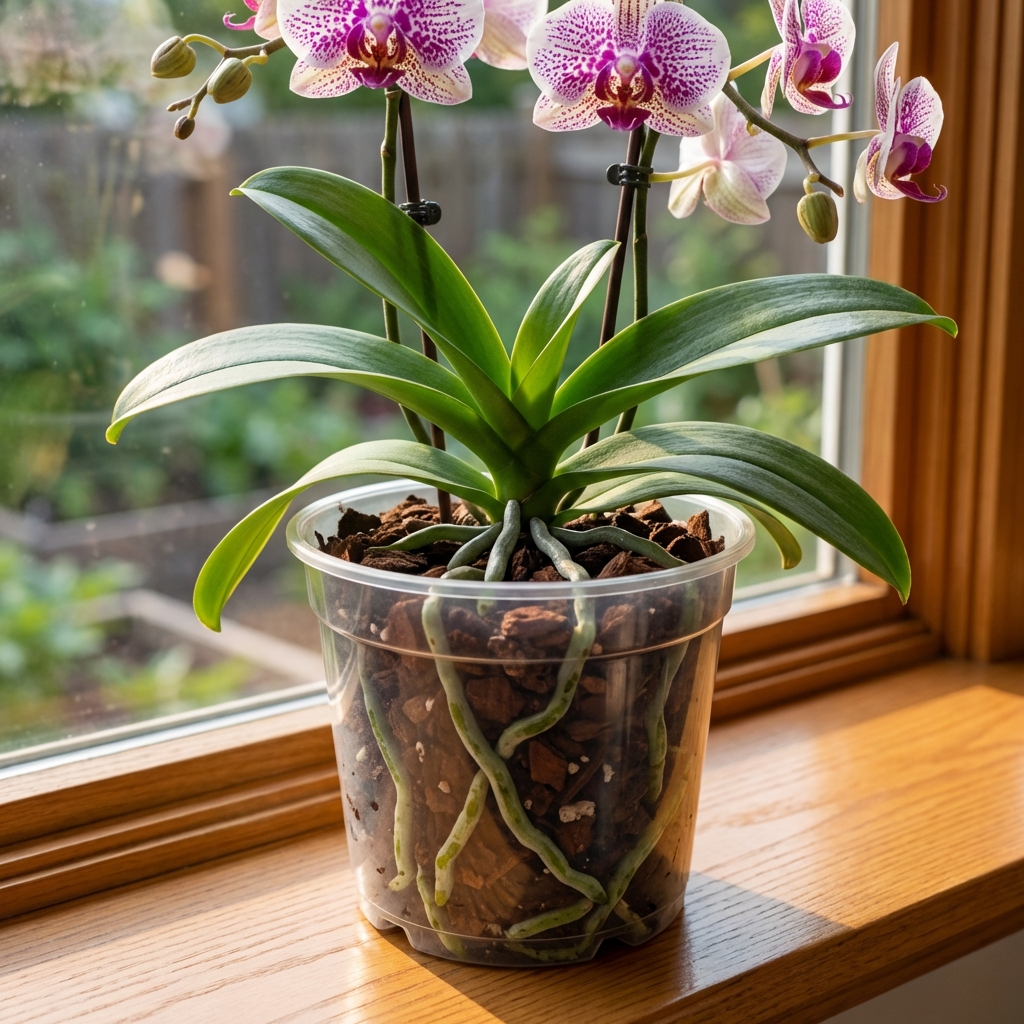
- Root cue (best in clear pots): silvery roots usually mean it is getting close, green roots usually mean recently watered.
- If your pot is opaque: use a skewer test (insert a wooden skewer and check for dampness), lift the pot to feel its weight, or check the mix near the center.
- Water in the morning so the crown and leaf joints dry by night.
- Avoid letting water sit in the crown, especially for Phalaenopsis.
- If your pot is decorative, make sure the inner pot never stands in water.
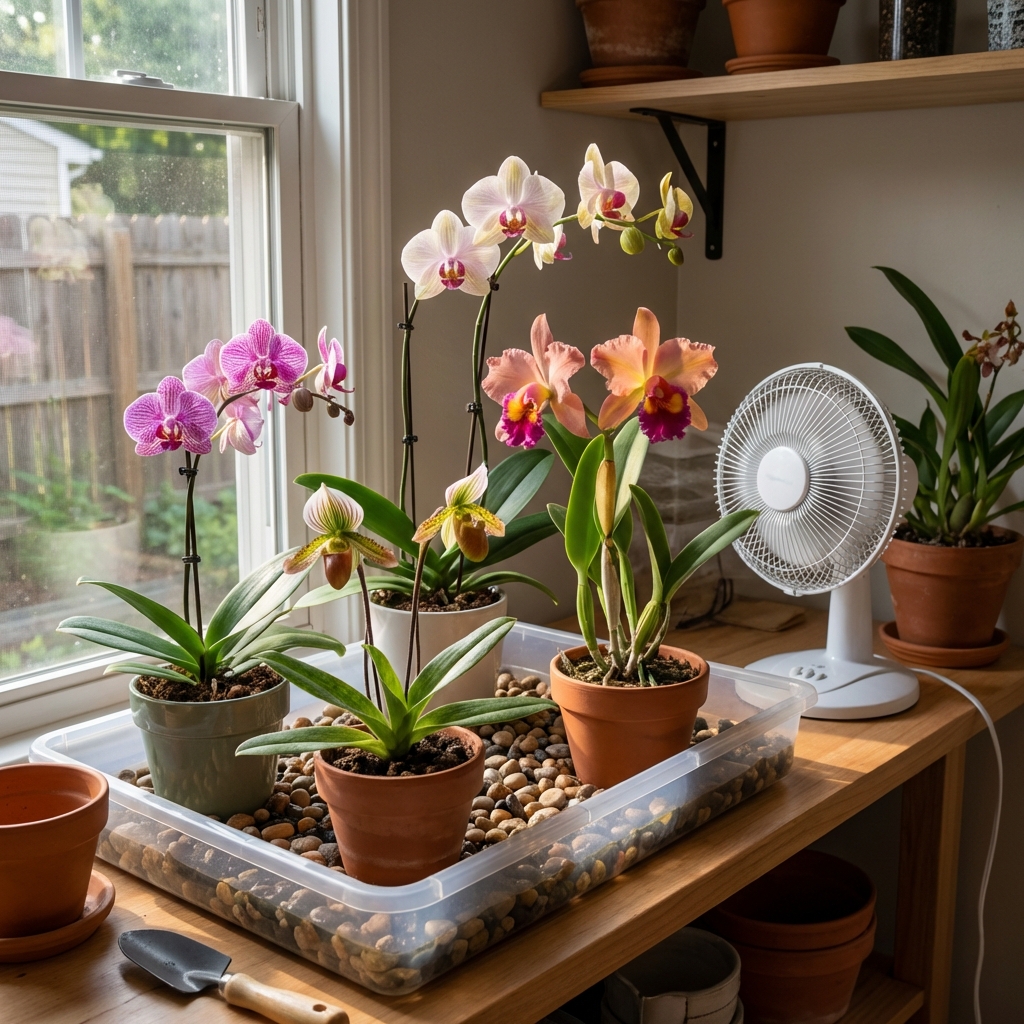
Airflow and humidity
Orchids like humidity, but they need airflow even more. Aim for moderate humidity (around 40 to 60 percent) and gentle air movement. A small fan across the room works well.
Potting mix
If the mix smells sour, looks soil-like, or stays wet for many days, it is time to repot. Most bark mixes break down in 12 to 24 months depending on watering habits and home conditions.
Temperature (a quiet key for blooms)
For Phalaenopsis, a small day and night temperature difference often helps trigger flower spikes. Many home growers see spikes after a few weeks of slightly cooler nights (without cold drafts). Keep the plant away from heating vents, fireplaces, and cold window glass on winter nights.
Natural watering upgrades that prevent problems
Use better water when you can
If your tap water is very hard or heavily softened, orchids can struggle over time. If possible, use rainwater, distilled water, or filtered water. If you are sticking with tap, do a monthly flush: run plenty of water through the pot for a full minute to rinse out salts.
Try a gentle root soak, not constant moisture
A short soak can help bark rehydrate evenly. Set the pot in a bowl of water for 10 to 15 minutes, then drain completely. Do not leave the pot soaking for hours.
Natural fertilizers and bloom support
Natural does not have to mean complicated. Orchids are light feeders, and consistent low doses work better than occasional heavy feeding.
- Simple approach: feed lightly during active growth, then follow with plain water sometimes, and keep up that monthly flush to prevent salt buildup.
- Classic reminder: weakly, weekly works for many growers, but a light feeding once or twice a month can also be fine if you are cautious and you flush regularly.
Worm castings tea (mild and safe)
Worm castings are gentle and hard to overdo. Steep a small handful in water overnight, strain, then use that water to lightly feed once or twice a month during active growth.
Seaweed or kelp extract
Seaweed-based products are popular because they support root growth and overall resilience. Use at a weak dilution and only as often as the label suggests. With orchids, less is more.
What to skip
- Coffee grounds in the pot: they compact, hold water, and can encourage fungus gnats.
- Eggshell chunks: they break down too slowly in bark to help much and can trap moisture.
- Banana peel water: it can smell, attract pests, and is inconsistent.
Use caution with trendy DIY treatments
Even “natural” ingredients can burn leaves or damage roots. Avoid experimenting with strong home mixes like undiluted vinegar, baking soda solutions, essential oils, or garlic concentrates on orchids. If you try any spray, test a small area first and wait 48 hours.
Natural pest control for orchids
When pests show up, isolate the plant first. Many orchid pests spread easily through contact, shared growing space, and human handling. Some, like mites, can also move with airflow. Then choose the mildest effective approach and repeat on a schedule because eggs hatch later.
Helpful habit: quarantine new orchids (and any new houseplants) for 2 to 3 weeks before they join your collection.
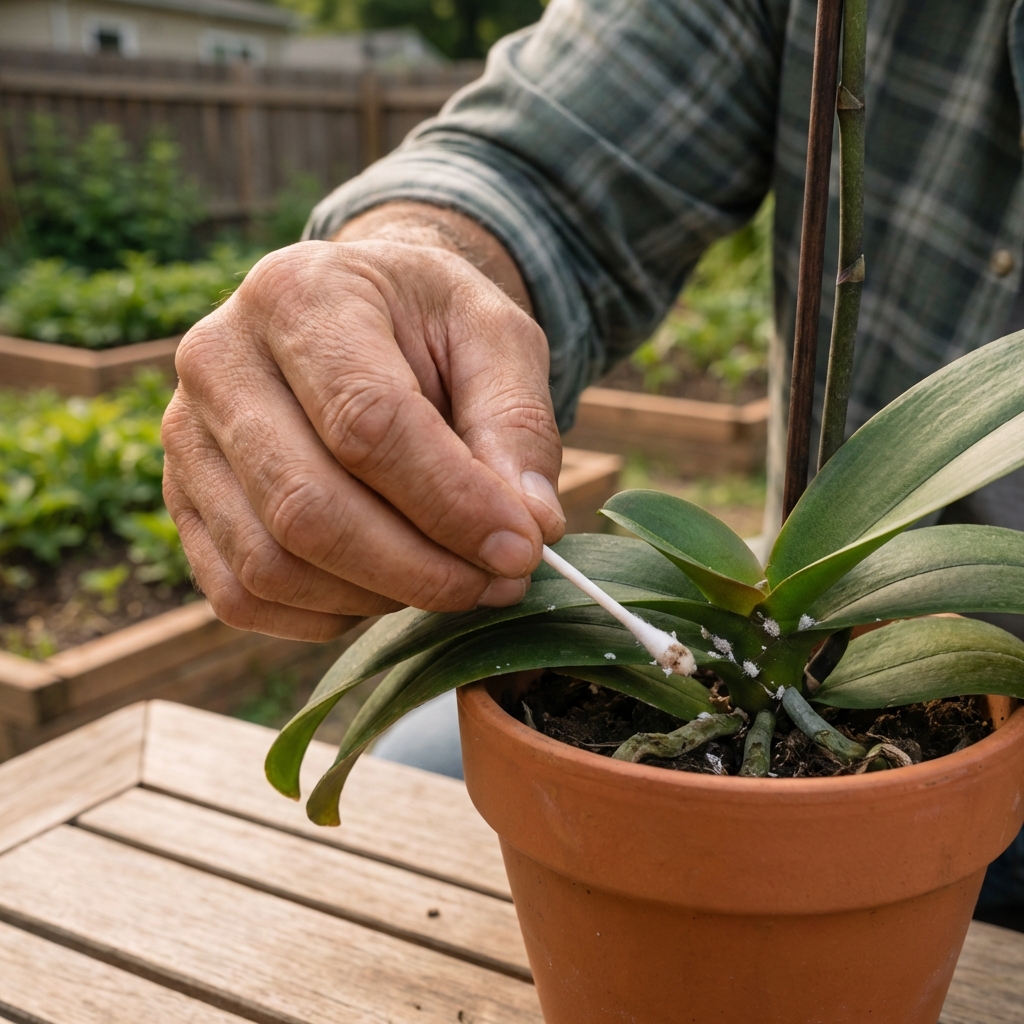
Mealybugs and scale
These are the big two for indoor orchids. Start with physical removal, then follow up.
- Spot treatment: dab pests with 70% isopropyl alcohol on a cotton swab.
- Wipe down: gently clean leaf undersides, petioles, and the base where they hide.
- Repeat: every 5 to 7 days for 3 to 4 rounds.
Spider mites
Spider mites love dry, still air. Increase humidity slightly, improve airflow, and rinse the plant in the sink. You can also use insecticidal soap, but test first because orchids can be sensitive.
Neem oil (use carefully)
Neem can work, but it is not always gentle on orchids, especially in bright light. If you use it:
- Apply in the evening or when the plant is out of direct sun.
- Use a very dilute mix and shake often.
- Test on one leaf first and wait 48 hours.
A simple soap spray (test first)
For light infestations, you can try a mild soap solution, but orchid sensitivity varies. A true insecticidal soap or a pure liquid castile soap is usually a safer bet than many dish soaps.
- Mix 1 teaspoon of gentle liquid soap in 1 quart of water.
- Spray leaf tops and undersides, avoiding open blooms.
- Test first: spray one leaf and wait 24 to 48 hours before treating the whole plant.
- Rinse with clean water after 30 to 60 minutes to reduce residue.
Natural remedies for fungus, rot, and leaf spots
Rot is usually a moisture and airflow problem first. A natural treatment may help, but fixing the cause is what saves the plant.
Hydrogen peroxide (limited, targeted use)
For a musty smell or early root issues, 3% hydrogen peroxide is sometimes used as a one-time flush to temporarily reduce surface microbes and loosen debris. It is not a cure for rot, and it can irritate or damage velamen if overused.
- Consider it a one-time support step, not a routine.
- Best fix: remove dead roots, improve airflow, and repot into fresh, airy mix if the media is staying wet too long.
Cinnamon for small cuts and soft spots
Ground cinnamon is a handy natural antifungal for dry wounds after trimming a root or removing a soft area. Use it as a light dusting on the cut, not as a tea.
- Only apply to trimmed areas.
- Avoid cinnamon on live roots: it is drying and can be phytotoxic on healthy tissue.
- Keep cinnamon out of the potting mix. It can dry roots out if overused.
How to handle crown rot (the urgent one)
If the center of a Phalaenopsis is black, mushy, or smells bad, act fast:
- Blot out water and remove mushy tissue with a sterile tool.
- Let the area dry and apply a light dusting of cinnamon to the affected spot (avoid live roots).
- Improve airflow and keep water out of the crown going forward.
If the growing point is gone, the plant might still survive by producing a basal keiki, but it will take time.
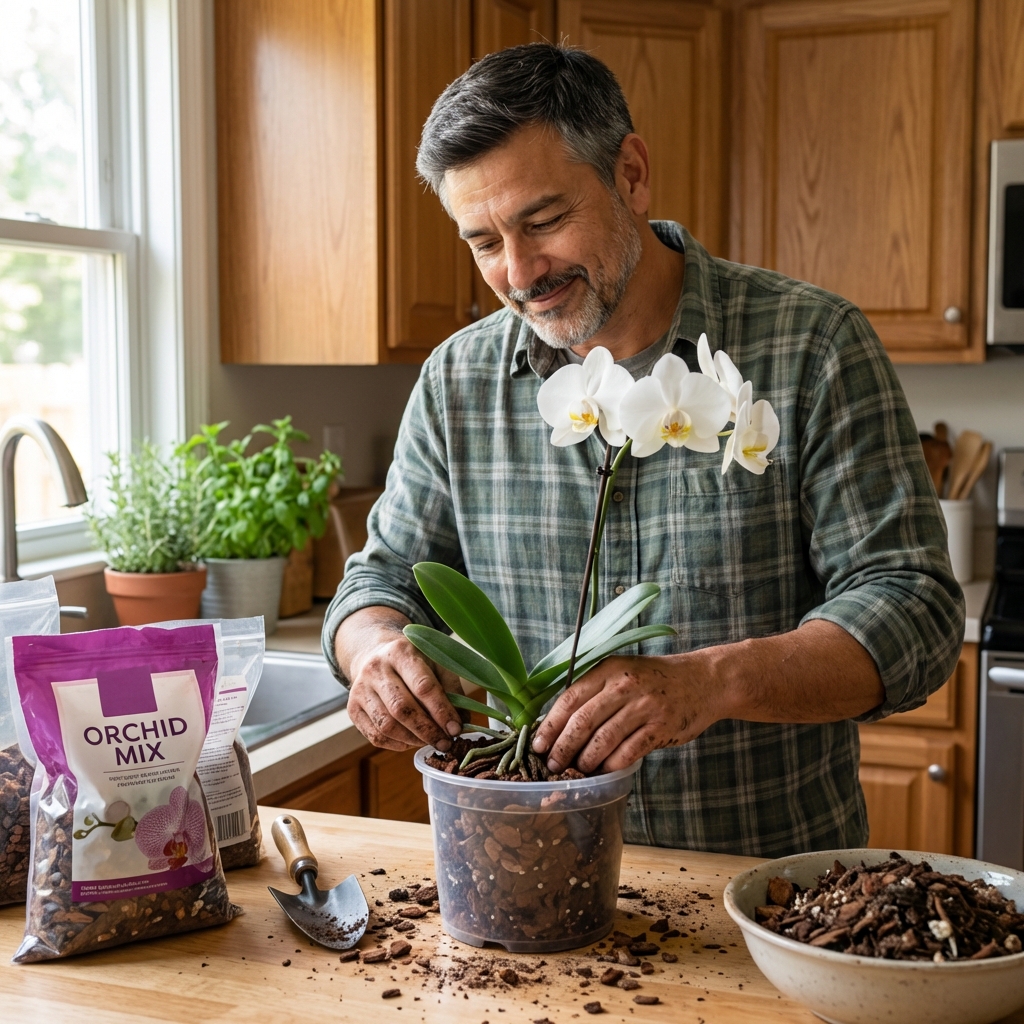
Repotting the natural way
Repotting is not a punishment. For orchids, it is often the fix. Do it when new roots are starting, usually after blooming for many Phalaenopsis.
What you need
- Fresh orchid bark mix (medium grade for most house conditions)
- Clean scissors or pruners
- A clear pot with drainage holes (helpful for learning root health)
- Optional: a little sphagnum moss if your home is very dry
Steps
- Remove the orchid and gently tease off old mix.
- Trim mushy or hollow roots. Healthy roots are firm.
- Set the plant so the base sits just above the mix, not buried.
- Pack bark lightly. Orchids like air around the roots.
- Wait 2 to 3 days before watering if you made lots of cuts.
Do not cut aerial roots
Aerial roots are normal, especially on Phalaenopsis. They help the plant breathe and manage humidity. Only trim roots that are clearly dead (hollow, papery, mushy, or rotting). Healthy aerial roots are firm, even if they look dry.
Troubleshooting by symptom
Wrinkled leaves
- Common cause: root damage or inconsistent watering.
- Natural fix: check roots, repot if mix is broken down, then water on a steady schedule.
Yellow bottom leaves
- Often normal: older leaves die off.
- Concerning if: several leaves yellow quickly or the base is soft. Check for rot.
Buds drop
- Common cause: drafts, sudden temperature changes, or very dry air.
- Natural fix: keep the plant stable, away from heating vents and cold windows at night.
Leaves sticky
- Possible cause: pests like scale or mealybugs.
- Natural fix: inspect closely and treat with alcohol swabs and repeat.
Quick natural care routine
- Weekly: check roots and moisture level, water only when approaching dry.
- Every watering: drain fully, no standing water.
- Monthly: flush thoroughly to remove salt buildup (especially important if you fertilize).
- During growth: light feeding with worm castings tea or diluted kelp, then occasional plain-water watering.
- Yearly to every 2 years: repot into fresh mix.
Safety notes for natural treatments
Natural does not automatically mean harmless. Always test any spray on a small area first, especially on thin-leaved orchids. Avoid spraying open flowers when possible, and do treatments out of direct sun to prevent leaf burn. Keep oils and soaps off hot leaves and do not combine multiple DIY treatments in one session.
When natural remedies are not enough
If an orchid has fast-spreading black rot, a collapsing crown, or pests that keep returning after multiple rounds of treatment, stepping up to a labeled orchid-safe product may be the most responsible move. Think of it like first aid versus surgery. Use the gentlest tool that actually solves the problem.
One last thing that makes orchids easier
If you are new to orchids, use a clear pot for a while. Seeing the roots takes out most of the guesswork. Green roots usually mean recently watered. Silvery roots often mean it is getting close. Mushy brown roots mean it is time to act.
If you tell me what type of orchid you have and what you are seeing (wrinkled leaves, no blooms, white bugs, black spots), I can help narrow down which natural remedy makes the most sense and what to fix first.

Jose Brito
I’m Jose Britto, the writer behind The Country Store Farm Website. I share practical, down-to-earth gardening advice for home growers—whether you’re starting your first raised bed, troubleshooting pests, improving soil, or figuring out what to plant next. My focus is simple: clear tips you can actually use, realistic expectations, and methods that work in real backyards (not just in perfect conditions). If you like straightforward guidance and learning as you go, you’re in the right place.