Orchids have a reputation for being fussy, but most problems come down to a few basics: too much water, not enough airflow, or light that is slightly too weak or too intense. The good news is you can fix a lot of issues without harsh chemicals. Think of natural orchid care as a routine that keeps the plant strong, plus a few targeted remedies when something pops up.
This page focuses on common house orchids (especially Phalaenopsis, the grocery store type), but the tips translate well to many epiphytic orchids that grow in bark or moss.
Start with prevention (it solves most problems)
1) Water the right way
Overwatering is the fast lane to root rot. Instead of watering on a schedule, water based on the potting mix, the pot weight, and what the roots are doing.
- Check roots, but do not rely on color alone: Silvery gray roots often mean it is time to water and green roots often mean wait, but roots can stay green from humidity or condensation even when the mix is drying. Roots buried in the pot can look different than aerial roots.
- Check the mix and pot weight: Lift the pot. If it feels light and the mix is dry closer to the center, it is usually time. If it still feels heavy and cool, wait.
- Soak, then drain: Water thoroughly until it runs out, then let it drain completely. No standing water in a cachepot.
- Keep water out of the crown: If water collects where the leaves meet, blot it with a paper towel. This is one of the easiest ways to prevent crown rot.
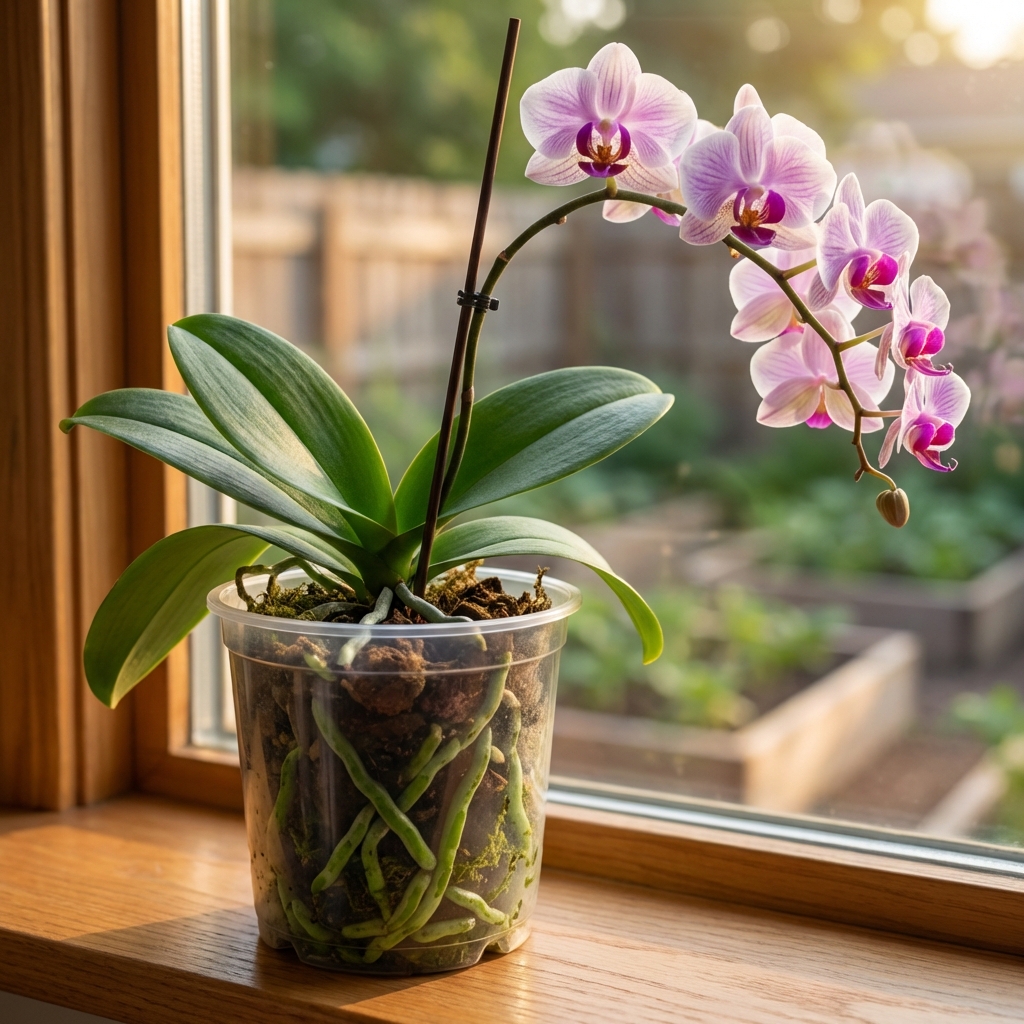
- Know your medium: Bark dries faster and forgives heavier watering. Moss holds water longer, especially when packed tight. Many grocery store orchids have a dense moss plug that stays wet in the center, so be extra cautious with watering and consider repotting after blooming.
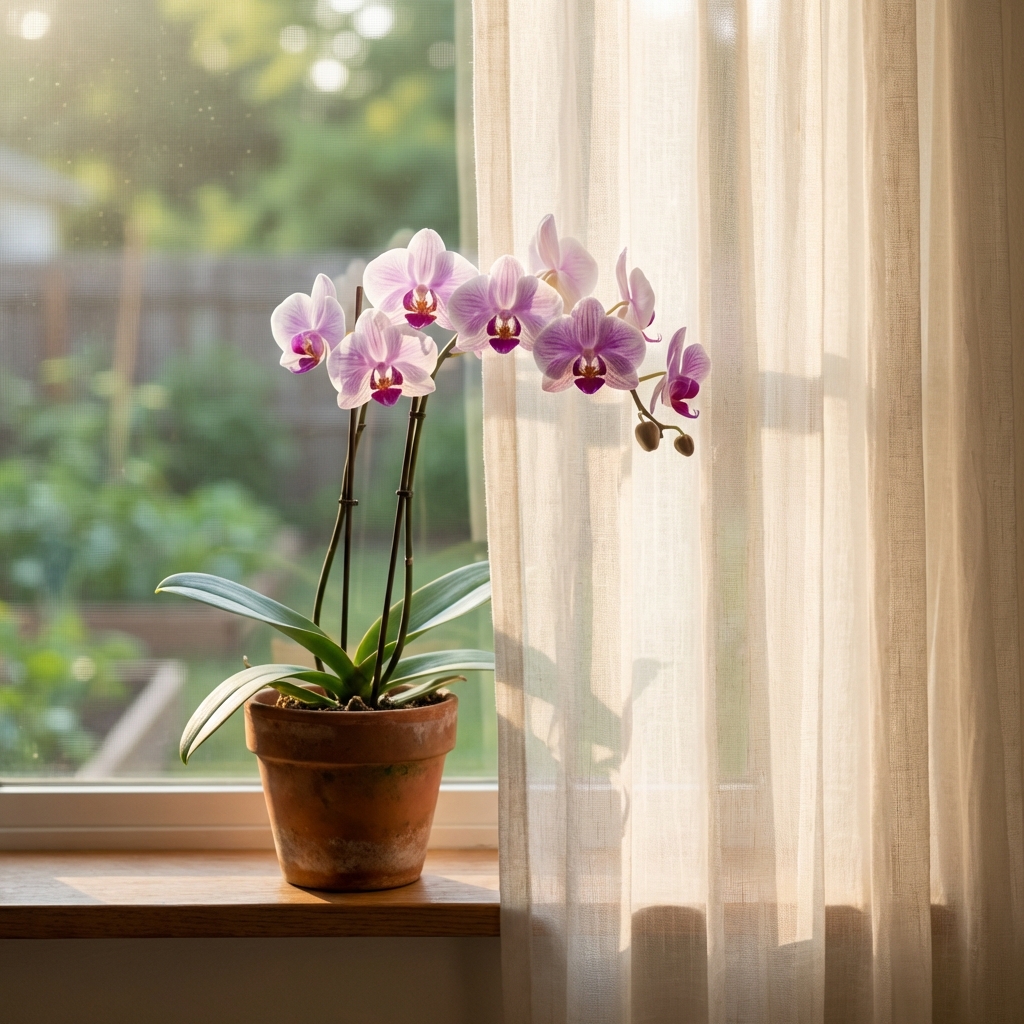
2) Light that is bright, not harsh
Most indoor orchids like bright, indirect light. East windows are often perfect. South or west windows usually need a sheer curtain.
- Too little light: Dark green leaves, slow growth, no blooms.
- Too much light: Yellowing, red or purple stress tones, or crisp sunburn patches.
3) Airflow and humidity, balanced
Orchids like humidity, but they also need air moving around the leaves and potting mix. Stale, damp air is where fungal and bacterial issues take hold.
- A small fan on low across the room helps a lot.
- Pebble trays may help slightly in a small, enclosed area, but they are often negligible in an open room. If humidity is a struggle, use a small hygrometer so you are not guessing.
- Aim for moderate humidity (often 40 to 60% indoors is fine for Phalaenopsis).
4) Temperature basics (and why spikes show up)
Most Phalaenopsis do well at typical home temperatures. Many will set spikes after a small night drop in fall or winter.
- Comfort range: Roughly 65 to 80°F (18 to 27°C) is a good target.
- Spike trigger: A gentle day-night difference (often 5 to 10°F, or 3 to 6°C) can help encourage blooming.
- Avoid stress: Cold drafts, heater blasts, and sudden swings can lead to bud drop.
Natural remedies for common orchid problems
Before treating anything, isolate the orchid from your other plants. Many issues spread faster than people expect.
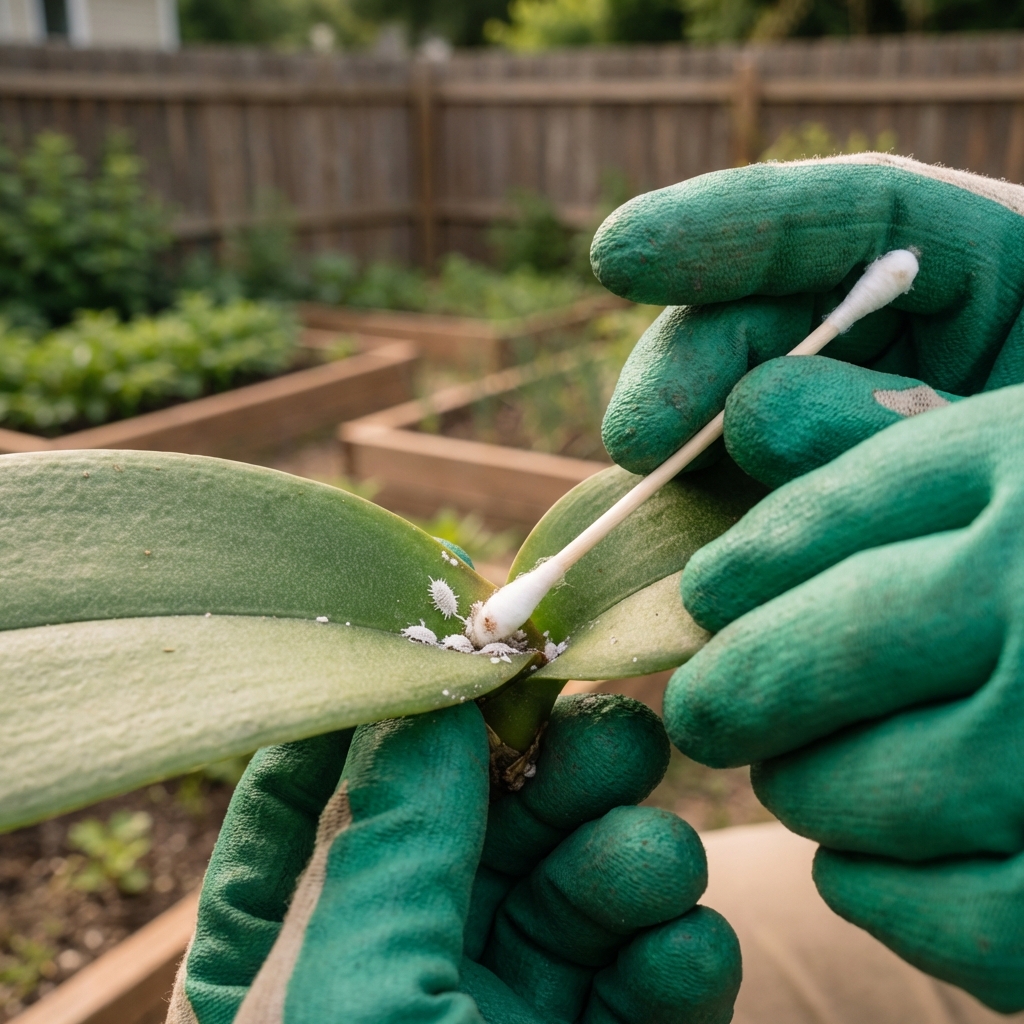
Sticky leaves or tiny bugs (aphids, mealybugs, soft scale)
These sap-suckers are common indoors and usually show up on new growth, flower spikes, and under leaves.
- First step: Rinse the plant with lukewarm water to knock pests off.
- Spot treatment: Dab pests with a cotton swab dipped in 70% isopropyl alcohol. Avoid tender new growth, avoid the crown, and do not soak the potting mix with alcohol.
- Gentle soap spray: Use insecticidal soap (best option) or a very mild, additive-free soap like pure castile soap. Mix 1 teaspoon in 1 quart of water. Spray leaves (top and underside), wait 10 to 15 minutes, then rinse. Repeat every 5 to 7 days for 3 rounds.
Watch out: Do not spray in hot sun. Some dish soaps and degreasers are harsh and can burn leaves, so avoid anything with heavy fragrance, degreasing agents, or added moisturizers. Test any spray on a small area first. Do not mix soap with other products in the same bottle.
Spider mites (fine webbing, speckled leaves)
Spider mites love dry indoor air. They are tiny, but the damage is pretty recognizable.
- Rinse leaves well, especially undersides.
- Increase humidity slightly and improve airflow.
- Use the same insecticidal soap or gentle soap approach, and rinse afterward.
Fungus gnats (tiny flies around the pot)
Gnats usually mean the mix is staying wet too long or breaking down.
- Dry-down adjustment: Let the mix dry more between waterings.
- Sticky traps: Yellow sticky cards catch adults quickly.
- Top-dress option: A thin layer of coarse orchid bark on top can reduce egg laying.
- Larvae control (low-toxicity option): BTi products (often sold as mosquito bits or dunks) are commonly used for gnat larvae. Follow label directions and remember orchids in bark do not behave like soil plants, so start with cultural fixes first and avoid keeping the mix constantly wet just to apply a drench.
About “natural drenches”: You will see suggestions like hydrogen peroxide, neem, and other mixes online. Orchids in bark or moss can react differently than soil houseplants, and some treatments can irritate roots. If you try anything new, test on one plant, use the mildest effective approach, and prioritize better drying and fresh mix.
Root rot (mushy roots, sour smell, wrinkled leaves)
Root rot is mostly a moisture and airflow problem. Natural care here means clean-up and better conditions.
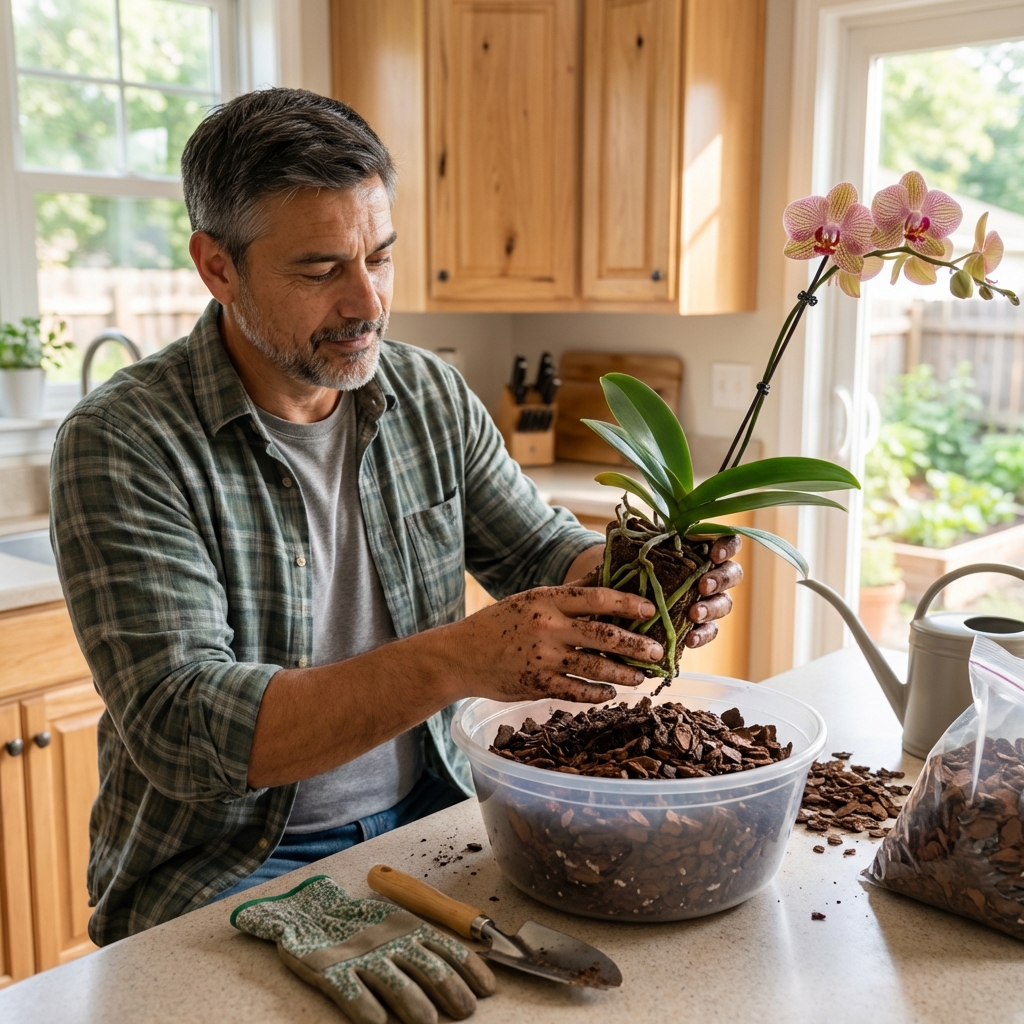
- Remove the orchid from the pot and gently rinse roots.
- Trim mushy, hollow, or blackened roots with sterilized scissors.
- Let cuts dry for 30 to 60 minutes.
- Repot into fresh orchid bark (or your preferred orchid mix) in a pot with strong drainage.
Cinnamon note: Ground cinnamon is a natural antifungal, but it can be drying. If you use it, dust a tiny amount on cut areas only, not on healthy roots or into the mix.
Crown rot (soft crown, yellowing center, leaf pulls)
Crown rot often starts when water sits in the crown and the center stays wet, especially in cool conditions. It can move fast.
- Keep the plant warm, improve airflow, and stop any misting.
- If the center is wet, blot carefully with paper towel.
- If leaves pull out easily or tissue looks watery and collapses, treat it as urgent. Isolate the plant and remove affected tissue early if possible.
Black spots or leaf lesions
Spots can come from sunburn, cold damage, bacteria, or fungus. The remedy depends on the cause, so start with the basics.
- Improve airflow and avoid wet leaves overnight.
- Remove badly damaged tissue with sterilized scissors if it is spreading.
- Keep water out of the crown and do not mist the leaves if spotting is active.
If spots are spreading quickly, smell foul, or look watery and soft, treat it as urgent. Isolation and removing affected tissue early can save the plant.
Natural feeding that actually helps
Orchids do not need heavy feeding, but they do benefit from small, consistent nutrition, especially while growing new roots and leaves.
- Simple approach: Use a balanced orchid fertilizer at low strength. Many growers follow “weakly, weekly,” but even every 2 to 4 weeks works in many homes.
- Flush monthly: Run plain water through the pot to wash out mineral salts.
- Skip sugary folk remedies: Things like sugar water can encourage microbes in the potting mix and invite problems.
If you prefer a more natural route, focus on fresh potting mix, good light, and proper watering. Those three beat almost any “miracle” additive.
Repotting basics for healthier orchids
Old mix breaks down and holds too much water. Repotting is one of the most natural ways to prevent rot and pests long-term.
- When to repot: Every 1 to 2 years, after blooming, or when bark looks dark and crumbly. Repot sooner if the plant is in a tight moss plug that stays wet in the center.
- Pot choice: Clear pots help you see root health and moisture level.
- Mix choice: Bark-based mixes dry faster than moss. If your home is humid, bark is usually safer.
Quick troubleshooting cheatsheet
- Wrinkled leaves + wet mix: Roots are likely compromised. Check for rot.
- Wrinkled leaves + dry mix: Underwatering or roots not taking up water. Soak and reassess.
- Yellow bottom leaf: Often normal aging if it is just one leaf.
- Bud blast (buds drop): Temperature swings, drafts, sudden light changes, low humidity, underwatering, or ethylene from ripening fruit nearby can all play a role.
- No blooms: Usually not enough light, or not enough day-night temperature difference.
What to avoid (even if it is “natural”)
Not every home remedy is orchid-friendly. A few popular ones can cause more damage than the original problem.
- Undiluted vinegar: Too acidic for roots and can burn tissue.
- Oils on leaves: Can interfere with stomata and gas exchange, trap heat, and raise the risk of leaf damage or sun scorch, especially in brighter light.
- Heavy cinnamon use: Can dry out roots and interfere with healthy tissue.
- Misting as a main humidity method: Raises leaf wetness more than room humidity, increasing spotting and crown-rot risk.
When it is time to step up treatment
If a pest infestation keeps returning, or a rot issue continues to spread even after repotting and better conditions, it is okay to consider a stronger product labeled for orchids. Natural methods work best when you catch problems early. If you are already dealing with a serious outbreak, your goal is plant survival first.
If you want, I can help you troubleshoot your exact situation. Share a photo of the plant and tell me: where it sits (window direction), how you water, what mix it is in, and what symptoms you see.

Jose Brito
I’m Jose Britto, the writer behind The Country Store Farm Website. I share practical, down-to-earth gardening advice for home growers—whether you’re starting your first raised bed, troubleshooting pests, improving soil, or figuring out what to plant next. My focus is simple: clear tips you can actually use, realistic expectations, and methods that work in real backyards (not just in perfect conditions). If you like straightforward guidance and learning as you go, you’re in the right place.