Pruning roses can feel intimidating because it is so easy to imagine you are about to ruin a plant you love. The good news is roses are tough. In most home gardens, a clean, sensible prune helps more than it hurts. You are mainly doing three things: removing weak or damaged growth, opening the center for airflow, and encouraging strong new canes that flower well.
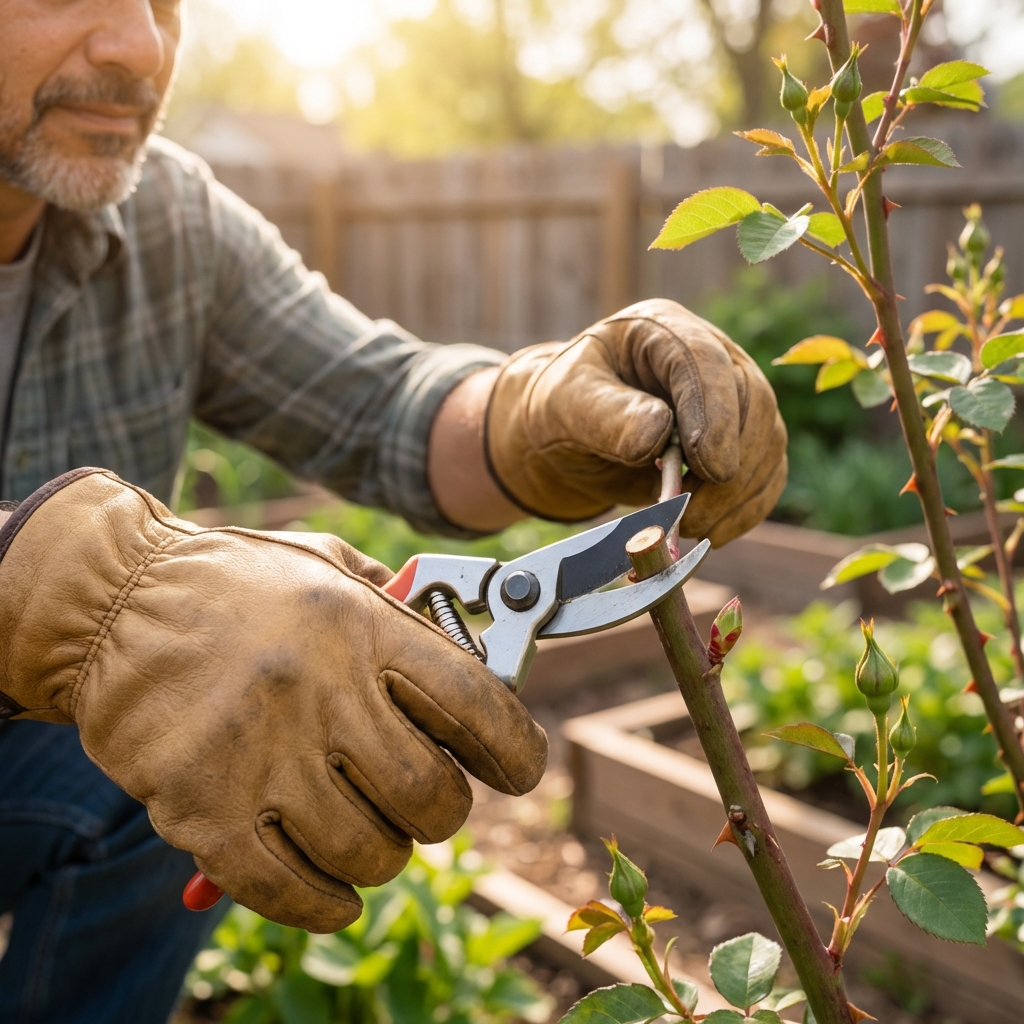
Quick safety note: Thorns are no joke. Wear thick gloves, long sleeves, and consider eye protection if you are reaching into a dense plant.
When to prune (the simple timing rule)
Timing depends on your climate and the type of rose, but you can keep it simple with a couple of dependable cues. In very mild climates, pruning often happens earlier. In very cold climates, it may shift later. When in doubt, wait until buds are swelling and daytime temperatures are mostly staying above freezing.
For most roses: late winter to early spring
- Prune when the worst cold is over and buds are starting to swell.
- A classic backyard cue is when forsythia blooms in many regions.
- If you prune too early and get a hard freeze, you can lose new growth. If that happens, just re-prune the damaged tips later.
Light summer touch-ups
After a bloom flush, you can tidy the plant by deadheading and removing spent flower stems back to a strong outward-facing leaf. This keeps repeat bloomers producing.
What about fall pruning?
In many colder areas, avoid hard pruning in fall because it can encourage tender growth right before winter. A safer fall move is a light reduction for stability: shorten very tall canes a bit so wind does not whip them around, and remove anything clearly dead or diseased.
Tools and supplies you actually need
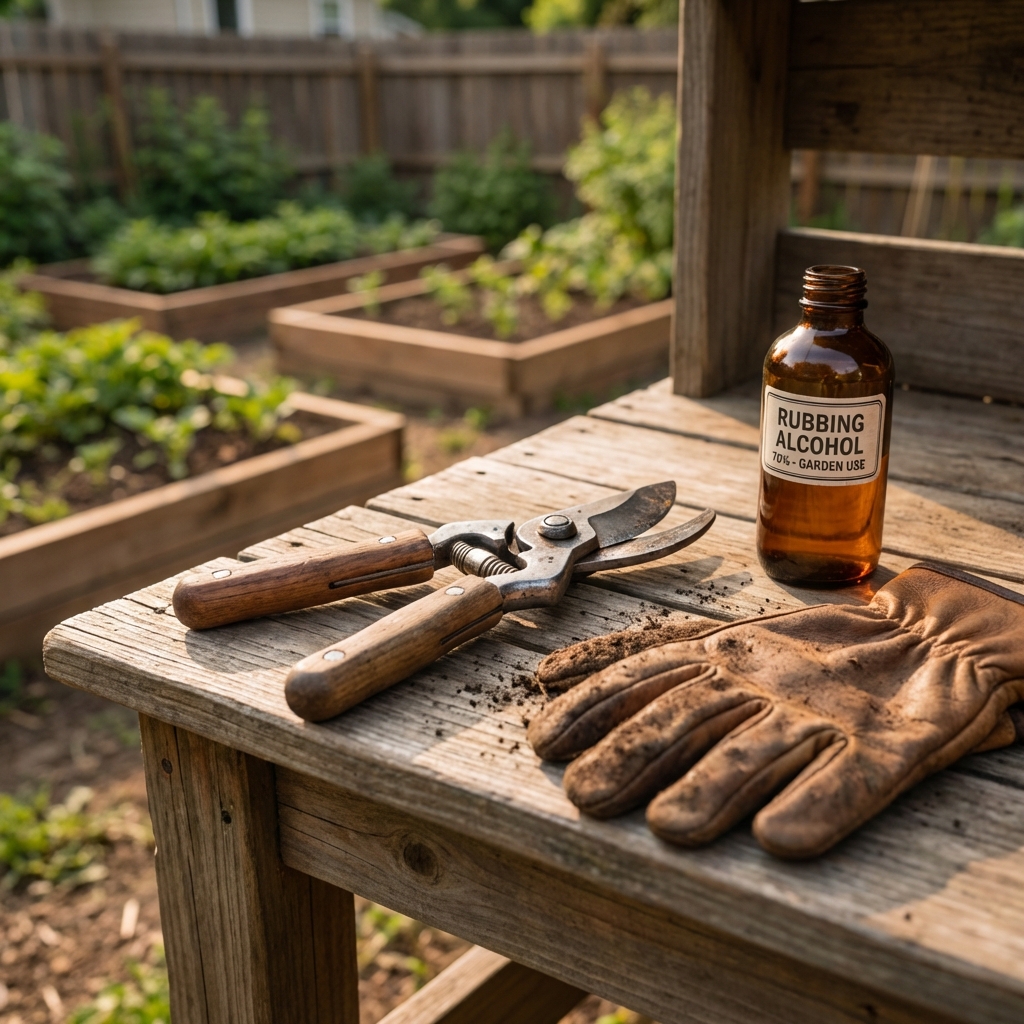
You do not need a fancy kit. You do need sharp, clean tools. Dull pruners crush canes and slow healing.
- Bypass hand pruners for most cuts (skip anvil pruners if you can, they tend to crush).
- Loppers for thicker canes you cannot comfortably cut with hand pruners.
- Thick gloves, ideally rose gloves that cover wrists and forearms.
- Sanitizer for blades (70% isopropyl alcohol works well for quick wipe-downs). Disinfecting between every single cut is optional, but do it between plants and anytime you cut into suspect canes.
- Rake and a bucket for cleanup. Old leaves can harbor disease.
Do you need pruning sealant? Usually, no. A clean cut is enough. Focus on sharp tools and good plant care.
Know your rose type (in one minute)
Rose pruning is easiest when you have a rough idea of what you are growing. If you are not sure, follow the general steps later in this guide and keep your cuts moderate.
- Hybrid tea and grandiflora: typically like a more deliberate spring prune to promote big blooms on strong canes.
- Floribunda: generally pruned a bit lighter than hybrid teas, aiming for lots of flowering stems.
- Shrub roses (including many landscape roses): often need less precision. Focus on thinning, shape, and removing old wood.
- Climbing roses: do not prune like a bush. You keep main canes and prune side shoots for flowers.
- Once-blooming old garden roses: many bloom on old wood, so major pruning is usually done right after flowering, not in early spring. (Some old garden types repeat, so if yours blooms more than once, treat it more like a repeat bloomer.)
Step-by-step: how to prune a rose bush
If you only follow one section on this page, make it this one. Work slowly, step back often, and remember: you can always take more off, but you cannot put it back on.
Step 1: Start with the obvious removals
- Cut out dead canes first. To check, lightly scratch the bark with a thumbnail. Healthy wood is greenish and moist underneath. Dead wood is brown and dry.
- Remove broken, cracked, or rubbing canes.
- Clear out leaf litter and old mulch that is matted against the crown.
Step 2: Remove suckers (if you have a grafted rose)
If your rose is grafted, you may see fast, different-looking shoots coming from below the graft union or from the roots. These are suckers and they steal energy.
- Trace the sucker down as far as possible and remove it close to where it starts.
- Suckers often have different leaf shape and more thorns than the main plant.
Step 3: Thin for airflow (this prevents problems)
A rose with good airflow dries faster after rain and is less inviting to black spot and powdery mildew.
- Aim for an open center shape, like a vase.
- Remove thin, spindly stems that will never hold good flowers.
- If two canes cross, keep the healthier, better-placed one and remove the other.
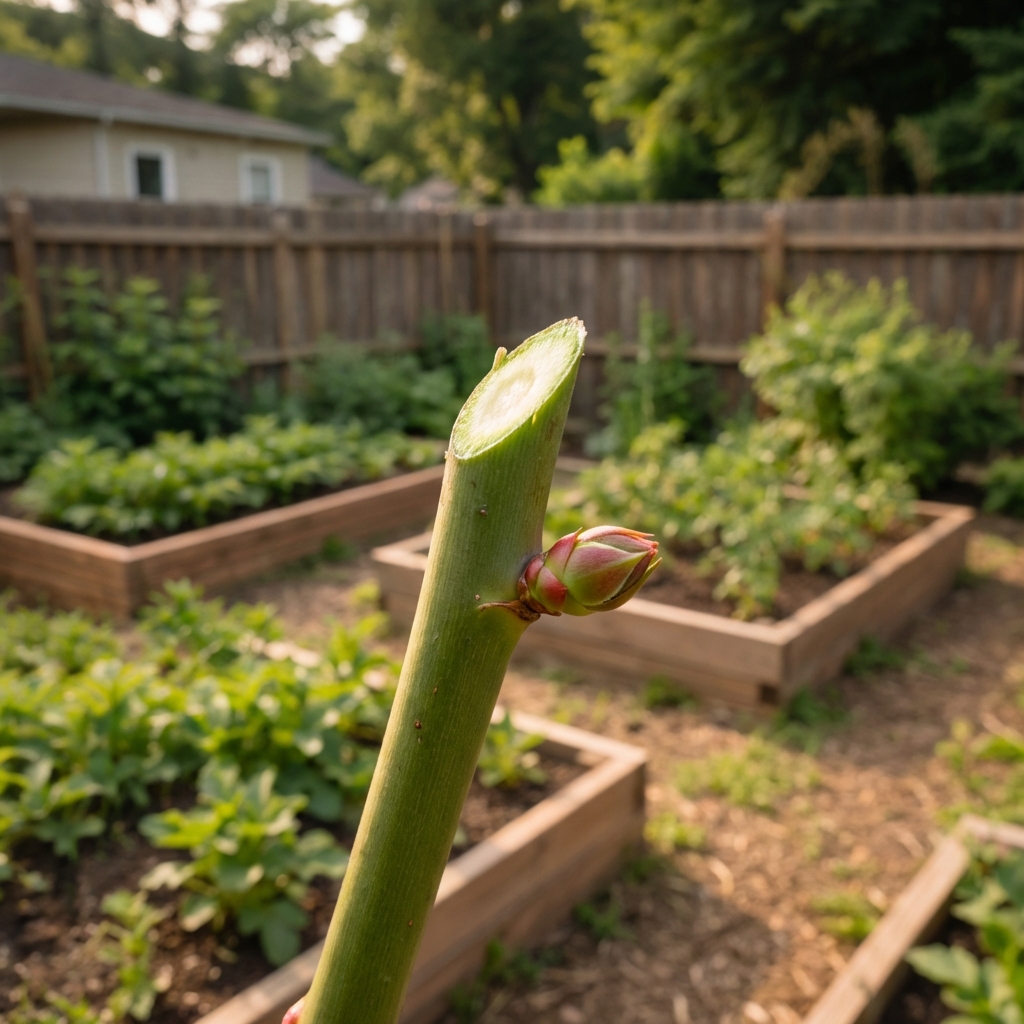
Step 4: Make clean, angled cuts above an outward-facing bud
This is the classic rose pruning move. New growth often follows the direction of the nearest bud, so choosing an outward-facing bud helps keep the center open.
- Find a bud (or a leaf node) that points away from the center of the bush.
- Cut about 1/4 inch (around 6 mm, not a perfect measurement) above that bud.
- Angle the cut slightly so water sheds off the cut surface.
Step 5: Decide how much to reduce the height
There is no single perfect height. Your goal is a sturdy framework of canes that fits the space and supports flowers.
- For many bush roses, reducing by about one third is a reasonable, low-risk starting point.
- If the plant is overgrown or shaded and you need a reset, you can go harder, but expect fewer blooms at first while it rebuilds.
- If you are unsure, prune lighter this year and adjust next season.
Climbing roses: the quick and simple approach
Climbers flower best when you keep their long main canes and train them. The flowering comes from side shoots.
- Keep the strongest main canes and tie them to a trellis or fence.
- Remove dead or very old canes at the base if the plant is crowded.
- Shorten side shoots to about 2 to 4 buds to encourage blooms along the cane.
- Training canes more horizontal often encourages more flowering side shoots.

Aftercare that makes pruning pay off
Pruning is only half the story. A rose that is pruned and then left hungry or stressed will struggle. Do a little aftercare and you will see better results.
Clean up
- Pick up and discard fallen leaves and cuttings, especially if you had disease last season.
- Do not compost diseased leaves or canes unless your compost gets reliably hot. Bag them or dispose of them with yard waste.
- Wipe blades with alcohol between plants, and anytime you cut into suspect canes.
Mulch and water
- Add 1 to 2 inches of compost if you have it, then mulch to keep moisture steady.
- Water deeply if the soil is dry. New growth needs consistent moisture, not soggy soil.
Feeding basics
Many gardeners fertilize after the main spring prune once growth is starting. Use a balanced rose fertilizer or a general slow-release product and follow the label. If you already amend with compost regularly, you may be able to fertilize lighter.
Common pruning mistakes (and what to do instead)
- Leaving stubs: They die back and can invite disease. Cut just above a bud or node.
- Not removing dead wood first: It hides the plant structure. Always start with dead, damaged, and diseased wood.
- Overcrowding the center: Dense centers stay wet longer. Thin for airflow.
- Using dull tools: Crushed cuts heal slowly. Sharpen pruners at least once a season.
- Pruning once-blooming roses too early: You can cut off this year’s flowers. For many once-bloomers, prune after flowering.
Troubleshooting: what you see after pruning
No new growth
If weeks pass with no bud swell, check for winter damage. Scratch a cane. If it is brown inside, keep cutting down until you reach green tissue, or remove the cane entirely.
Lots of leafy growth but few blooms
Often a light issue or too much nitrogen. Make sure the plant gets adequate sun and avoid heavy high-nitrogen feeding.
Black spot or mildew returns fast
Focus on airflow, cleanup, and watering at the base. Removing infected leaves and avoiding overhead watering helps more than most people expect.
Quick checklist you can follow in the yard
- Put on gloves (and long sleeves), grab clean sharp pruners.
- Remove dead, damaged, and rubbing canes.
- Remove suckers from below the graft if present.
- Thin the center for airflow.
- Cut to outward-facing buds, about 1/4 inch above.
- Clean up debris, mulch, and water if needed.
If you want a simple rule to remember: clean it up, open it up, then shape it.

Jose Brito
I’m Jose Britto, the writer behind The Country Store Farm Website. I share practical, down-to-earth gardening advice for home growers—whether you’re starting your first raised bed, troubleshooting pests, improving soil, or figuring out what to plant next. My focus is simple: clear tips you can actually use, realistic expectations, and methods that work in real backyards (not just in perfect conditions). If you like straightforward guidance and learning as you go, you’re in the right place.