A leftover stump is more than an eyesore. It can trip people, wreck mower blades, sprout new shoots, and attract insects as it starts to break down. The good news is you have several solid options, and the “best” one usually comes down to four things: stump size, how close it is to structures, how fast you want it gone, and what tools you can realistically use.
This guide walks you through smart stump removal solutions, from fast mechanical methods to slower, low-effort approaches, with safety notes and what to do with the spot afterward.

Start here: quick decision checklist
If you want a fast answer, use this as your rule of thumb.
- Need it gone in a day or two: stump grinding (rent a grinder or hire a pro).
- Small stump (often manageable by hand): dig it out with hand tools. As a rough guide, many stumps under about 8 inches are doable, but species, soil, and root type matter.
- Near utilities, fences, or a foundation: avoid aggressive digging and skip burning. Grinding is usually safest.
- You do not care about speed and want minimal effort: help it rot naturally (drill holes, keep it moist, cover it).
- Not sure what is underground: have utilities marked before digging. In the US, call 811. Outside the US, contact your local utility locating service.
Safety first (do not skip this)
Stump removal looks simple until a hidden root hooks a tool, a grinder throws debris, or you hit a utility line. A few basics keep this job from turning into a problem.
- Call before you dig: have utilities marked.
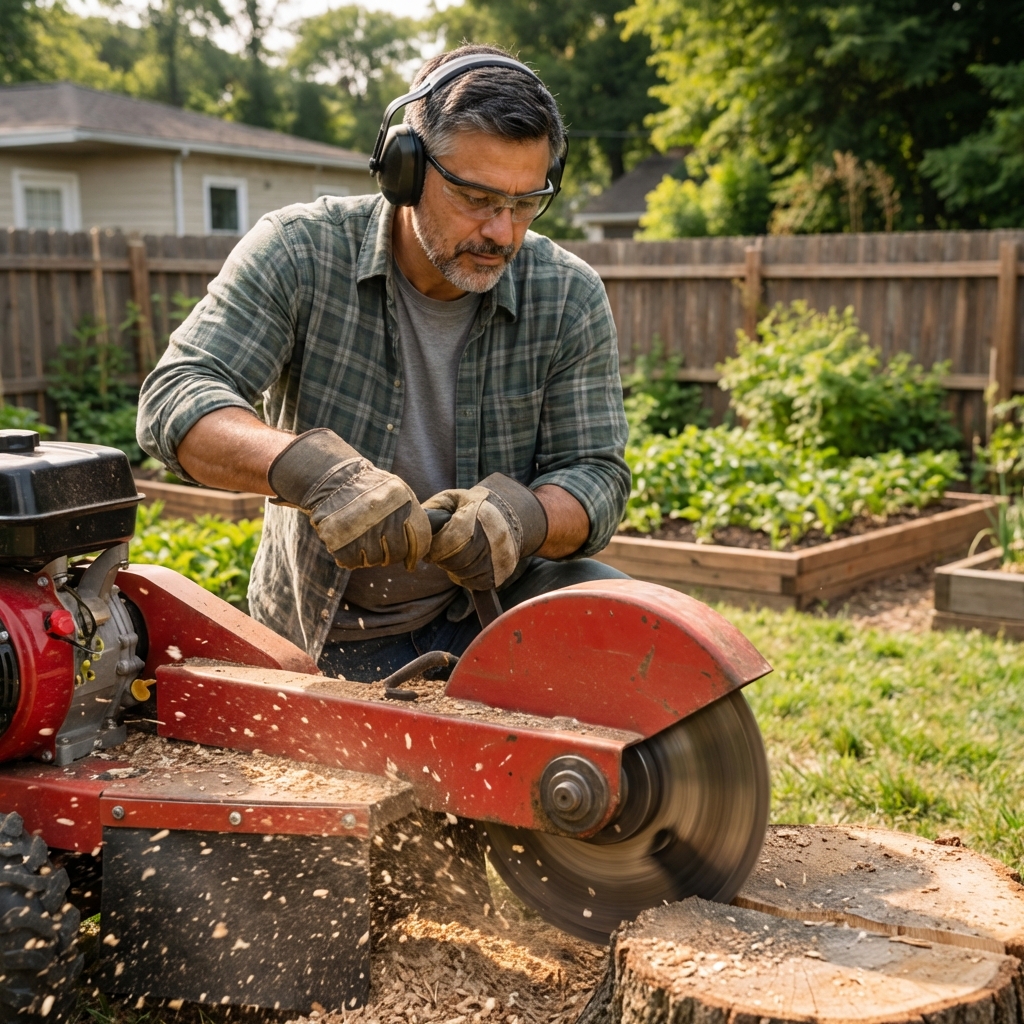
- Gear: gloves, eye protection, sturdy boots. Add hearing protection and a face shield for grinding.
- Clear the zone: keep kids, pets, and breakables well away from the work area.
- Watch for kickback: with axes, mattocks, and saws, work slowly and keep stable footing.
- Know local rules: open burning is restricted in many areas. Even if allowed, burning stumps is risky and unpredictable. Also check HOA rules where applicable.
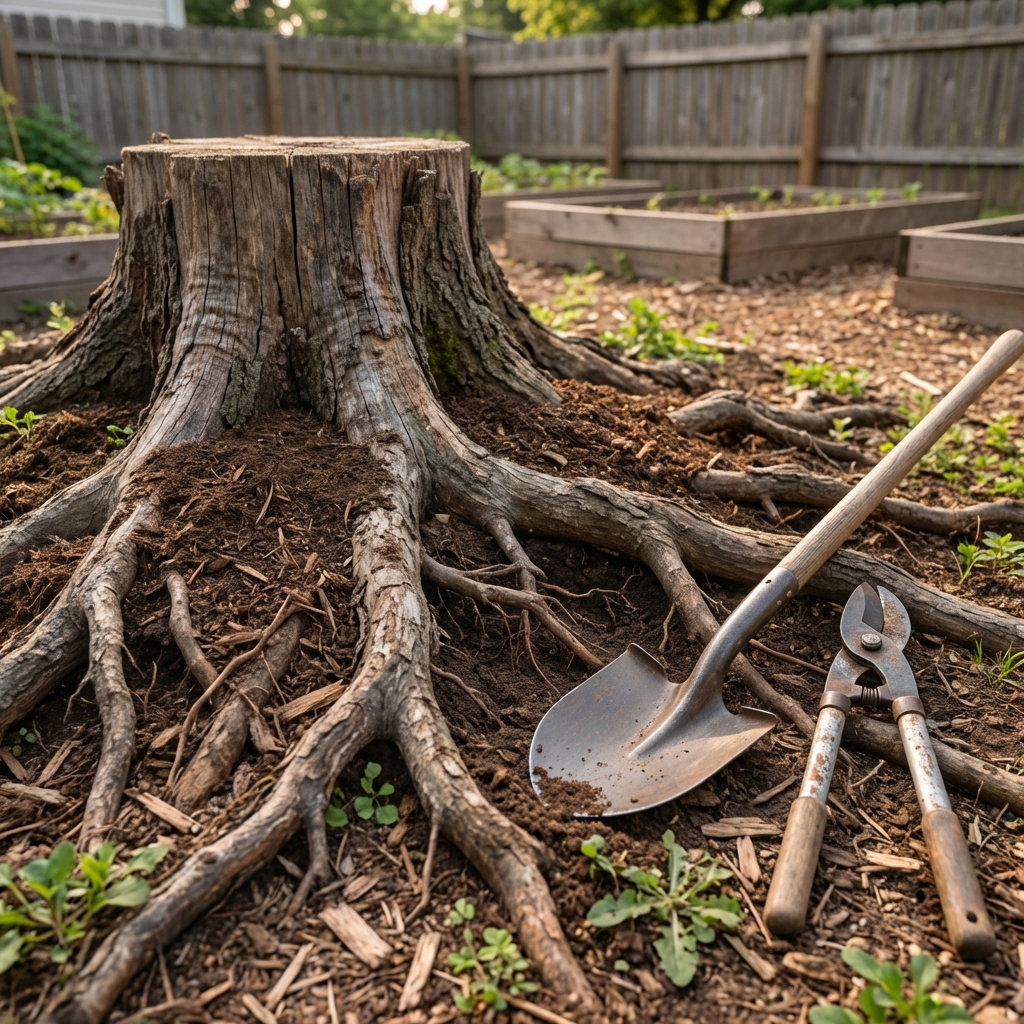
Option 1: Dig it out (best for small stumps)
Digging is the cheapest method, and it works great on smaller stumps, shallow-rooted trees, and freshly cut stumps that have not had time to harden and anchor deeper.
Tools that make a difference
- Spade shovel and digging shovel
- Mattock or grub hoe (for roots and compacted soil)
- Hand pruners and loppers
- Reciprocating saw with a pruning blade (or a sharp hand saw)
- Pry bar and a sturdy chain (optional)
Steps
- Expose the root flare: dig a trench 8 to 12 inches away from the stump and work inward until you see the major roots.
- Cut roots cleanly: use loppers for small roots, a saw for thicker ones. Cut in sections so you can lift and pry.
- Work around the stump: keep circling, cutting roots as you find them. This is slower than it sounds, so pace yourself.
- Pry and rock: once most major roots are severed, rock the stump to locate any remaining anchors.
- Lift out: pull the stump free. A come-along or hand winch is safer than vehicle pulling for most DIYers. Chains and straps can snap back and anchors can fail, so keep bystanders far away and never stand in line with a taut chain.
Time and effort
Expect a few hours for a small stump. For medium stumps, digging can turn into an all-day project, especially in clay soil or with trees that have strong lateral roots.
Option 2: Stump grinding (fast and clean)
If the stump is medium to large, or you want the area usable quickly, grinding is usually the smartest solution. A grinder chews the stump down below grade and leaves you with wood chips.
Hire vs. rent
- Hiring a pro: typically faster and safer, especially near fences, patios, or tight spaces.
- Renting a grinder: can save money if you are comfortable with equipment and the site is easy to access.
Access and site notes
- Check access first: many grinders will not fit through narrow gates. Measure gate width and confirm the machine’s width before you rent or book.
- Debris radius is real: grinders can throw chips and small debris. Keep people, pets, and breakables well back, and use screens if you are near windows or cars.
- Slopes: avoid grinding on steep slopes unless you have experience. A pro is usually the better call.
What grinding does and does not do
- Does: removes the visible stump and grinds several inches below the soil surface.
- Does not: remove the entire root system. Most roots are left to decay naturally underground.
Smart tips for better results
- Ask how deep they grind: for lawn, 4 to 6 inches below grade is often fine. If you want to regrade, lay thicker sod, plant, or do hardscape, deeper (often 6 to 12 inches) helps reduce settling issues and mower scalping later.
- Handle chips the right way: fresh wood chips mainly tie up nitrogen when they are mixed into soil, not when used as surface mulch. For planting soon, rake chips out of the hole and keep chips out of planting holes. Use soil and compost in the planting zone.
- Expect some settling: as buried roots decompose, the ground can sink. Top up with soil as needed.
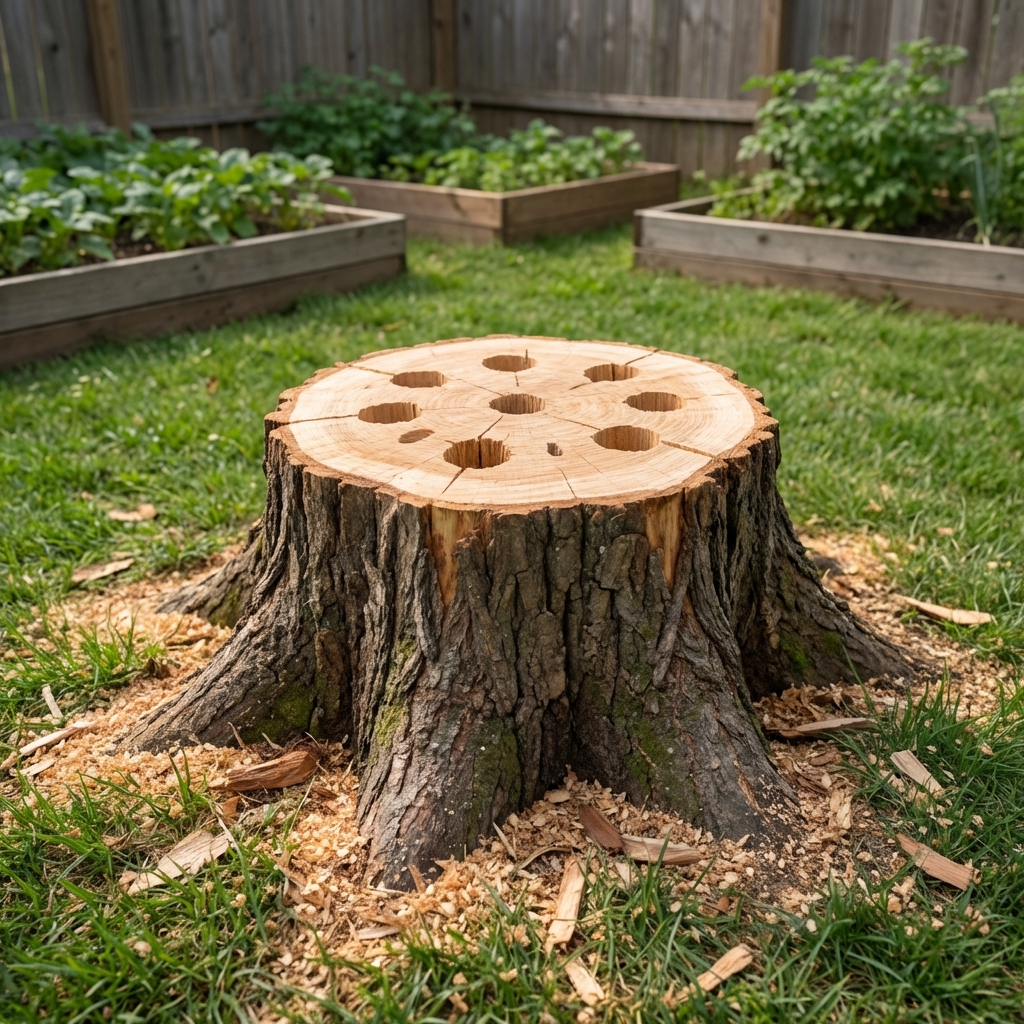
Option 3: Help it rot (slow but low-effort)
If the stump is not in the way and you can wait, you can speed natural decay. This is a good approach for back corners, wooded edges, or spots you are not ready to rework yet.
How to do it
- Cut it low: the closer to ground level, the better.
- Drill holes: drill multiple holes across the top, about 1/2 to 1 inch wide and several inches deep.
- Keep it moist: moisture helps fungi and microbes do their job. Covering with a tarp can hold moisture in dry climates.
- Add nitrogen: a light application of high-nitrogen fertilizer can encourage decomposition. Water it in.
How long it takes
It can take months to years, depending on tree species, stump size, and climate. Hardwood stumps generally take longer than softwoods.
Option 4: Chemical stump remover (use carefully)
Chemical stump removers are designed to soften wood so it breaks apart easier. They do not make the stump disappear quickly. Think of them as a tool to reduce the effort after a waiting period.
What to expect
Many products are potassium nitrate-based or similar, and they help speed breakdown (or make the stump easier to burn where legal). Results vary by product and conditions, so follow the label for timelines and use.
When it makes sense
- You cannot grind or dig due to access or physical limitations.
- You are fine waiting several weeks to months.
- The stump is away from vegetable gardens, wells, and water features.
Smart precautions
- Follow the label exactly. More is not better.
- Keep products away from edible planting areas.
- Store securely and keep pets away from treated stumps.
If you are gardening in the same area soon, the most garden-friendly approach is usually grinding or digging, then rebuilding the soil with compost.
About burning stumps
Burning can look like an easy fix, but in real backyards it is often slow, smoky, and risky. Roots can smolder underground, fire can spread through dry soil or mulch, and many areas restrict open burning.
- Safety: underground smoldering is hard to control.
- Smoke: can be heavy and persistent.
- Soil impact: intense heat can damage nearby plant roots and soil biology.
If you are considering burning, check local rules and consider getting professional guidance first. For most homeowners, grinding is the safer “fast” option.
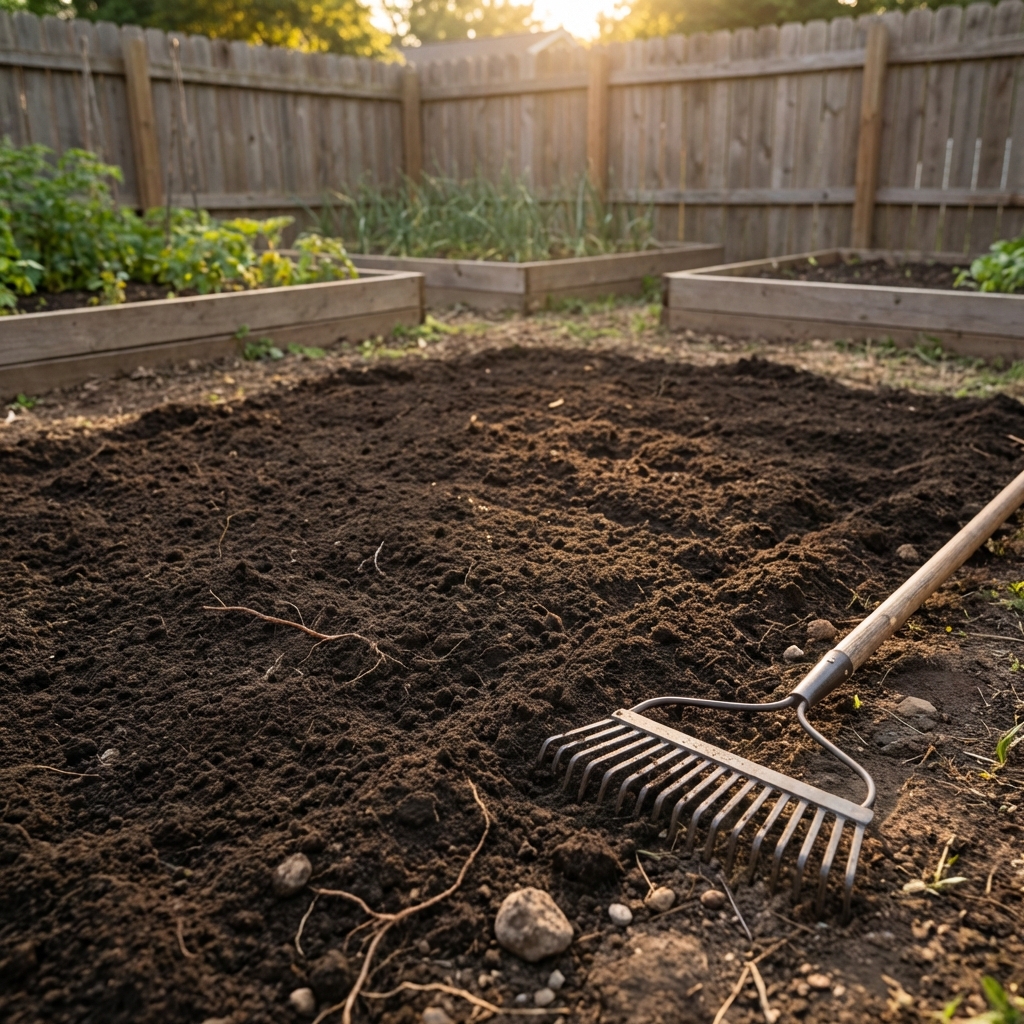
What to do after stump removal
Once the stump is gone or ground down, the next steps determine whether the spot stays level and plantable.
Fill the hole the right way
- After digging: backfill with native soil in layers, tamp lightly, then water to settle.
- After grinding: remove excess chips from the hole, then fill with a mix of topsoil and compost. Aim to mound it slightly since it will settle.
Replanting tips
- Want grass: add a few inches of clean topsoil, seed or sod, and keep evenly moist until established.
- Want a garden bed: remove most wood chips, then build with compost and quality topsoil. Consider a raised bed if the area settles a lot.
- Planting a new tree: do not plant directly into a pocket full of chips. Use soil-based backfill and plant slightly away from where the stump sat if possible.
Chip and wood disposal
- Use as mulch: chips make great surface mulch under trees and shrubs. Keep mulch a few inches away from trunks.
- Compost: mix chips with “green” materials (grass clippings, kitchen scraps) to balance carbon and nitrogen.
- Green waste pickup: bag or pile according to your local program rules.
Expect some settling
Even when the stump is removed, roots left underground decompose and the soil can sink a bit over time. Keep a bag of topsoil handy and top off the area as needed during the first year.
Costs and timelines
- Digging: lowest cost, highest effort. Best for small stumps. Usually same-day results.
- Grinding: medium cost, low effort for you. Often done in under a couple hours on site. Typical pro pricing is commonly based on stump diameter and access. Roughly, many homeowners see totals in the $100 to $400+ range per stump, with large or hard-to-access stumps costing more.
- Natural decay: lowest effort, slowest. Often months to years.
- Chemical softening: low to medium cost, still slow. Often weeks to months, then manual breakup.
If you are deciding based on budget, remember your time and back matter too. For many yards, a one-time grinder visit is the cleanest path to a usable space.
When to call a pro
Get professional help if any of these are true:
- The stump is large or from a species known for aggressive roots.
- It is close to a foundation, septic system, retaining wall, or fence.
- It is on a slope where equipment control is tricky.
- You suspect utility lines are nearby.
- You need the area prepped for a project with a deadline, like a patio or new planting bed.
- Access is tight, like narrow gates, steps, or soft yards where heavy equipment could rut.
Quick FAQ
Will a stump grow back?
Some species resprout vigorously from the stump or roots, especially if the tree was cut during active growth. Grinding low and removing sprouts promptly helps, but it does not always stop root suckers for certain trees (for example, poplar, aspen, and tree-of-heaven). Persistent regrowth usually requires repeated cutting, and in some cases a targeted herbicide treatment applied to fresh cuts, following local rules and the product label.
Can I plant right away after grinding?
Yes, with a caveat. Remove most chips from the planting zone and bring in soil and compost. Wood chips mainly cause nitrogen tie-up when mixed into soil, so keep chips out of planting holes. For heavy-feeding plants, consider adding compost or a nitrogen source to support early growth.
Do I need to remove the roots?
Usually no. Most roots can stay and decompose naturally. The exception is when you are building hardscape or need a very stable base where settling would be a problem.
The smart choice for most homeowners
If the stump is small and accessible, digging it out is straightforward and cheap. If it is medium to large, or you want the space back fast without a weekend of heavy labor, stump grinding is hard to beat. For out-of-the-way stumps, encouraging rot is perfectly fine as long as you are patient.
Pick the method that matches your yard and your timeline, then finish strong by rebuilding the soil so the spot is ready for whatever you want to grow next.

Jose Brito
I’m Jose Britto, the writer behind The Country Store Farm Website. I share practical, down-to-earth gardening advice for home growers—whether you’re starting your first raised bed, troubleshooting pests, improving soil, or figuring out what to plant next. My focus is simple: clear tips you can actually use, realistic expectations, and methods that work in real backyards (not just in perfect conditions). If you like straightforward guidance and learning as you go, you’re in the right place.