Curing onions is not a fancy extra step. It is the difference between onions that last for months and onions that get soft, moldy, or sprout early. The goal is simple: dry the outer layers and neck so the bulb is sealed, then store only the onions that are truly ready.
Below is a safe, backyard-friendly way to cure onions, plus the facts that matter and the fixes that actually help when something goes off track.
What curing onions means
Curing is controlled drying. You are drying the neck (where the leaves attach) and the outer skins so they become papery and protective. When curing is done well, the onion’s neck tightens and closes, which slows down decay and moisture loss during storage.
Key facts (the ones that prevent rot)
- Airflow matters more than heat. Stagnant air invites mold.
- Shade is safer than sun. Direct hot sun can sunscald bulbs, especially in very warm climates.
- Dry necks equal longer storage. A thick, wet neck is the most common reason onions fail in storage.
- Only store fully cured onions. If you are unsure, keep it out and use it first.
When to harvest
Harvest timing is half the battle. If you pull onions too early, they tend to have thick necks that do not dry down well. Too late and you can see splitting, regrowth, or increased disease risk.
Best harvest signals
- About 50 to 70 percent of the tops have flopped over naturally (ranges vary a bit by variety and weather).
- Bulbs feel firm and have reached good size for the variety.
- Skins are starting to look dry and papery on some bulbs.
If rain is coming, it is usually better to harvest a bit earlier and cure under cover than to let mature onions sit in wet soil.
Safe steps to cure onions
1) Harvest gently
Loosen the soil with a fork if needed, then lift bulbs without bruising them. Bruises do not always show immediately, but they often turn into soft spots later.
2) Do not wash onions
Washing adds moisture right when you are trying to remove it. Shake off loose dirt and let the rest dry. After curing, you can brush off dried soil.
3) If you harvested wet onions
Sometimes you have to pull in wet weather. That is fine, but do not trap moisture.
- Knock off mud gently and blot standing water with a towel if needed.
- Give them extra airflow right away and expect a longer cure.
- Do not put wet onions in sealed bins, buckets, or plastic bags.
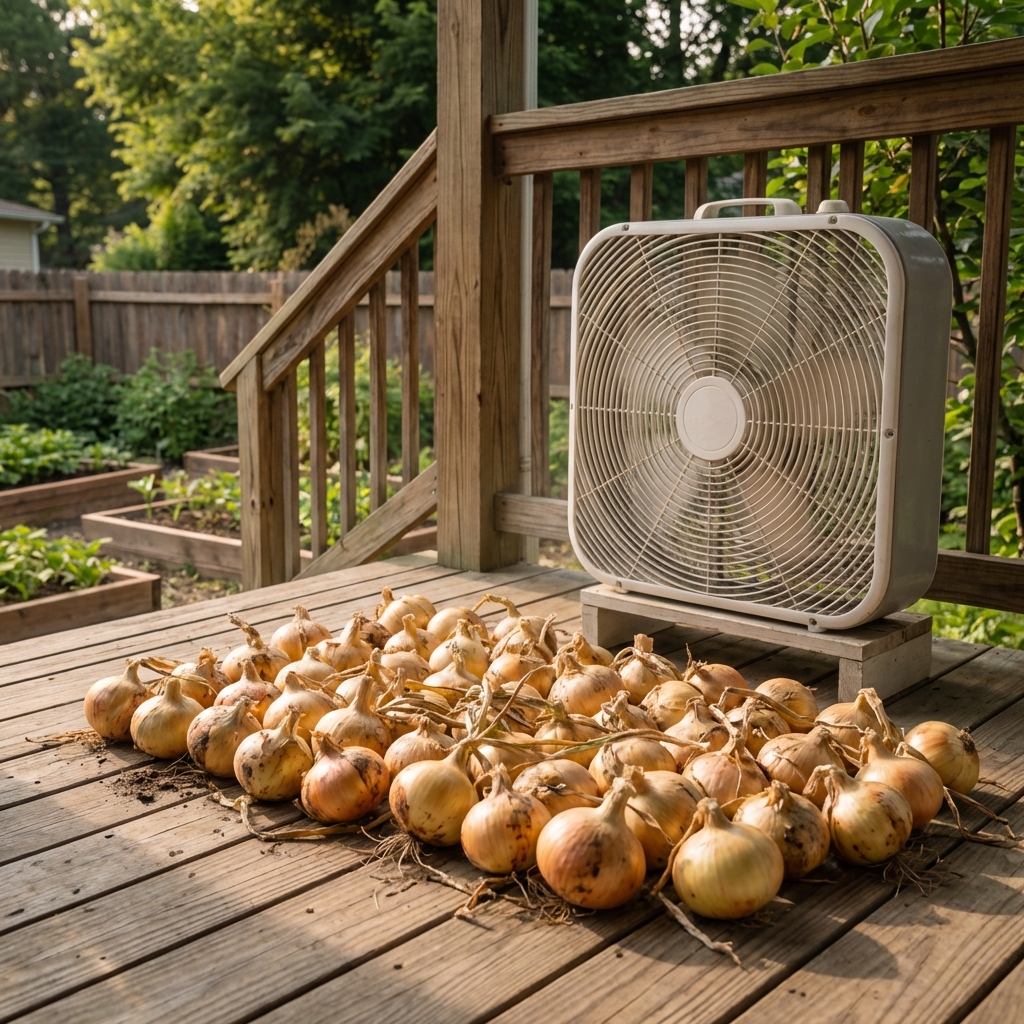
4) Choose a curing spot
- Location: dry, shaded, and protected from rain (garage with the door cracked, covered porch, shed, barn aisle).
- Airflow: steady and gentle. A box fan on low is perfect.
- Surface: breathable (screen, rack, slats). Avoid solid plastic or flat metal surfaces that hold moisture against the bulb.
- Temperature: roughly 65 to 80°F is a good target range for most home situations.
- Humidity: lower is better for curing. If you can measure it, aim for roughly under 70% RH. If you cannot, use a simple test: choose a spot where paper and cardboard stay crisp, not limp.
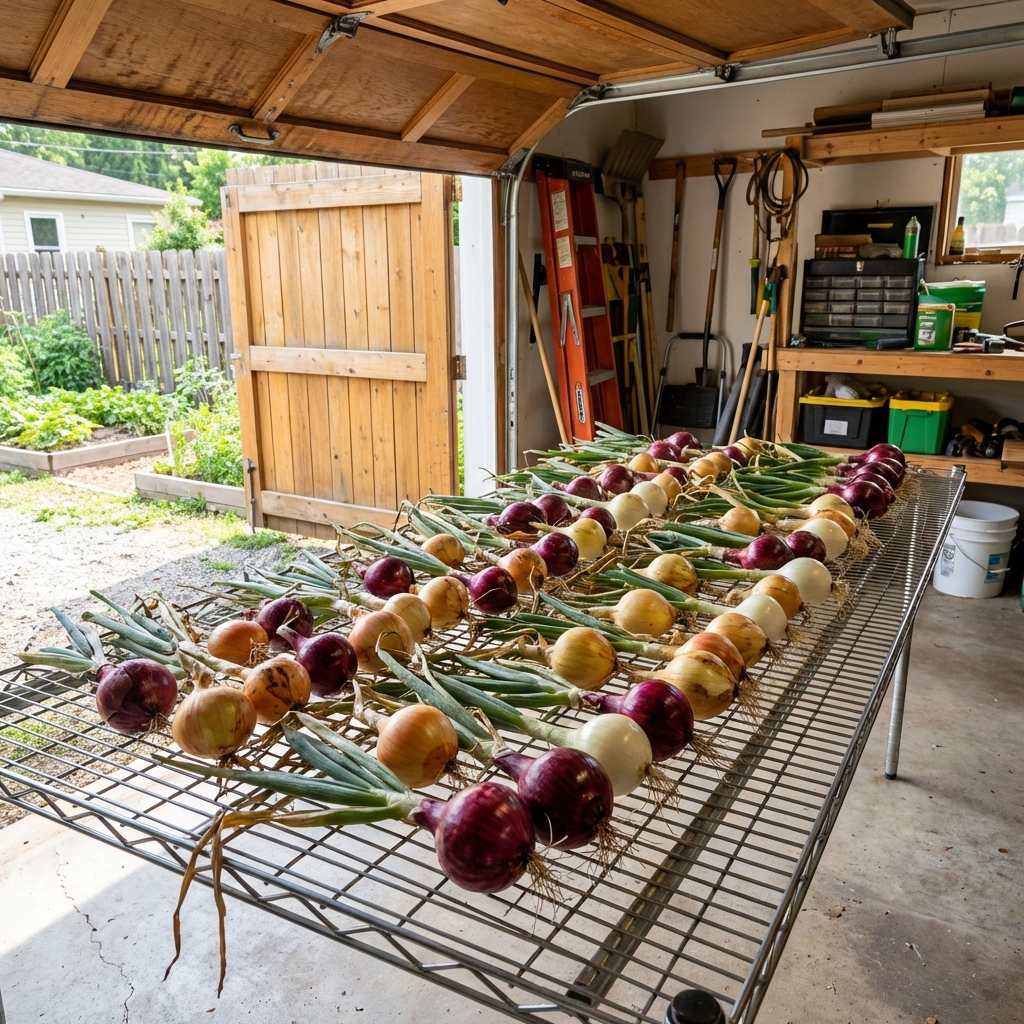
5) Lay onions out correctly
Spread onions in a single layer on a screen, wire rack, slatted table, or even cardboard with holes. Leave space so bulbs do not touch much. If you are short on space, use shallow crates with lots of ventilation and rotate them daily.
6) Cure until the neck is truly dry
Most onions cure in 10 to 21 days depending on airflow and humidity. Do not rush this. “Looks dry” is not the same as “stores well.”
7) Quick cure check
- Necks are tight and dry, not bendy or juicy. When you pinch the neck, it feels closed, not spongy.
- Tops are completely dry (if left on) and the outer skins rustle and feel papery.
- Roots are dry and wiry.
- Bulbs feel firm with no soft spots.
Trimming and cleaning
Once cured, you can trim and tidy for storage. This step is where people accidentally reopen the neck or damage the protective skins.
Safe trimming
- Trim tops: cut leaves to about 1 to 2 inches above the bulb. If you plan to braid, keep tops long and braid only when they are dry and pliable.
- Trim roots: snip close to the base, but do not cut into the basal plate.
- Peel lightly: remove only loose, dirty outer skins. Do not peel down to moist layers.
Set aside any bulbs with thick necks, bruises, or questionable spots for early use.
Storage basics
Curing sets you up for storage, but storage conditions still matter.
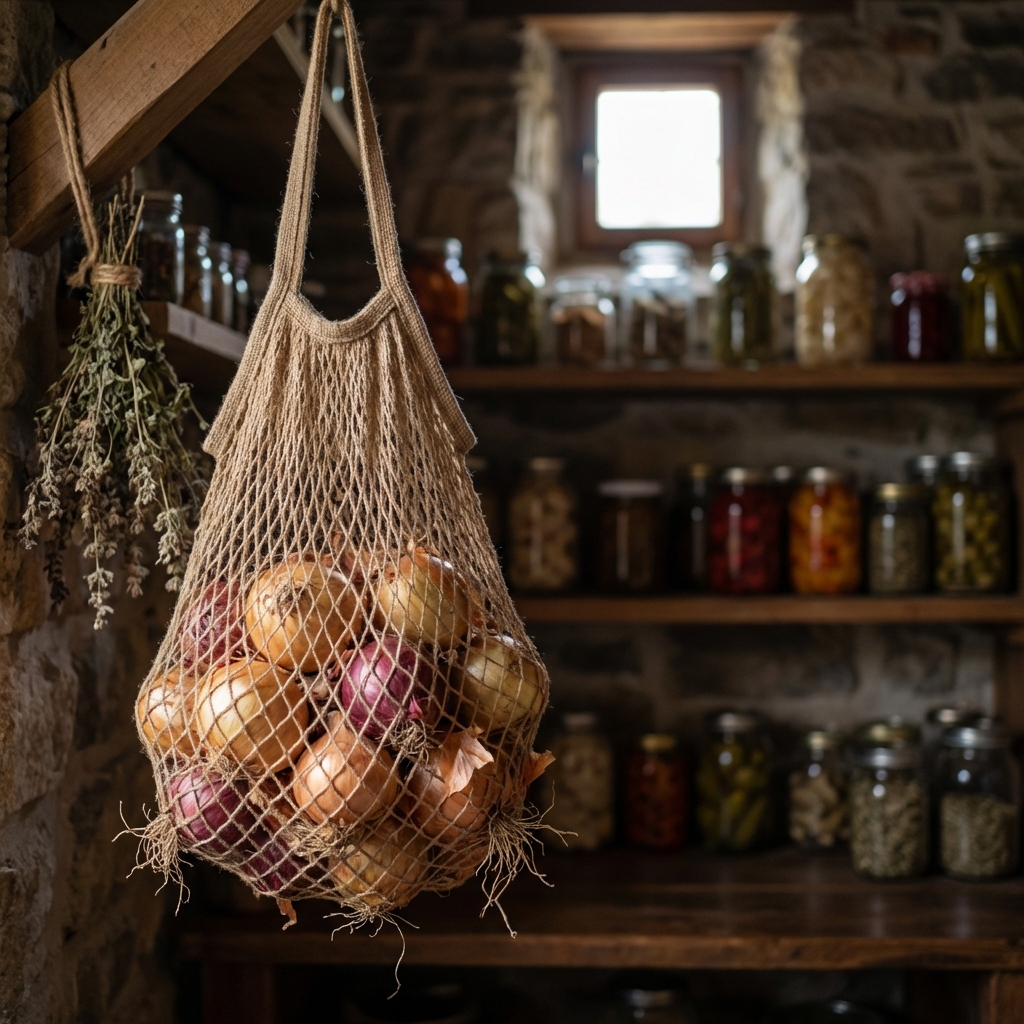
Best home storage conditions
- Cool: for long storage, aim for about 32 to 40°F, as close to 32°F as you can without freezing. If near-freezing space is not realistic, a cool pantry or basement around 45 to 55°F can still work, just expect a shorter storage window.
- Dry (but not bone-dry): if you can measure it, aim for roughly 60 to 70% RH. Too humid encourages rot, and extremely dry air can cause extra shrinkage.
- Ventilated: mesh bags, slatted crates, baskets, or hung in netting.
- Dark: light encourages sprouting.
Avoid storing onions next to potatoes. Potatoes release moisture and ethylene, and the close quarters can also help rot spread.
Variety note
Not every onion is meant to sit for months, even with perfect curing.
- Storage onions (many yellow and some red varieties) are bred to keep longer.
- Sweet onions (Vidalia-type and many fresh, mild types) have higher water content and usually store for a shorter time. Cure them the same way, then plan to use them first.
Common problems and fixes
Problem: Mold on the skins
Why it happens: not enough airflow, onions stacked too deep, or curing in a damp area.
- Fix now: spread onions into a single layer, add a fan, and move them to a drier spot.
- What to keep: if mold is only on the dry outer skin, you can peel it off after curing and use the onion sooner.
- What to toss: if the bulb is soft, smells off, or mold has moved into moist layers.
Problem: Soft bulbs or squishy spots
Why it happens: bruising at harvest, too much moisture during curing, or storing before fully cured.
- Fix: remove those bulbs from the curing pile immediately. Use them first if they are still sound inside.
- Prevention: handle gently, keep onions dry, and never pile them thick while they are drying.
Problem: Thick necks that will not dry
Why it happens: harvested too early, high nitrogen late in the season, or varieties that naturally store poorly.
- Fix: cure longer with stronger airflow and keep those onions separate.
- Best practice: label them as “use first.” Thick-neck onions are not good long keepers.
Problem: Sunscalded onions
Why it happens: bulbs left in intense sun and heat after harvest. This can create pale, soft patches.
- Fix: move curing onions to shade right away. Use damaged bulbs first.
- Prevention: cure under cover or in bright shade, not on hot pavement or in direct midday sun.
Problem: Onions sprouting early
Why it happens: storage is too warm, too bright, or onions were not fully cured. Some varieties also sprout faster.
- Fix: move to a cooler, darker spot with airflow. Use sprouting onions soon.
- Prevention: grow long-storing varieties and avoid excess nitrogen late in the season.
Quick safety notes
- Do not store damaged bulbs long-term. Any onion with rot, deep bruising, or a bad smell can spoil others nearby.
- Keep curing areas clean and dry. A dusty garage is fine. A damp basement corner is not.
- Check stored onions regularly. A quick look every week or two helps you catch one bad bulb before it spreads.
Curing checklist
- Harvest when about half (or a bit more) of the tops have fallen over
- Do not wash bulbs
- Cure in shade with steady airflow
- Use a breathable surface and never seal onions in plastic while they dry
- Single layer whenever possible
- Cure 10 to 21 days until necks pinch closed and skins rustle
- Trim and store in a cool, dry, dark, ventilated spot
- Use thick-neck, bruised, sweet, or questionable onions first
If you want the most practical rule to remember, it is this: airflow plus dryness equals storage. When you nail those two, curing becomes easy and your onions last way longer.

Jose Brito
I’m Jose Britto, the writer behind The Country Store Farm Website. I share practical, down-to-earth gardening advice for home growers—whether you’re starting your first raised bed, troubleshooting pests, improving soil, or figuring out what to plant next. My focus is simple: clear tips you can actually use, realistic expectations, and methods that work in real backyards (not just in perfect conditions). If you like straightforward guidance and learning as you go, you’re in the right place.