Fleas are tiny, fast, and persistent. If you have ever seen one hop across a sock or watched a pet scratch nonstop, you already know this is not a “spray once and forget it” kind of pest. The good news is you can knock flea pressure way down with a few simple natural repellents and some basic cleanup.
This guide covers DIY repellents you can make at home, where to use them, and how to stay safe around pets and kids. I am keeping it practical. No weird ingredients, no perfect-world routines, and no miracle claims.
Before you spray: a realistic flea plan
Natural repellents work best as part of a bigger plan. Fleas have multiple life stages, and most of what you are fighting is not the adult fleas you see. Eggs and larvae sit in carpets, pet bedding, and cracks. Realistically, most homes need 2 to 4 weeks of steady effort to fully break the cycle.
What to do first (this matters more than any recipe)
- Treat the pet first: If you have pets, this is usually the cornerstone. Fleas reproduce on animals. Without vet-recommended flea control, home treatments often fail. Treat all pets in the household.
- Vacuum like you mean it: rugs, baseboards, couch cushions, under pet beds. Daily for 10 to 14 days helps, then stay consistent for 2 to 4 weeks total.
- Empty the vacuum the right way: seal contents in a bag and take it outside right away (or empty the canister outdoors). You do not want live fleas crawling back out.
- Wash pet bedding: hot water, high heat dry if the fabric allows. Do this 1 to 2 times per week during an active problem.
- Comb your pet: a flea comb over a white towel shows what is still there.
- Talk to your vet if your pet is suffering: heavy infestations can cause anemia or skin infections. “Natural” should not mean “let them suffer.”
Use the DIY repellents below to reduce bites and discourage fleas from settling in, while the cleanup removes the life stages you cannot see.
Safety first: what is safe, what is not
This is the part most DIY posts gloss over. Some natural ingredients are fine for humans but risky for pets, especially cats. Also, if anyone in your home has asthma or scent sensitivities, keep things well-ventilated and go easy on sprays and powders.
Important cautions
- Skip essential oils on pets unless your vet approves. Cats are especially sensitive to many essential oils (including tea tree, eucalyptus, peppermint, clove, and citrus oils). Even small amounts can cause serious reactions.
- Be cautious with citrus around cats. The lemon recipe below is not an essential oil, but it can still be irritating if a cat licks treated fabric or is sensitive to scents. If you have cats, use it only on surfaces they cannot access, or skip it.
- Never use garlic or onion-based treatments on pets. They can be toxic.
- Do not use powders in ways that create dust clouds. Dust irritates lungs. Use light applications and keep pets out until it settles.
- Patch test fabrics. Vinegar and citrus can discolor some surfaces.
If you want the most pet-safe DIY approach, stick to cleaning, laundering, vacuuming, and using repellents on the environment rather than directly on the animal.
DIY natural flea repellent recipes (simple and effective)
These recipes focus on ingredients that are easy to find and have a long track record in home use. None are a replacement for veterinary flea control if you have an active infestation, but they can help reduce pressure. Think discourage and reduce, not “wipe them out overnight.”
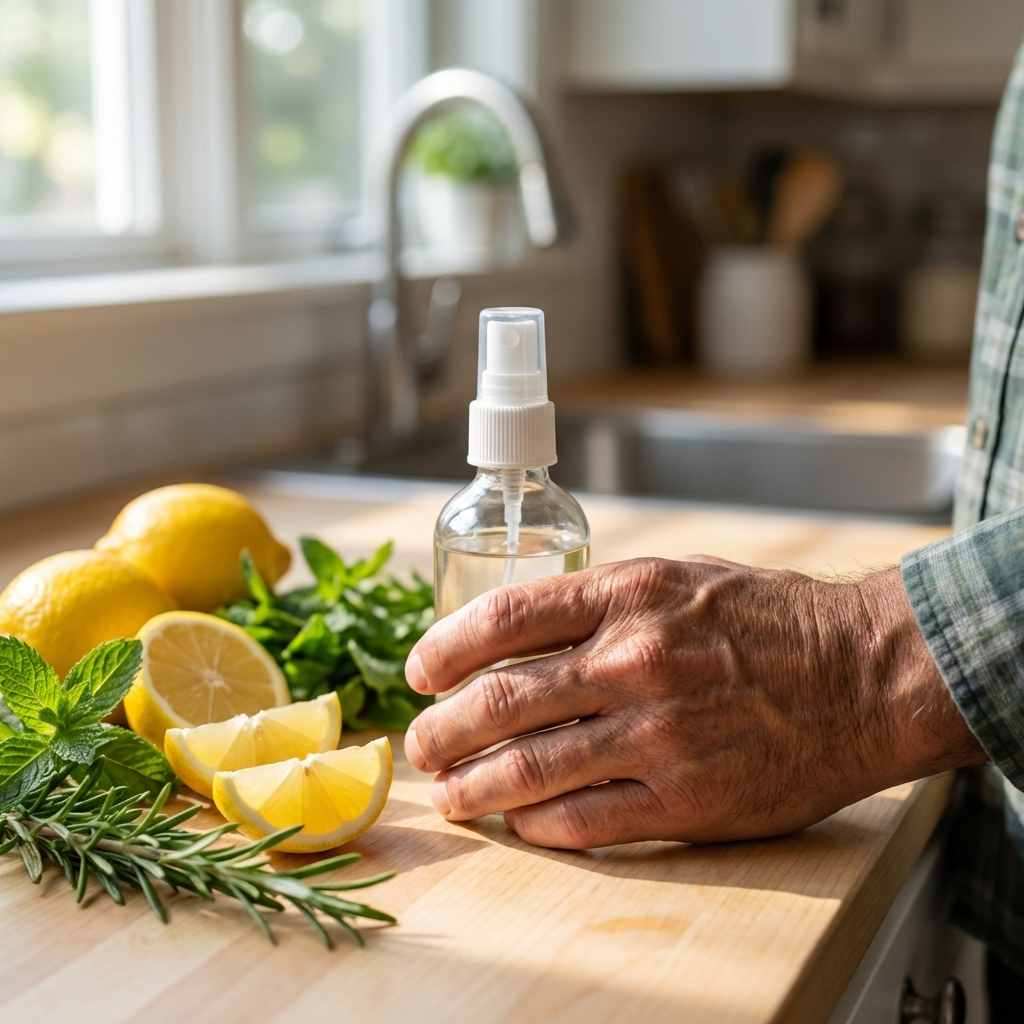
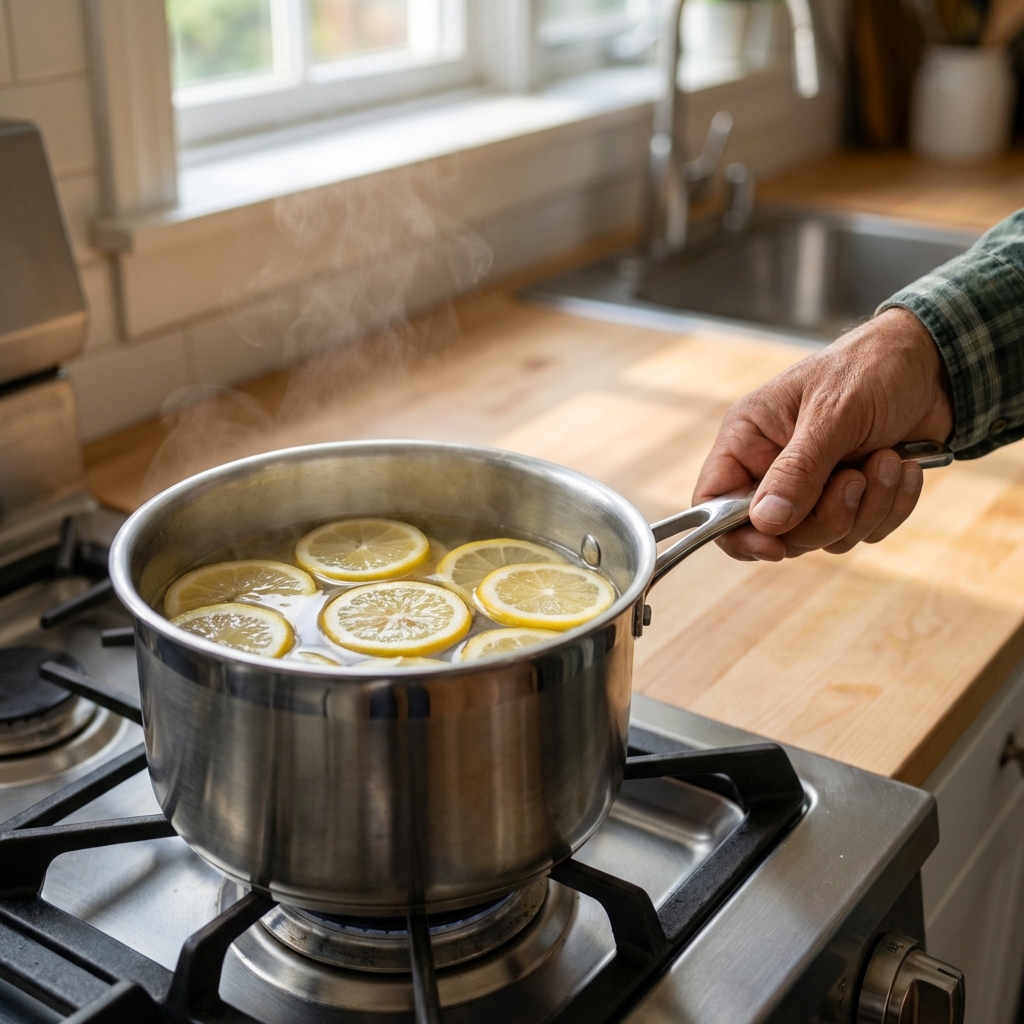
1) Lemon-infused spray (for home surfaces)
Best for: pet bedding (after washing), rugs (light mist), entry mats, and non-delicate fabrics.
You need:
- 1 lemon
- 2 cups water
- Spray bottle
How to make it:
- Slice the lemon thin.
- Bring water to a simmer, add lemon slices, then turn off heat.
- Let steep 6 to 8 hours (overnight is easy).
- Strain and pour into a spray bottle.
How to use: Lightly mist surfaces, let dry completely. Repeat every 2 to 3 days during an active problem.
What not to expect: This is a variable repellent. It may help discourage fleas in treated areas, but it will not kill all life stages.
Notes: Do not spray directly on pets. Do not soak fabrics. A light mist is enough. If you have cats, avoid using this on anything they might lick or sleep on.
2) Vinegar spray (for floors and hard surfaces)
Best for: tile, laminate, sealed hardwood, baseboards, crates, and litter-mat areas.
You need:
- 1 cup white vinegar or apple cider vinegar
- 1 cup water
- Optional: a few drops of mild unscented dish soap (helps the spray wet surfaces evenly)
How to use: Spray and wipe hard surfaces, especially along edges and under furniture. For problem areas, wipe regularly for 2 to 4 weeks.
What not to expect: Vinegar is mainly a cleaning and mild deterrent tool. It is not a reliable flea killer on its own.
Notes: Vinegar smell fades as it dries. Avoid unsealed wood and natural stone.
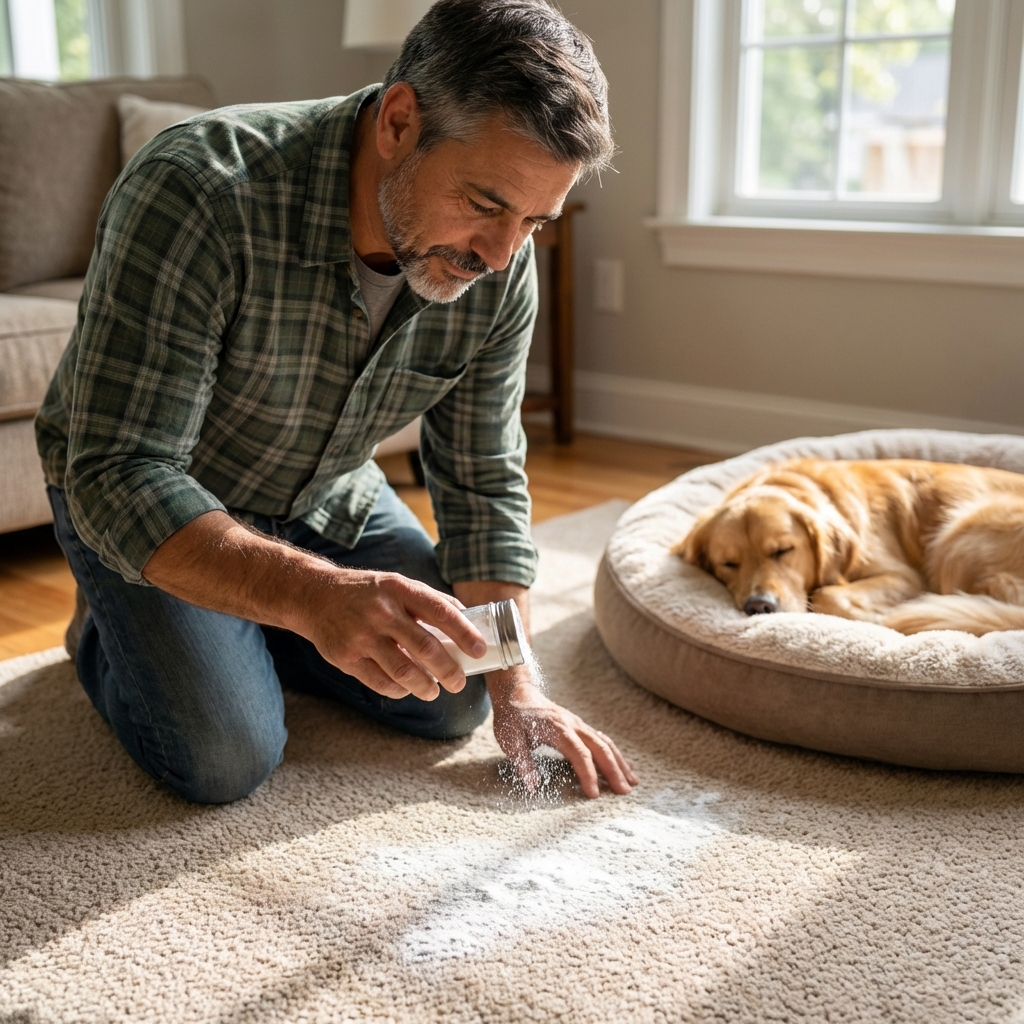
3) Baking soda and salt carpet treatment (helper step)
Best for: carpets and rugs that can be vacuumed thoroughly.
You need:
- 1 cup baking soda
- 1 cup fine salt
How to use:
- Mix and sprinkle a light, even layer over carpet.
- Work it in gently with a broom or dry brush.
- Leave for 6 to 12 hours.
- Vacuum slowly and thoroughly.
What not to expect: Evidence is mixed on how much baking soda helps with flea larvae and eggs in real homes. The main win here is supporting a thorough, repeated vacuum routine and possibly helping dry out some larvae. Do not rely on this alone.
Notes: Keep pets and kids out of the area while it sits. Do not over-apply. You want a light dusting, not piles. If anyone has asthma, consider skipping powders and focusing on vacuuming and laundering.
4) Food-grade diatomaceous earth (DE) for cracks and edges
Best for: along baseboards, under appliances, in cracks where fleas hide.
You need:
- Food-grade diatomaceous earth (not pool grade)
- A hand duster or a spoon
How to use: Apply a very thin layer in out-of-the-way areas. Leave for 24 to 48 hours, then vacuum up. Reapply weekly during active season.
Safety: DE is dusty and can irritate lungs, eyes, and skin. Avoid inhalation. Wear a mask if needed, keep pets away until dust settles, and do not use it where it will puff into the air.
Notes: DE works best when dry. It is much less effective on damp surfaces or in humid, wet areas.
Natural repellent options for the yard
If fleas are coming from outdoors, indoor work alone feels like bailing water with a cup. Focus on shady, humid spots where pets rest. If the problem keeps returning, consider wildlife sources (stray cats, raccoons, opossums) and block access to under-deck and crawlspace hangouts if possible.
Yard steps that actually help
- Mow and trim: fleas like tall grass and shade.
- Rake out leaf litter: especially under decks and shrubs.
- Target pet hangouts: under porches, dog runs, around water bowls.
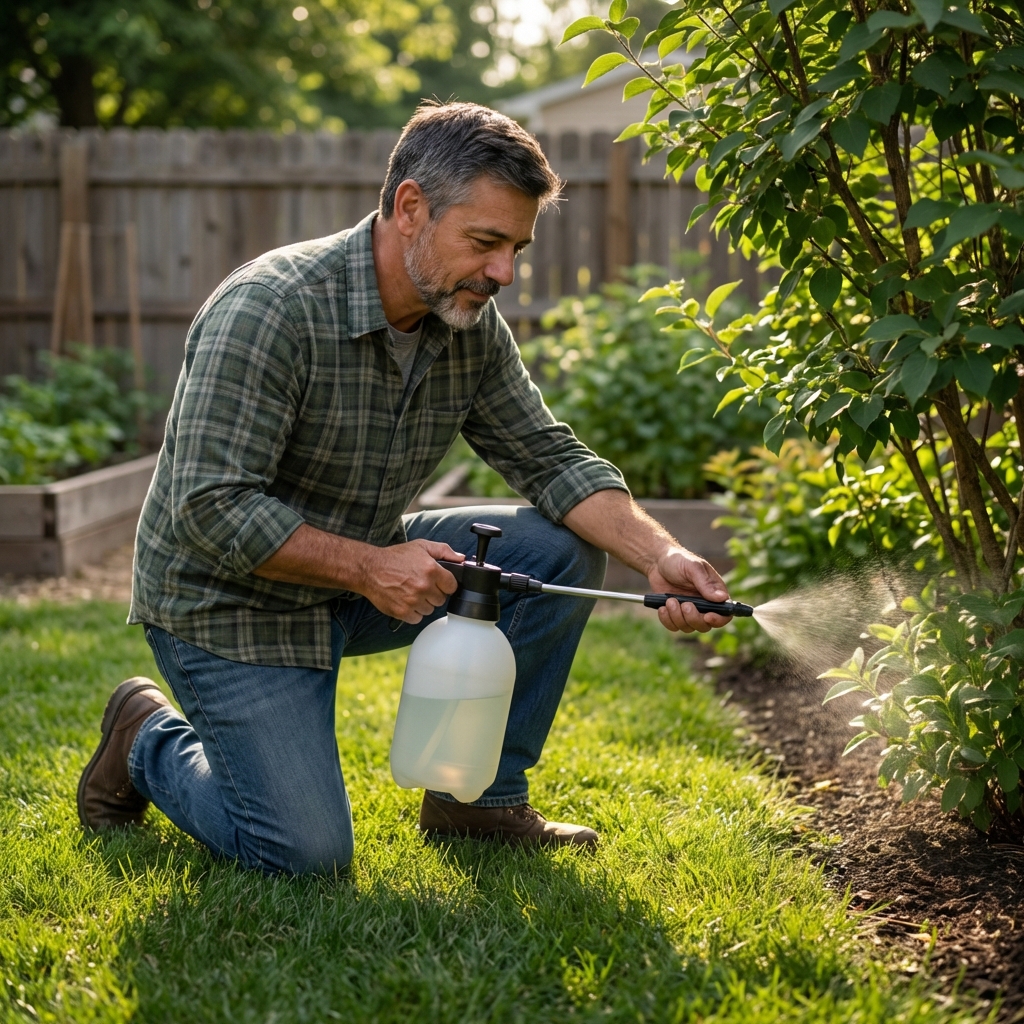
DIY yard spray (very mild soap solution)
You need:
- 1 gallon water
- 1 to 2 teaspoons mild liquid soap
How to use: Apply with a garden sprayer to shady areas and pet resting zones. It works only on contact, so you need direct coverage of where fleas are active. Let it dry before pets return. Repeat weekly during peak season.
Why it is here: Soap solutions can disrupt some insects on contact, but yard fleas often sit deep in leaf litter and soil microhabitats. Consider this a minor add-on to mowing, raking, and pet-first control.
Note: Always test a small patch first if you care about a particular plant. Avoid spraying blossoms where pollinators visit.
Can I put natural repellent directly on my pet?
For most households, the safest DIY approach is to treat the environment and use a flea comb on the animal. If you want something you can use on a dog, keep it extremely simple and vet-approved.
Low-risk options
- Flea comb plus soapy water: Comb, dip the comb in a cup of warm water with a drop of dish soap to trap fleas, repeat.
- Bath with a gentle pet shampoo: This can remove adult fleas temporarily, but it will not stop new ones from hopping on.
Avoid DIY essential oil “flea sprays” for pets. They are the most common cause of accidental toxicity in well-meaning homemade flea routines.
How often should I reapply?
Natural repellents do not last as long as commercial products. Plan for repeat applications, and plan for a longer timeline overall.
- Home sprays (lemon or vinegar): every 2 to 3 days in problem zones.
- Carpet powders: 1 time per week for 2 to 3 weeks, with frequent vacuuming and laundering throughout a 2 to 4 week plan.
- DE: weekly, or after vacuuming, but only in thin layers and only where it will stay dry.
- Yard work: weekly mowing and cleanup during flea season.
When DIY is not enough
If you are seeing fleas daily, your pet has scabs or hair loss, or anyone in the house is covered in bites, you may need a stronger plan. That often means a vet-recommended flea treatment for the pet plus aggressive cleaning for 3 to 4 weeks. Natural DIY steps still help, but they work best as backup, not as the only tool.
Quick checklist for “I need to level up”
- Fleas present after 10 to 14 days of frequent vacuuming and laundering
- Pets are scratching constantly or skin looks inflamed
- Multiple rooms affected
- You have indoor-outdoor pets bringing fleas back in
- Yard infestations persist and you suspect wildlife or stray animals nearby
Simple weekly routine (easy to stick with)
If you want something you can actually maintain, here is a realistic baseline once things are under control:
- Weekly: wash pet bedding, vacuum rugs and pet zones, wipe baseboards in problem areas, empty vacuum contents outside.
- Every 2 weeks: lemon spray on pet bedding area after washing (only if pet-safe for your household), quick check with a flea comb.
- Seasonally: yard cleanup, trim shady edges, remove leaf piles, block or discourage wildlife hangouts near the house.
Fleas are a persistence game. If you stay steady for a few weeks, you usually win.

Jose Brito
I’m Jose Britto, the writer behind The Country Store Farm Website. I share practical, down-to-earth gardening advice for home growers—whether you’re starting your first raised bed, troubleshooting pests, improving soil, or figuring out what to plant next. My focus is simple: clear tips you can actually use, realistic expectations, and methods that work in real backyards (not just in perfect conditions). If you like straightforward guidance and learning as you go, you’re in the right place.