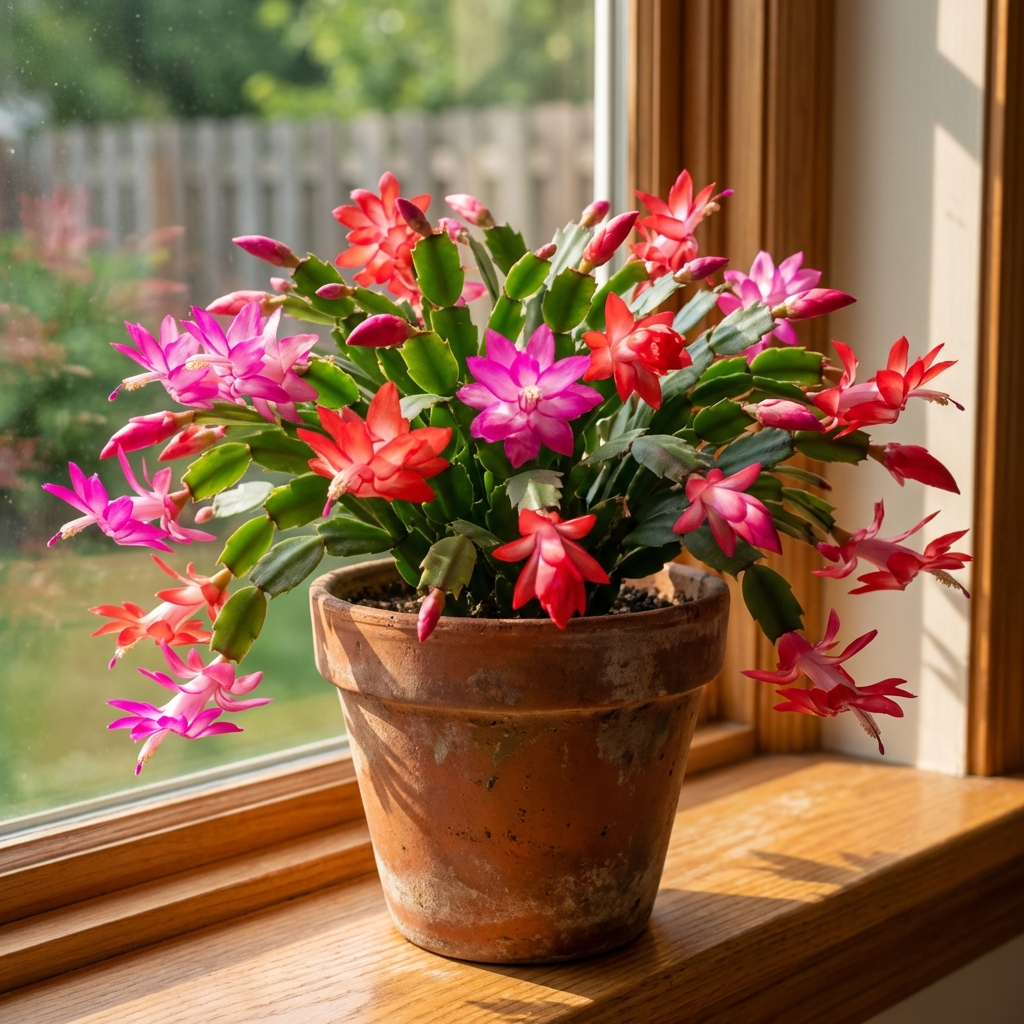
Christmas cactus is one of those plants that feels fancy when it blooms, but it does not need fancy care. If you have a bright window and can remember to water when the pot gets noticeably lighter, you can grow a whole “garden” of them in just a few pots. The big win is that you can make more plants from a single healthy one, so your collection can grow without a big budget.
Pet safety note: Schlumbergera (holiday cactus) is generally considered non-toxic to cats and dogs, though chewing on any houseplant can still cause mild tummy upset.
Quick note on names: plants sold as “Christmas cactus” are usually Schlumbergera truncata (often called Thanksgiving cactus). The true Christmas cactus is commonly listed as Schlumbergera × buckleyi (or closely related hybrids). Both are tropical forest cacti from Brazil. They like moisture and airy potting mix, not hot desert conditions. Treat it more like a rainforest epiphyte than a desert cactus.
Pick the right plants for your garden
If you are starting from scratch, aim for one healthy “mother plant” plus one or two different colors. That gives you variety and plenty of cuttings later.
What to look for at the store
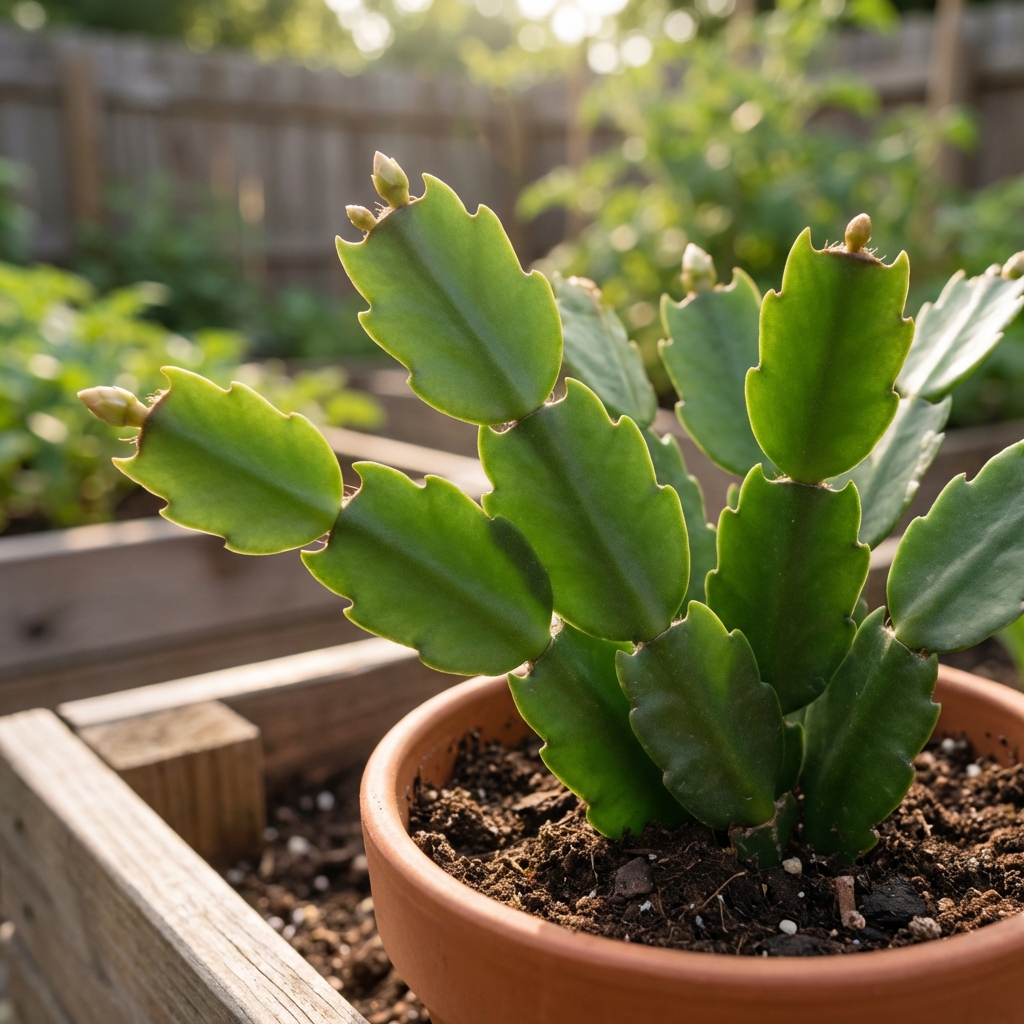
- Firm segments (the flat “leaf” pieces) with no mushy spots.
- Even color. Slight reddish edges can be normal from bright light, but blotchy yellowing can signal stress.
- No pests. Check under segments and at joints for cottony mealybugs or tiny webbing.
- Roots not circling like crazy if you can peek. A little snug is fine, severely root-bound means extra rehab.
Thanksgiving cactus vs Christmas cactus
Many “Christmas cactus” at big box stores are actually Thanksgiving cactus (S. truncata). It still grows and blooms great indoors. The easiest tell is the segment edges: Thanksgiving cactus often has pointier, claw-like teeth, while Christmas cactus tends to have softer scallops. Another clue is flowers: Thanksgiving cactus blooms often angle outward more, while true Christmas cactus flowers tend to hang more.
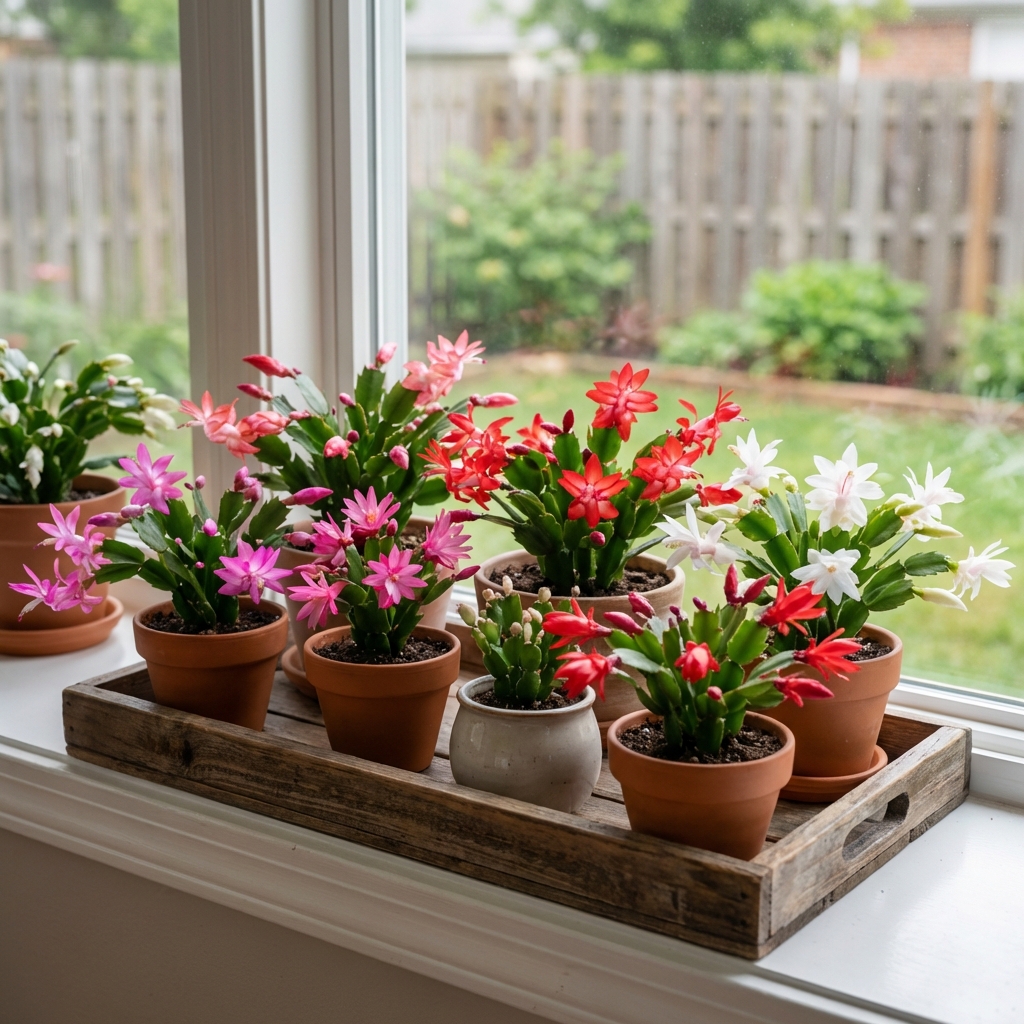
Set up your pots like a small collection
A Christmas cactus garden is really a group of plants that all get similar care. The easiest setup is 3 to 6 pots grouped together on a tray near a bright window.
Pot size matters more than you think
Christmas cactus blooms best when it is slightly snug. Choose a pot that is only 1 to 2 inches wider than the root ball. Oversized pots stay wet too long and invite root rot.
Best containers
- Terracotta: breathes, dries faster, forgiving if you overwater.
- Plastic: holds moisture longer, great if your home is dry or you forget to water.
- Hanging baskets: perfect for mature plants with arching stems.
Whatever you choose, make sure it has a drainage hole. Strongly recommended, always.
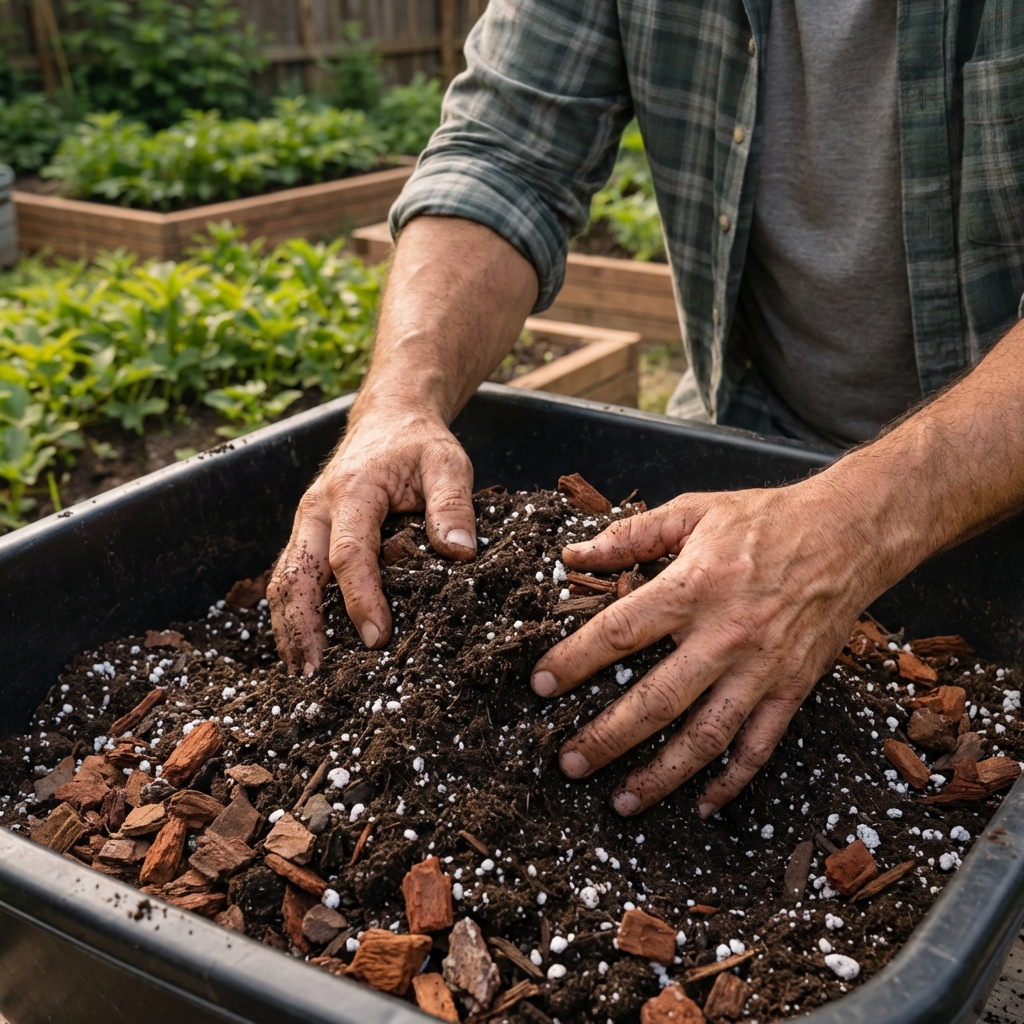
Use a potting mix that drains fast but does not go bone-dry
This is where most people struggle. Christmas cactus roots like oxygen. Heavy potting mix stays wet and suffocates them.
Simple, reliable mix recipe
- 2 parts quality potting mix
- 1 part perlite or pumice
- 1 part orchid bark (small to medium pieces)
If you do not have bark, you can use more perlite, but bark helps keep the mix airy for longer.
Store-bought shortcut
Use a cactus and succulent mix, then lighten it with extra perlite. Many bagged “cactus” mixes are still too peat-heavy on their own.
Light and temperature: the sweet spot indoors
Think bright forest edge conditions.
Best light
- Bright, indirect light is ideal.
- Morning sun from an east window is usually perfect.
- South or west windows can work if you pull the plant back a bit or use a sheer curtain.
If the segments look pale and limp, it might be too much direct sun. If it grows but never blooms, it may be too dark.
Temperature basics
Average home temps are fine. Avoid hot blasts from heaters and cold drafts. A steady spot beats a “perfect” spot that changes constantly.
Humidity: a small tweak that helps a lot
Because these are tropical forest cacti, moderate humidity can mean sturdier growth, fewer spider mites, and less bud drop.
- Pebble tray: set the pot on a tray of pebbles with water below the top of the stones. The pot should not sit in water.
- Group pots together: a little plant cluster creates a more humid pocket of air.
- Humidifier: the simplest option if your winter air is very dry.
Watering that prevents rot and keeps growth steady
The goal is evenly moist, not soggy. Let the top layer dry a bit, then water deeply.
My simple watering check
- Stick a finger in the potting mix. If the top 1 inch feels dry, it is usually time.
- Lift the pot. “Noticeably lighter” means it feels like it lost most of its weight compared to right after watering.
- Water until it runs out the bottom, then empty the saucer.
Common watering problems
- Mushy segments: potting mix staying wet too long, often from heavy mix or oversized pot.
- Wrinkled segments: usually underwatering, but can also happen if roots are damaged and cannot take up water.
In winter, many homes are drier. You might water less often because growth slows, or slightly more often because the air is dry. Let the potting mix, not the calendar, guide you.
Feed lightly for better blooms
Christmas cactus does not need heavy fertilizer, but a little nutrition helps it build strong segments and bud well.
Easy feeding schedule
- Spring through early fall: feed once a month at half strength.
- Use a balanced houseplant fertilizer, or a bloom fertilizer diluted well.
- In late fall while buds are forming and through peak bloom, reduce or pause feeding. Either approach is fine, the goal is not to push lots of leafy growth during bud time.
If you repot into fresh potting mix, you can often skip feeding for 4 to 6 weeks.
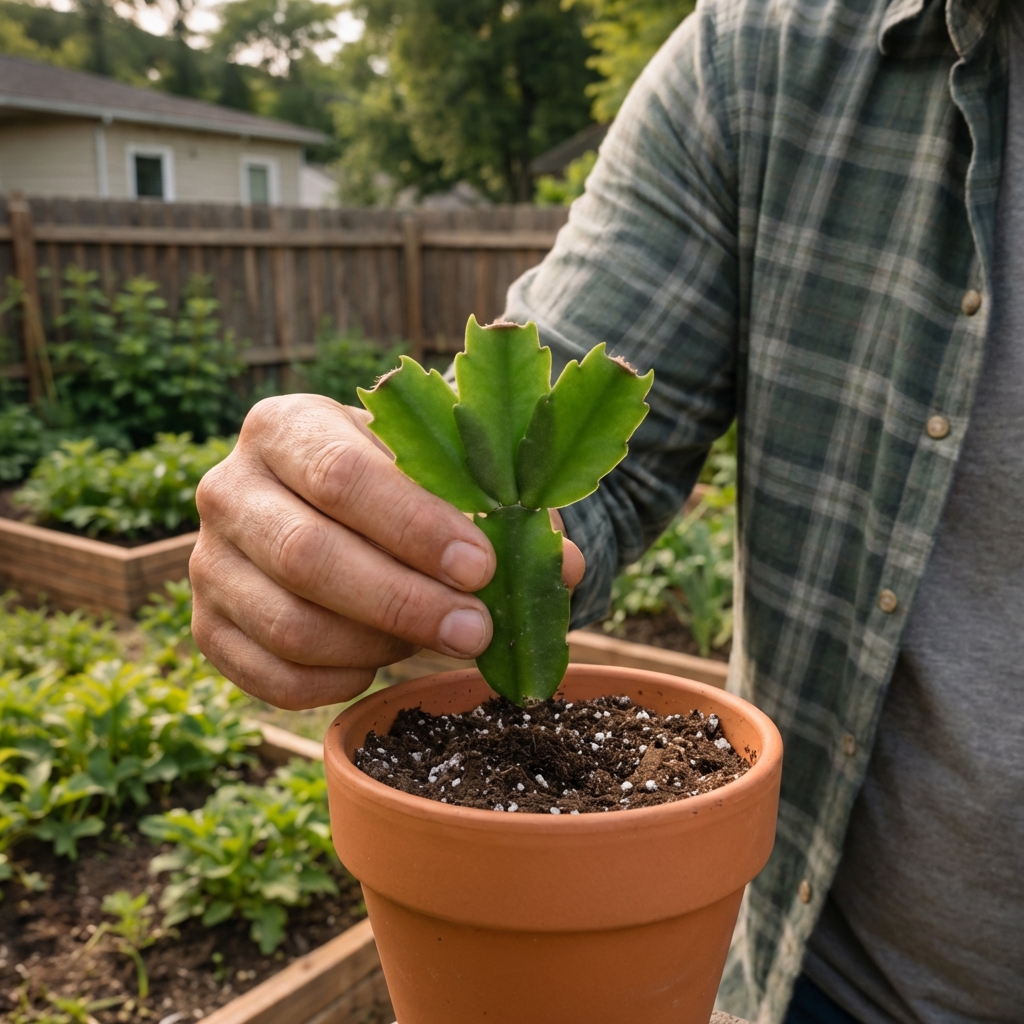
How to propagate and expand your “garden”
This is the fun part. One plant can turn into five with just a little patience.
Step-by-step propagation
- Twist off a cutting with 2 to 4 segments. Twisting at the joint is cleaner than cutting.
- Let it sit out for 12 to 24 hours so the end can dry slightly (24 to 48 hours is also fine if your home is humid).
- Place the bottom segment into barely moist potting mix. Bury only about 1 segment.
- Keep in bright, indirect light. Mist lightly or water sparingly until it roots.
In a few weeks, gentle tug resistance means roots have formed. After that, water like a normal plant.
Repotting and pruning without stressing the plant
When to repot
Every 2 to 3 years is plenty, or when the potting mix breaks down and stays wet too long. The best time is after blooming, when the plant is ready to grow again.
How to prune for a fuller plant
After flowering, pinch or twist off a few end segments. This encourages branching, which gives you more stem tips, and more stem tips often means more buds later.
Save those pieces. They are free baby plants.
How to get blooms on schedule
Christmas cactus blooms are triggered by a mix of cooler temperatures and long nights. Indoors, the easiest method is to respect its “dark time.”
Bloom trigger checklist (usually 6 to 8 weeks)
- 12 to 14 hours of darkness each night (some plants do best closer to 14). Light from lamps can delay buds.
- Keep temperatures on the cool side, roughly 60 to 68°F if you can. In some homes, cooler temps alone help a lot.
- Water a bit less than in active growth, but do not let it fully dry for long.
Bud drop causes
- Moving the plant once buds form
- Big temperature swings or cold drafts
- Overwatering or letting it go bone-dry
Once you see buds, keep the plant in a steady spot and avoid turning it daily. Stability is your best friend here.
Pests and problems to watch for
Most issues are fixable if you catch them early.
Common pests
- Mealybugs: white cottony clusters at joints. Dab with 70% isopropyl alcohol on a cotton swab, then repeat weekly until gone.
- Spider mites: fine webbing and stippling. Rinse the plant in the sink and increase humidity around it.
- Fungus gnats: tiny flies from constantly wet potting mix. Let the mix dry a bit more between waterings and use sticky traps.
Root rot red flags
If the plant is limp but the potting mix is wet, check roots. Healthy roots are light and firm. Rotten roots are brown, mushy, and smell off. If you find rot, take healthy cuttings and restart in fresh, airy potting mix.
A simple starter plan for your first season
- Week 1: Buy 1 to 3 plants, set them in bright indirect light, and let them settle.
- Week 2: Repot only if the potting mix is heavy or the pot has no drainage.
- Month 2: Take a few cuttings and start your first propagation pots.
- Spring to fall: Light monthly feeding and steady watering.
- Fall: Give long nights and cooler temps to set buds.
If you do just those basics, you will usually end up with healthier plants, more branches, and blooms that show up when you are hoping they will.

Jose Brito
I’m Jose Britto, the writer behind The Country Store Farm Website. I share practical, down-to-earth gardening advice for home growers—whether you’re starting your first raised bed, troubleshooting pests, improving soil, or figuring out what to plant next. My focus is simple: clear tips you can actually use, realistic expectations, and methods that work in real backyards (not just in perfect conditions). If you like straightforward guidance and learning as you go, you’re in the right place.