Hydrangeas are pretty forgiving once they are established, but the first few months after planting are where most problems happen. If you plant at the wrong time, you are asking a brand-new shrub to handle heat, drought, or hard freezes before it has a root system that can keep up.
The practical answer to “when should you plant hydrangeas” is simple: plant when the weather is mild and the soil is workable, then keep moisture consistent. That combo does more for success than any fancy fertilizer.

Best time of year to plant hydrangeas
In most home gardens, the best times are spring and early fall. Those seasons give you moderate temperatures and more reliable soil moisture, which means faster root growth and less stress.
Spring planting
- Best for: Cold winter climates, windy sites, and gardeners who want a full growing season for root growth.
- When in spring: After the ground thaws and you can dig, and after your worst hard freezes are mostly done.
- Big advantage: The plant has months to root in before winter.
Fall planting
- Best for: Areas with long, mild falls and predictable moisture.
- When in fall: Aim for 4 to 6 weeks before the ground freezes so roots can start growing.
- Big advantage: Cooler air means less water stress, and many shrubs quietly build roots in fall.
What about summer or winter?
Summer planting can work, but it is higher maintenance. You will need close attention to watering, and a heat wave can set the plant back fast. Winter planting is generally not recommended unless you are in a very mild climate, the plant is dormant, the soil is workable (not frozen or waterlogged), and you can keep the root ball from drying out.
Timing by climate zone (the practical version)
If you do not know your exact USDA zone, that is fine. Use your local pattern: when does the ground freeze, and when does heat ramp up? That is what matters most.
Cold winter areas (roughly USDA zones 3 to 5)
- Best: Spring to late spring, once soil is workable.
- Early summer: Possible, but try not to plant right before your typical hot spell. Extra shade and very steady watering help.
- Fall: Only if you can plant early enough to beat freezes by at least a month.
- Extra tip: Mulch well the first winter to reduce heaving from freeze-thaw cycles.
Middle zones (roughly USDA zones 6 to 7)
- Best: Spring or early fall.
- Watch for: Late spring heat spikes. Planting earlier in spring often makes summer care easier.
Warm winter areas (roughly USDA zones 8 to 10)
- Best: Fall to early winter, and also late winter to early spring, as long as the soil is workable.
- Heads up: Parts of zone 8 can still get hard freezes. If a cold snap is likely, wait it out.
- Avoid: Planting right before your hottest stretch of summer unless you can water consistently.
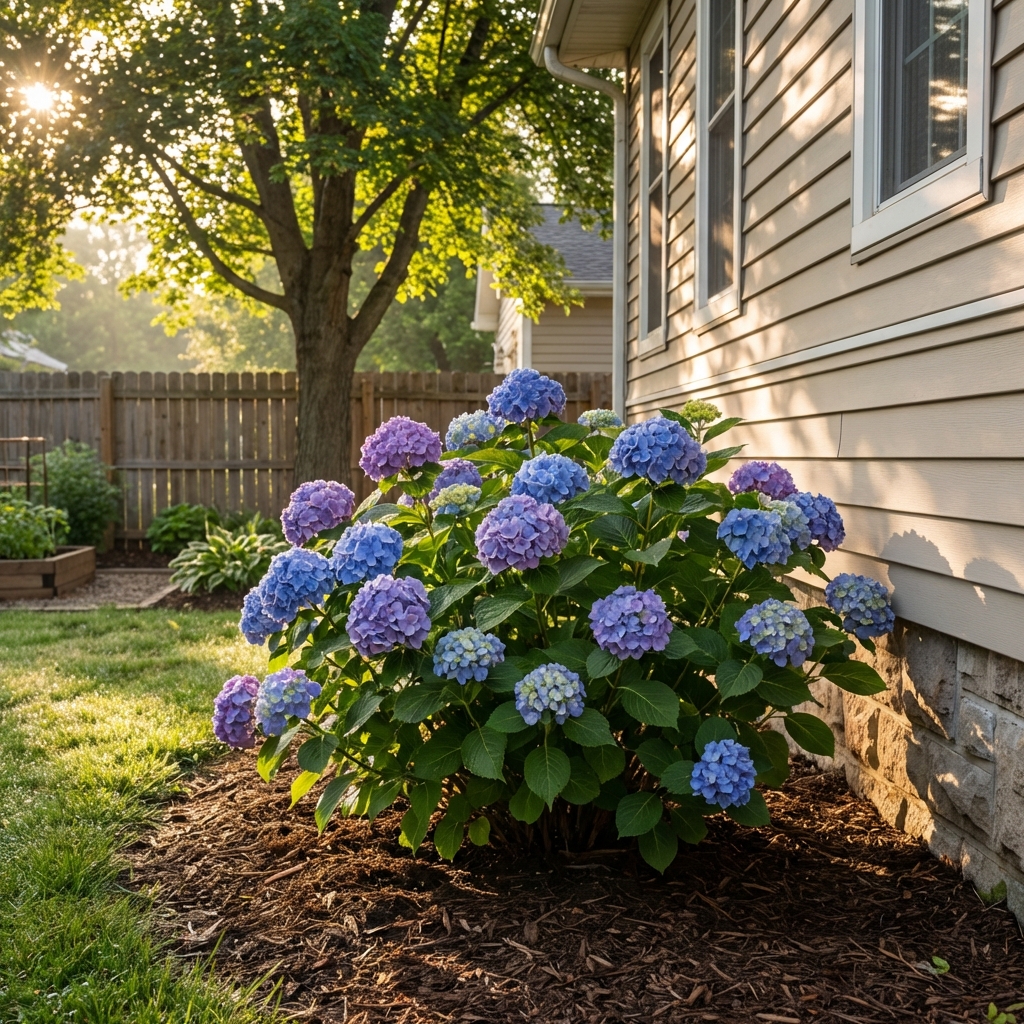
Choosing the right spot before you plant
Hydrangeas will tolerate a lot, but they do best when you match the light to your type and keep them out of harsh afternoon sun.
Light basics
- Bigleaf hydrangeas (Hydrangea macrophylla): Morning sun, afternoon shade is usually ideal.
- Panicle hydrangeas (Hydrangea paniculata): More sun-tolerant, often does well with 6 hours of sun.
- Smooth hydrangeas (Hydrangea arborescens): Part sun to part shade, dependable in many yards.
- Oakleaf hydrangeas (Hydrangea quercifolia): Likes dappled shade or morning sun, great for woodland edges.
Give them room
Check the mature width on the tag and plant with that in mind. Crowded hydrangeas stay damp, invite leaf spot, and are harder to prune. If you are unsure, err on the side of more space.
Near a house?
Hydrangeas can look great by foundations, but leave clearance for airflow and mature size, and try to avoid spots that get blasted by roof runoff. Consistent drip lines can turn “even moisture” into “always soggy.”
How to plant hydrangeas so they establish quickly
You do not need a complicated process. Focus on good soil contact, correct depth, and steady moisture.
Container-grown vs. balled-and-burlapped
Most home hydrangeas are container-grown, and those are the easiest to plant in spring or fall (and sometimes other mild windows) as long as you water well. Balled-and-burlapped shrubs are less common for hydrangeas, but if you have one, treat it as a higher-stress transplant: stick to the mildest weather you can, keep the root ball evenly moist, and avoid letting burlap or twine constrict the trunk as the plant settles.
Step-by-step planting
- Water the pot first: A moist root ball slides out easier and hydrates the plant.
- Dig a wide hole: About 2 to 3 times the width of the container, but no deeper than the root ball height.
- Plant at the right depth: The top of the root ball should sit level with the surrounding soil, or slightly high if your soil is heavy.
- Loosen circling roots: If roots are wrapped around the pot shape, gently tease them outward so they grow into the native soil.
- Backfill and firm lightly: You want good contact, not packed soil.
- Water in deeply: This settles soil around roots and removes air pockets.
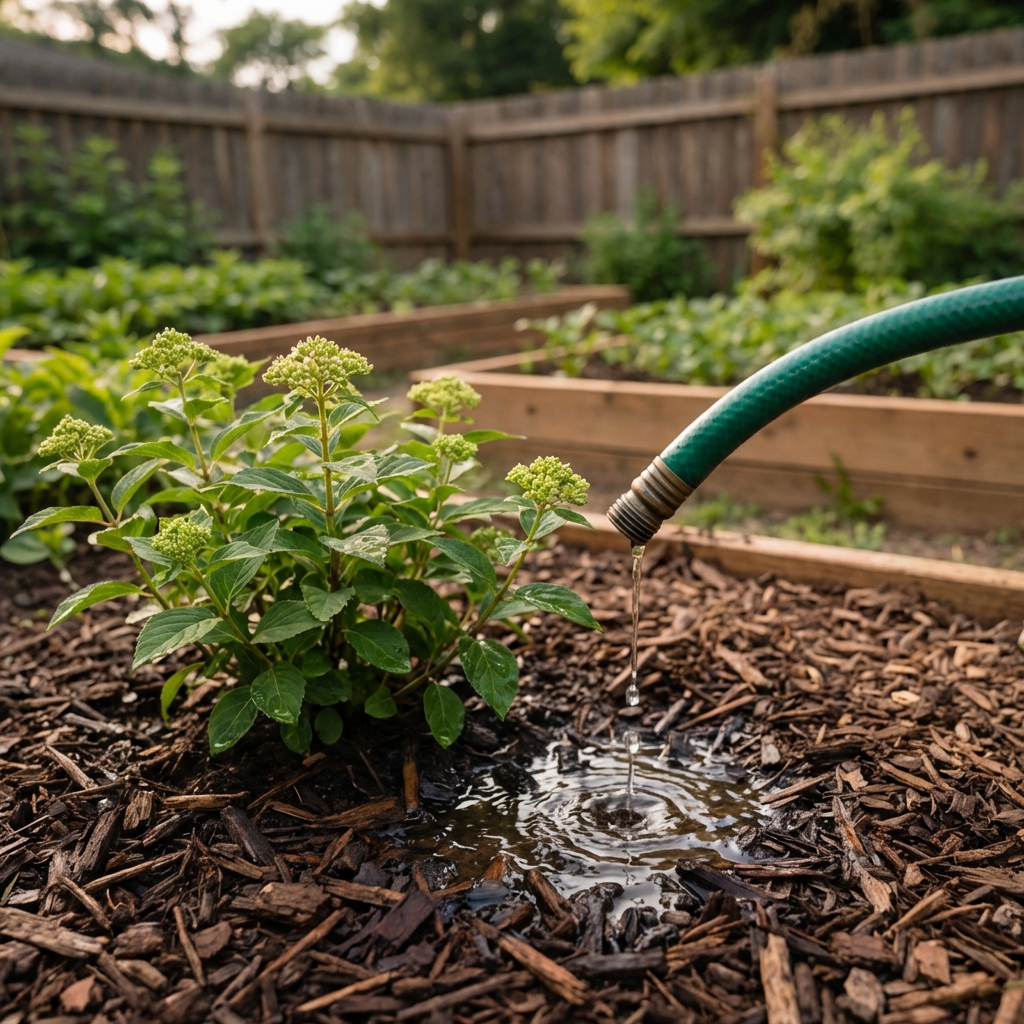
Mulching basics
Add 2 to 3 inches of mulch around the plant to keep moisture consistent, but keep mulch a few inches away from the stems so you do not trap rot.
Watering plan for the first season
Most hydrangea failures are really water timing problems. Newly planted shrubs have a small root zone and dry out faster than you expect.
A simple schedule
- Week 1: Water deeply every 2 to 3 days (more often in heat or wind).
- Weeks 2 to 6: Water deeply about once or twice a week, adjusting for rain.
- After that: Aim for consistent moisture. Hydrangeas like evenly damp soil, not soggy soil.
As a rough benchmark, many shrubs do well with about 1 inch of water per week (rainfall plus irrigation), but your soil, heat, and plant size can push that number up or down.
How to tell if it needs water
Do not go by the top inch. Check 3 to 4 inches down. If it is dry there, water. A little midday wilting in heat can happen even when soil is moist, but wilting that lasts into evening usually means it is too dry.
Soil tips that actually matter
Hydrangeas prefer rich soil with good drainage and steady moisture. You do not need to replace your native soil, but improving it helps.
Quick soil improvements
- Compost: In average garden soil, you can blend a modest amount into the backfill. In heavy clay, it is often better to backfill mostly with native soil and top-dress with compost instead, so you do not create a sharp “pot” of different soil that holds water differently.
- Drainage check: If water sits after rain, consider planting slightly high, improving drainage, or choosing a more tolerant hydrangea type.
- pH and bloom color: Bigleaf hydrangeas can change color based on soil pH and aluminum availability, but do not chase color during the first year. Focus on establishment first.
Common planting mistakes to avoid
- Planting too deep: This can slow growth and increase stem and crown problems.
- Skipping root prep: Pot-bound roots that stay circling often struggle to expand.
- Over-fertilizing right away: Too much nitrogen pushes soft growth that needs more water and can flop. If you fertilize, keep it light and wait until you see new growth.
- Late-season nitrogen in cold climates: Avoid pushing tender new growth late in the season. It is more likely to get nipped by early cold.
- Afternoon sun in hot climates: This is the fastest route to crispy leaves and constant watering battles.
- Letting it dry out between waterings: Hydrangeas recover, but repeated drought stress reduces bloom potential.
FAQ
Can I plant hydrangeas when they are blooming?
Yes, but treat it like a higher-stress transplant. Plant in mild weather if possible, keep the root zone consistently moist, and expect the blooms to fade sooner while the plant focuses on roots.
How long does it take a hydrangea to establish?
Plan on a solid first season of regular watering. Many hydrangeas look “settled” in a few months, but true establishment often takes one to two years, depending on size and conditions.
Should I prune after planting?
Usually no. Remove only broken or dead stems. Pruning rules depend on the type, and pruning at the wrong time can remove flower buds, especially on bigleaf hydrangeas that bloom on old wood.
Do I need winter protection?
In colder zones, many hydrangeas benefit from a little first-winter help. Mulch the root zone after the ground starts to cool. For bigleaf hydrangeas where flower buds can be winter-killed, a simple leaf or mulch cage around the plant can improve bloom performance next year.
Quick takeaway
If you want the easiest path: plant hydrangeas in spring or early fall, choose a spot with the right light, plant at the correct depth, mulch, and keep moisture steady for the first couple months. Do that, and most hydrangeas will reward you with stronger growth and better blooms year after year.

Jose Brito
I’m Jose Britto, the writer behind The Country Store Farm Website. I share practical, down-to-earth gardening advice for home growers—whether you’re starting your first raised bed, troubleshooting pests, improving soil, or figuring out what to plant next. My focus is simple: clear tips you can actually use, realistic expectations, and methods that work in real backyards (not just in perfect conditions). If you like straightforward guidance and learning as you go, you’re in the right place.