Orchids get a reputation for being fussy, but repotting is usually only tricky the first time. The real secret is timing. Repot too early and you disturb healthy roots. Wait too long and the potting mix breaks down, roots suffocate, and the plant stalls.
This guide walks you through when to repot, the most reliable signs it is time, and how to repot without turning it into a weekend-long project.
The short answer: when should you repot an orchid?
Most home orchids do best when repotted about every 1 to 2 years, but the real schedule depends on your medium and conditions. Bark can last longer in some homes, while sphagnum moss often needs attention sooner.
- Best timing (especially for Phalaenopsis): right after flowering ends and when new roots are just starting (look for fresh green root tips).
- Best timing (for many sympodials like Cattleya and Oncidium): when new growth begins and new roots start, even if that is not immediately after flowering.
- Acceptable timing: any time you notice the mix smells sour or musty, looks broken down, or the roots are struggling.
- Avoid if you can: repotting while the orchid is in full bloom, unless there is a real problem like rot.
That is the “calendar” answer. The more accurate answer is to repot based on what the plant and potting mix are telling you.
Clear signs it is time to repot
1) The potting mix looks tired or smells off
Orchid bark and mixes break down over time. When they do, air spaces collapse, water stays trapped longer, and roots can start to rot.
- Bark pieces look dark, crumbly, or sponge-like
- Mix stays wet for many days even with good light
- You notice a musty, sour, or “compost” smell
If you see this, repot even if it has only been a year.
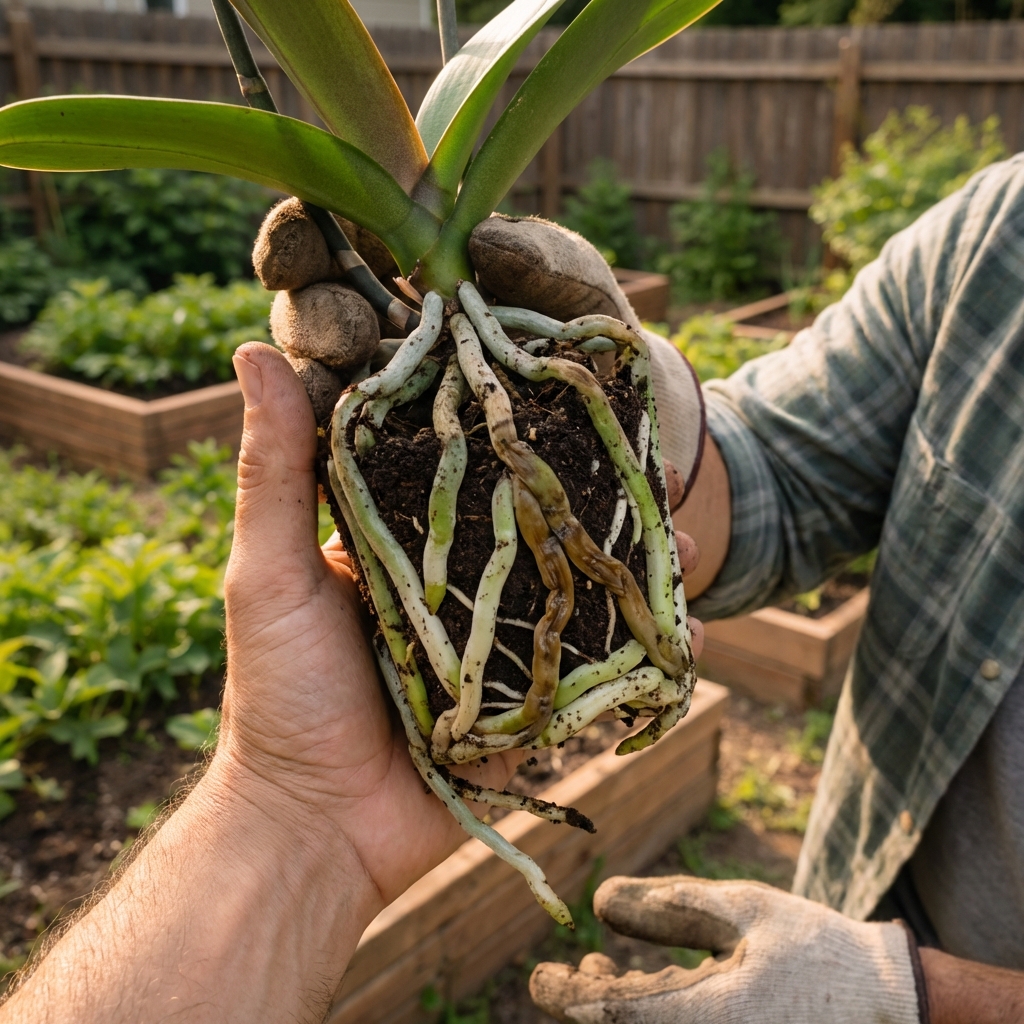
2) Roots are rotting or the plant is wobbling
A healthy orchid should feel anchored. If the plant rocks in the pot, it often means roots have died back or the mix has collapsed.
- Rotting roots: brown or black, mushy, hollow, or foul-smelling
- Healthy roots: firm, pale silvery when dry, green when wet
3) Roots are overflowing, but the mix still looks good
Roots climbing out of the pot is not automatically a problem, especially for Phalaenopsis where aerial roots are normal. Repot mainly when the plant is so crowded that watering becomes inconsistent or the pot tips easily.
4) You see salt buildup and chronic dehydration
White crusty buildup on the pot or medium can happen from fertilizer and hard water. That alone is not an emergency, but when paired with shriveled roots and wrinkled leaves, it can hint the plant is not taking up water well anymore.
5) Pests or fungus issues keep returning
Fungus gnats, mold, or recurring root problems can mean the medium is staying too wet or breaking down. Fresh medium and better airflow often fixes the cycle.
Best time of year to repot orchids
For most indoor growers, the sweet spot is late winter through spring, when days are getting longer and the plant is ready to grow again. That said, your orchid does not own a calendar. It responds to conditions.
Repot right after flowering (common for Phalaenopsis)
With common grocery-store orchids, you will usually repot after the last flower drops. If the spike is still green, you can keep it, or you can trim it depending on your goals. Repotting does not require cutting spikes, but removing a spike can help the plant focus on roots if it is weak.
Repot when new roots start (least stressful)
This is the least stressful timing because new roots adapt quickly to fresh media. Look for:
- Little green root tips emerging at the base
- Fresh root growth on existing roots
When you should repot immediately (even if timing is not ideal)
- Root rot is spreading
- The medium is soggy, broken down, or smells bad
- The crown is staying wet and you need better airflow fast
- The pot cracked or drainage failed
When not to repot (if you can avoid it)
- During full bloom, if the plant is healthy. Repotting can shorten bloom time.
- Right after you already stressed it (big move, cold exposure, severe underwatering). Give it a couple weeks to stabilize unless rot is present.
- When the mix is still chunky and drying normally, even if roots are visible. Many orchids like to be snug.
Orchid types: timing differences that matter
These are general guidelines for common home orchids:
Phalaenopsis (moth orchids)
- Repot about every 1 to 2 years, often after blooming
- Do not panic about aerial roots. That is normal.
- They prefer slightly snug pots, not oversized ones
Cattleya
- Repot when new growth starts and new roots begin
- They hate having roots disturbed at the wrong time, so timing matters more here
Dendrobium
- Repot after flowering or when new growth begins
- They can be sensitive to frequent repotting. Only do it when needed.
Oncidium
- Repot when new growth starts
- They like even moisture, so fresh medium can help if the old mix got compacted
Choosing the right potting mix
Repotting success is not just timing. It is also picking a medium that matches your home.
- Bark-heavy mixes: Classic choice for many epiphytes (like Phalaenopsis and Cattleya). Airy, forgiving, and typically lasts longer before breaking down.
- Sphagnum moss: Holds more water and can be great in dry homes, but it compacts faster and can stay too wet if you overwater or have low airflow. Expect to repot sooner if it starts to sour or stay wet for too long.
- Chunkier mixes (large bark, added perlite, charcoal): Helpful if you tend to overwater or grow in lower light.
If you are not sure, a medium-grade bark mix is a safe baseline for most beginners with indoor Phalaenopsis.
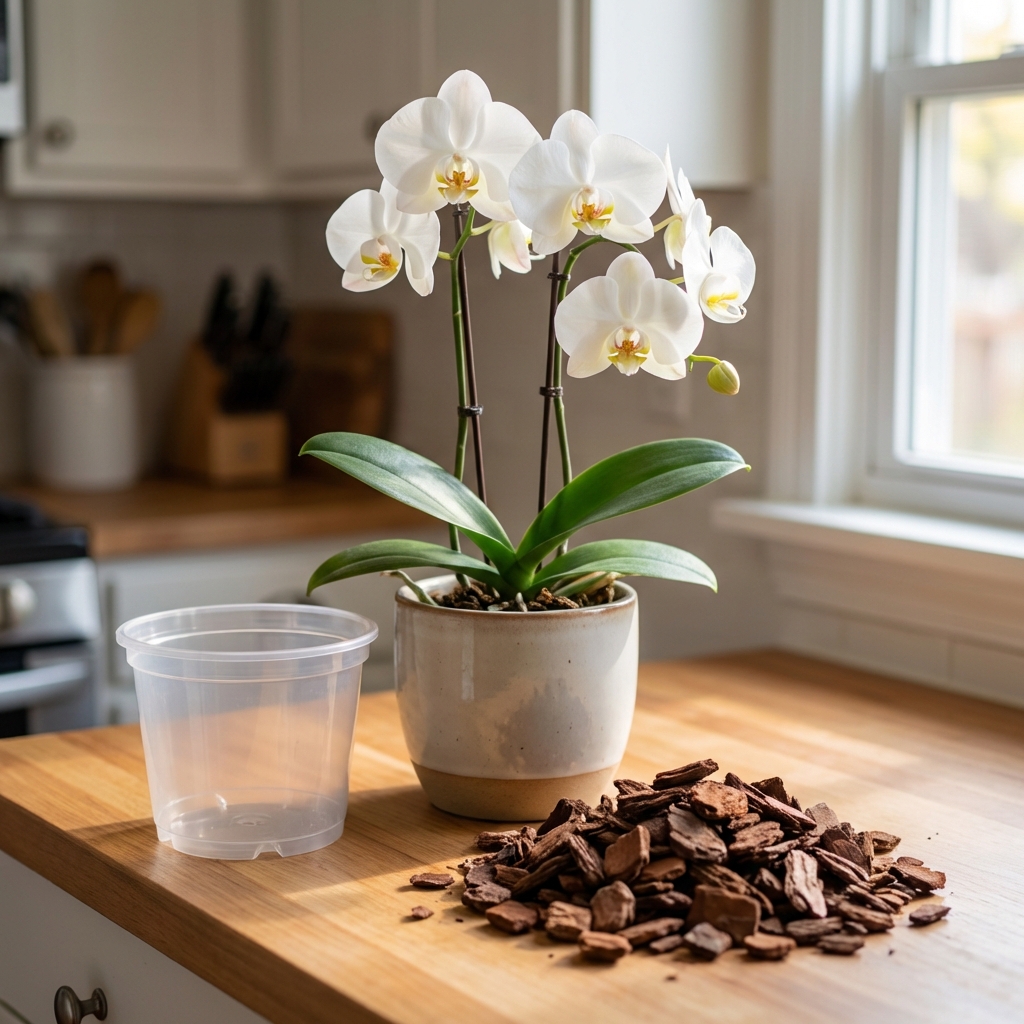
What you need before you start
Keep it simple. The goal is airflow, drainage, and stability.
- Fresh orchid mix (often medium-grade bark, sometimes with perlite or charcoal)
- A pot with plenty of drainage holes (clear pots are helpful for beginners)
- Clean scissors or pruners
- Optional: cinnamon (only for cuts on non-root tissue), rubbing alcohol for sterilizing tools
Pot size tip: move up only about 1 inch (2 to 3 cm) wider than the current root mass. Oversized pots stay wet too long indoors.
Step-by-step: how to repot an orchid without drama
1) Water the orchid a few hours before repotting
Slightly hydrated roots bend instead of snapping. You are not soaking it for days, just making roots flexible.
2) Remove the plant and gently loosen old mix
Work slowly. Bark pieces can cling to roots. It is fine if a few pieces stay stuck.
3) Check for a moss plug (common in grocery-store orchids)
Some Phalaenopsis are sold with a tight core of compacted moss around the roots. It can stay wet and cause rot even when the rest of the pot looks fine. If you find a dense plug, gently tease it out. Do not rip healthy roots to get every strand, just remove what you can without damage.
4) Trim only dead or rotting roots
Sterilize your tool. Cut:
- Mushy, hollow, black, or foul-smelling roots
- Completely dried, papery roots that collapse
Keep firm roots, even if they look a little wrinkled. When in doubt, leave it.
5) Use cinnamon carefully (optional)
Cinnamon is a strong desiccant. If you use it, use a tiny amount only on cuts to non-root tissue (for example, a cut on a flower spike). Do not dust living roots with cinnamon, because it can dry and damage them.
6) Set the orchid at the right height
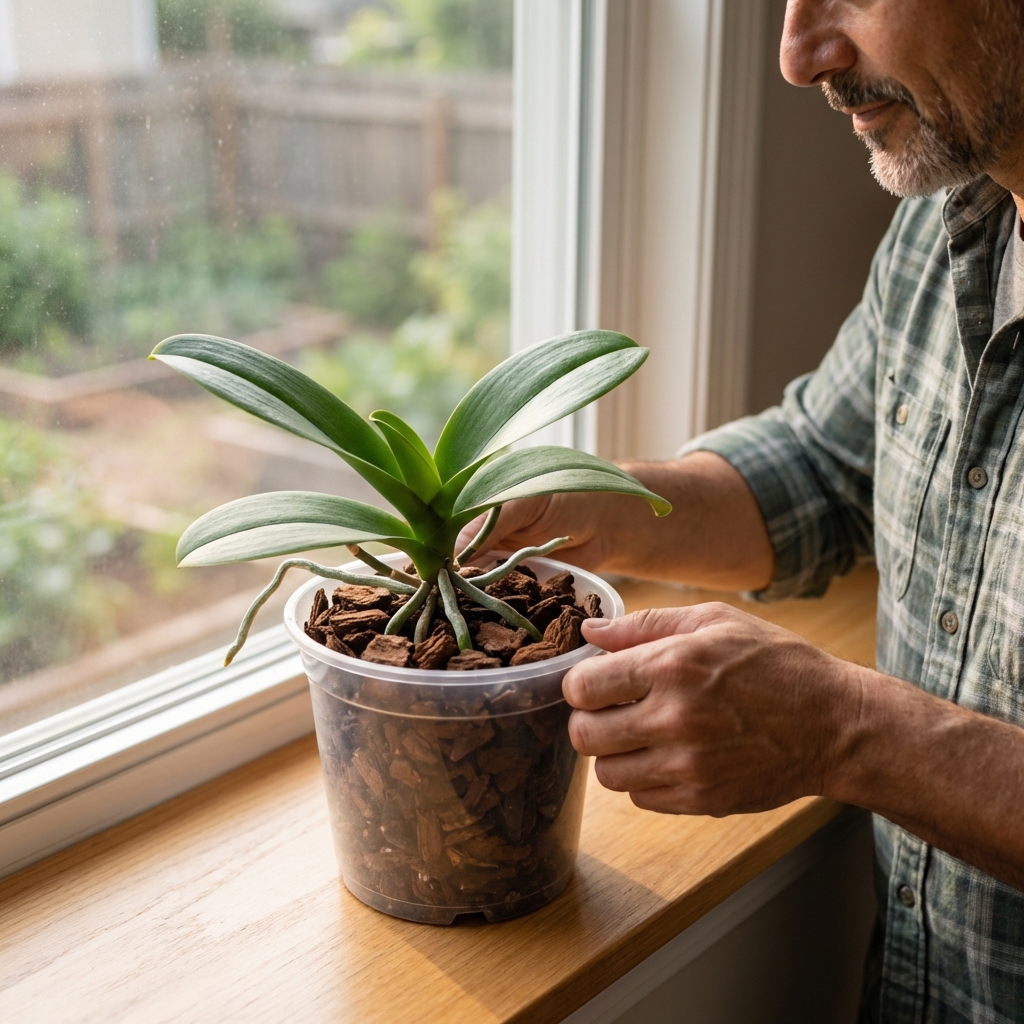
For Phalaenopsis, keep the crown above the mix. You do not want water sitting in the crown where it can rot.
7) Add fresh mix and settle it in, do not pack it tight
Tap the pot to help the mix fall into gaps. The roots need air. If the plant wobbles, use a stake temporarily instead of compressing the medium.
8) Aftercare the first 2 to 3 weeks
- Bright, indirect light
- Good airflow
- Be cautious with watering at first, especially if you removed rotten roots
- Fertilizer is often held for about 2 to 4 weeks, particularly after heavy root trimming. If you did minimal trimming and the plant looks strong, you can resume sooner at a light dose.
Simple watering rule: if you trimmed a lot of mushy roots, wait about 3 to 5 days before the first real watering. If you did minimal trimming, you can water lightly once to settle the medium, then wait until the mix is approaching dryness before watering again.
Common repotting mistakes (and how to avoid them)
Using regular potting soil
Most orchids are epiphytes. They need air around roots. Soil stays too wet and smothers them.
Choosing a pot that is too big
Bigger is not better. A pot that is slightly snug helps the mix dry at a healthy pace.
Packing the medium tightly
It feels like you are “securing” the plant, but you are really removing airflow. Use a stake if stability is the issue.
Watering like nothing happened
Fresh medium often drains differently than old medium. Adjust. Check roots and moisture before you water.
Skipping basic hygiene
Old medium can harbor fungus and pests. Discard it, rinse and reuse pots only after cleaning, and sterilize cutting tools. If you are repotting because of rot or pests, consider isolating the plant for a couple of weeks while you watch for a repeat issue.
Quick FAQ
Do I need to repot an orchid right after I buy it?
Not always. If the mix is still chunky, roots look healthy, and the plant is stable, you can wait until it finishes blooming. Repot sooner if you suspect rot, the pot has no drainage, you find a tight moss plug staying wet, or the mix is breaking down.
Can I repot while it is blooming?
You can, but expect the blooms to drop sooner. Only do it during bloom if the plant is in trouble.
Should I cut aerial roots to make repotting easier?
No. Aerial roots are working roots. Guide them gently or leave them outside the pot.
How do I know if the repot worked?
Within a few weeks to a couple months you should see new root tips, firmer leaves, and more consistent hydration. Repotting is about long-term health, not instant results.
A simple rule to remember
If you only remember one thing, make it this: repot when the medium breaks down or the roots are struggling, and aim for the start of new root growth whenever possible. That combo gives you the best chance of a smooth transition and a happier orchid for the next bloom cycle.

Jose Brito
I’m Jose Britto, the writer behind The Country Store Farm Website. I share practical, down-to-earth gardening advice for home growers—whether you’re starting your first raised bed, troubleshooting pests, improving soil, or figuring out what to plant next. My focus is simple: clear tips you can actually use, realistic expectations, and methods that work in real backyards (not just in perfect conditions). If you like straightforward guidance and learning as you go, you’re in the right place.